
Results 1 to 10 of 18
 8Likes
Thread: New 7 Day Set Case
 LinkBack URL
 About LinkBacks
Hybrid View
-
04-01-2012, 12:05 AM #1Senior Member

- Join Date
- Aug 2011
- Location
- Toronto, Canada
- Posts
- 233
Thanked: 22
Don't worry about hijacking the thread...We're supposed to share

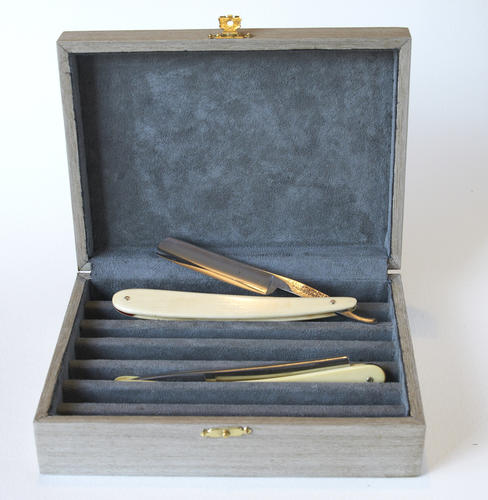
I line my cases directly to the wood. Here's a brief explanation. You can look at the picture to kinda get what I mean.
The first thing to do is measure the width of your case and cut a piece of fabric that is the same width. The length needs to be more than the total of the front, bottom, back of the bottom PLUS the back, top and front of the top portions.
I glue the fabric to front, bottom and back portions of the bottom half of the case, leaving an overhang on the front.
Once that has dried I open the case to 90 degrees, brace it in that position and glue the rest, making sure the fabric is taught across the hinged back. This does two things.
1. it hides the hinges when the case is open
2. It acts as a stop so the case does not flop open
Again, once the glue has dried, trim the overhangs with a razor blade.
Now you have to line the sides.
Do that one at a time, taking care to cut the fabric to exactly the length needed so that you don't have an overlap on the existing lining. Trim the overhang with a razor blade.
Its a slow process and if you're not the patient type, it can be very frustrating.
If you're going to attempt a scratch built case, be prepared for a learning curve. There are a bout 48 different opportunities for mistakes in the process, any one of which can be fatal to the project. Don't ask me how I know
-
04-01-2012, 10:25 PM #2Senior Member

- Join Date
- Jan 2012
- Location
- St. John's, Newfoundland and Labrador, Canada
- Posts
- 164
Thanked: 11
That's really cool with the fabric covering the hinge. It's too late for me to do something like that but this box is more about learning for me anyway, I'm sure I'll do another.
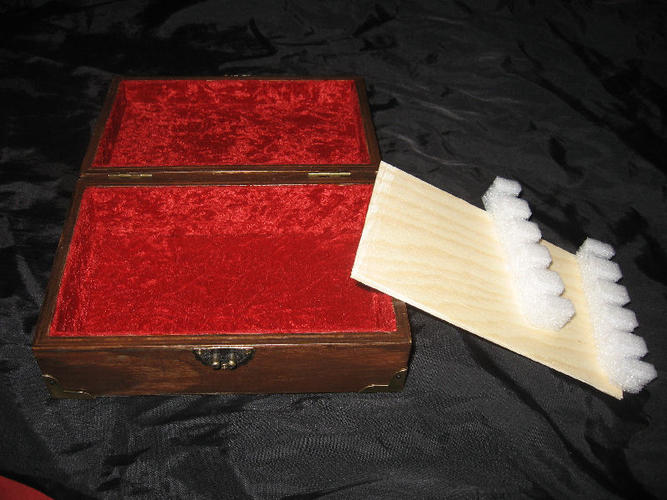
Here's what I have so far. The piece of wood will be the bottom and the foam pieces were one idea I was messing with but I don't think I will use. I do want a design where the foam "grips" the scales, holding the razors firmly and able to adjust for different sizes. I like this foam, it's stiff and doesn't melt when contact cement is applied.
 Cove5440 likes this.
-
04-01-2012, 10:49 PM #3Senior Member
- Join Date
- Aug 2011
- Location
- Toronto, Canada
- Posts
- 233
Thanked: 22
The case looks nice...you just have to figure out what you're doing with dividers.
I considered the foam idea, but I wanted the inside my cases to look really uniform and I never really transport, lean or invert the cases so I don't have to worry about gripping the razors tightly. Also, I"m pretty good about making sure my razors are clean and dry before they get put away, so the fabric is not an issue.
Keep working on it, the perfect solution for you is out there somewhere. The journey is half the fun
By the way, its probably not too late to do the fabric hinge thing on your case, but it does get a lot trickier with making sure you cut the new piece to EXACTLY the right size. Once its glued in place, if it overlaps the bottom or top there's no turning back.Last edited by joebehar; 04-01-2012 at 10:53 PM.
-
04-03-2012, 11:37 PM #4Member

- Join Date
- Apr 2006
- Location
- Cleveland,Ohio
- Posts
- 52
Thanked: 1
jobehar, very very nice.
-
04-04-2012, 01:04 AM #5Senior Member

- Join Date
- Sep 2008
- Location
- NY, Long-eye land
- Posts
- 944
Thanked: 201
Beautiful...
Well done !


 Reply With Quote