
Results 1 to 9 of 9
 16Likes
Thread: Finally set up a light box
 LinkBack URL
 About LinkBacks
-
04-02-2013, 03:09 AM #1Senior Member


- Join Date
- Sep 2011
- Posts
- 1,650
Thanked: 1341 Finally set up a light box
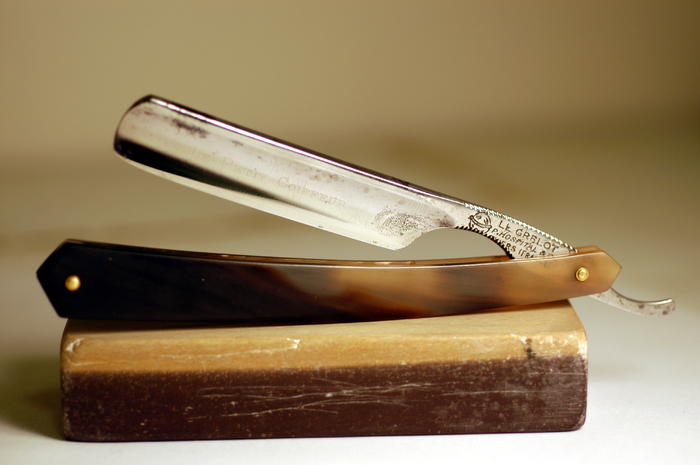
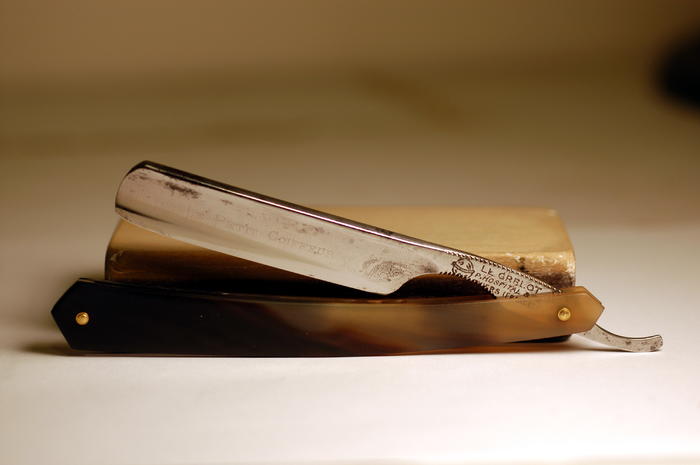
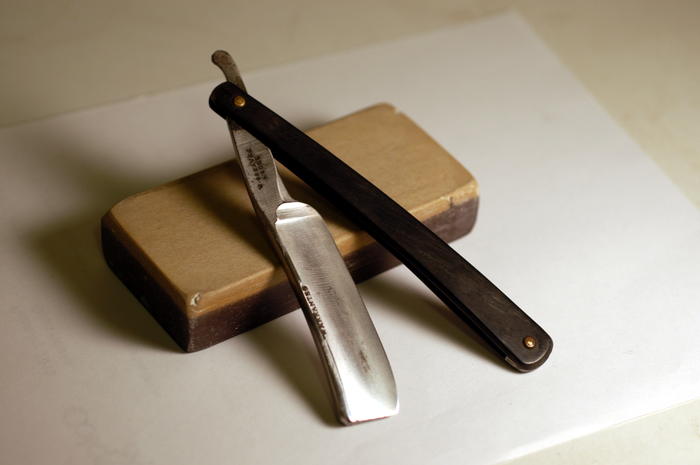
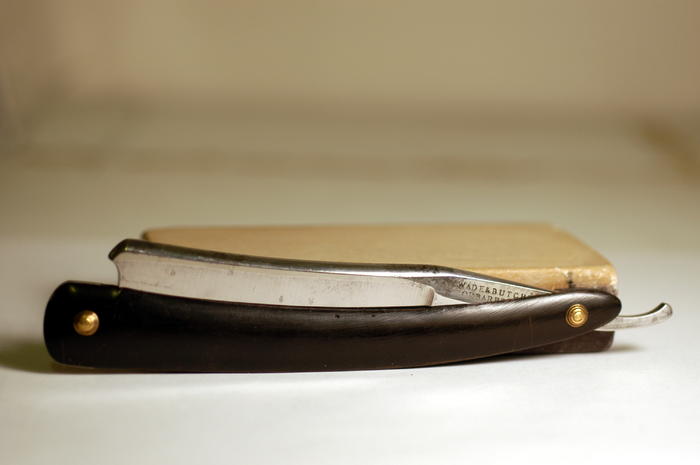
I just got my setup done for a light box and I'm excited about some test pictures! I have a 65W Reveal floodlight with a white shirt as a diffuser on a moveable arm lamp. I have a lot to learn and experiment with lighting but have started to get the hang of it so far. Here they are (with some help from GIMP):
-
04-02-2013, 04:56 AM #2Know thyself


- Join Date
- Feb 2008
- Location
- New York
- Posts
- 11,930
Thanked: 2559
Looks pretty good. A second light as a backlight might help. And see if you can get all white reflected off the blade; I find a uniform reflection shows the blades condition better.
-
The Following User Says Thank You to holli4pirating For This Useful Post:
ScienceGuy (04-02-2013)
-
04-02-2013, 08:01 AM #3Greaves is my friend !!!

- Join Date
- Nov 2012
- Location
- N.East OH
- Posts
- 2,297
Thanked: 307
LOOKS NICE !!! I NEED SOMETHING LIKE THAT .. I HATE TAKING RAZOR PICTURES WITH A CELL OR CAMERA WITH CRAPPY LIGHTING ... (srry hit caps and im not finger pecking this again ..lol ) you should send that stone to me so i can see if i can get some good pictures off of it

-
04-02-2013, 11:40 AM #4This is not my actual head.


- Join Date
- Nov 2009
- Location
- Middle of nowhere, Minnesota
- Posts
- 4,624
- Blog Entries
- 2
Thanked: 1371
Looking good so far!
The direction and diffusion of the light looks good.
Another thing to look at is the white balance. You can either use the white balance setting on your camera, or play with the levels adjustments in the Gimp (I assume they call it "levels"). You could alternately get some pure white bulbs for your light setup.
To illustrate the difference:
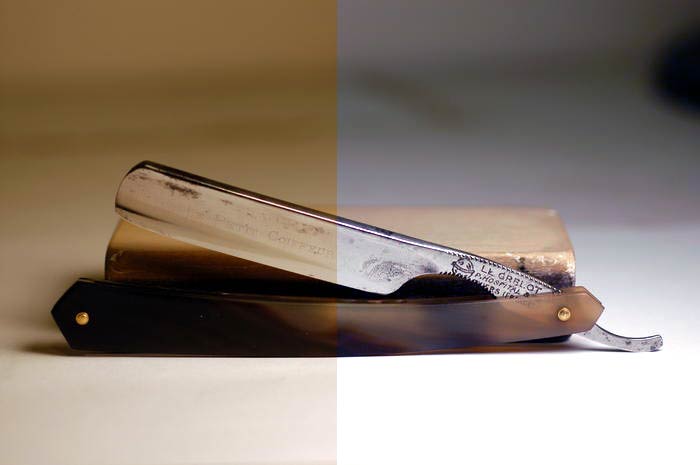
The color balance depends on what you're doing with your pics. If you want to sell razors or identify a stone, it's best to have the colors as correct as possible. Sometimes for a Shave of the Day picture, the warm yellow coloring can be nice.
As to the reflections on the blade, if you look at online articles about photographing reflective objects, they all talk about diffuse lighting and use a white box. When I was trying to figure this stuff out, I got very frustrated because most of the articles I saw didn't address the real problem (IMO).
It's as simple as remembering that if your razor has a mirror finish, you never get a picture of the razor - you get a picture of what's reflected off of the razor. Never take a picture with the blade square to the camera lens (unless you intend to have your lens reflected in the picture). Try to position the blade to reflect your part of your white box. Alternately, get a large white reflector to move around and position as needed. You could even get a piece of white poster board - you'll want something at least 18"x18" or more. I use a larger variant of this: photography reflector (I posted a link to one of the lower priced ones I could find, obviously a bigger size makes it easier to reflect white without having the reflector in the photo). I hold it by hand when I take my pictures. The camera is on a tripod, so I just look through the lens and move the reflector around to get the whole blade white. (even with that I still screw up and get the nasty dark areas on the blade - that is the hardest part of getting good razor pictures, IMO)
If I read your post right, you're using a diffuse light source, and not an actual box. That gives you a lot more freedom - the diffuse light along with a reflector gives you a lot of freedom in how you setup your photos / where and what you can photograph.
With the white reflector, as long as the picture isn't overexposed, you'll be able to show all the flaws in the blade. Of course, if you're doing a SOTD and want it to look flawless, just overexpose a little bit and wash everything out.
Last edited by HNSB; 04-02-2013 at 12:28 PM. Reason: clarifying some things
Strange women lying in ponds distributing swords is no basis for a system of government.
-
04-02-2013, 01:23 PM #5Senior Member
- Join Date
- Sep 2011
- Posts
- 1,650
Thanked: 1341
Thanks for the pointers. I'll look into a reflector. As of now, you're right, it's just a big white space (no box). I still need to get a large white piece of paper or poster, but not sure if I want to enclose everything in a box or leave it as is. The pictures shown were all just auto white balanced in Gimp. I'm still playing with the balancing features to get the hang of it; I think I'll stick to that for now rather than get a gray reference or anything like that. My camera can shoot in raw images, so I may play with that a bit for post processing.
-
04-02-2013, 01:32 PM #6This is not my actual head.
- Join Date
- Nov 2009
- Location
- Middle of nowhere, Minnesota
- Posts
- 4,624
- Blog Entries
- 2
Thanked: 1371
I just installed gimp to see - the easy way is colors-->levels and use the gray point eyedropper to select part of the image that's close to middle gray (like where there's a shadow from the curve in the white backdrop). You can click around the image to see how it looks from sampling different places before making a final selection.
Strange women lying in ponds distributing swords is no basis for a system of government.
-
04-02-2013, 01:54 PM #7Senior Member


- Join Date
- Feb 2008
- Posts
- 32,564
Thanked: 11042
All I know is I like them razors !!
gooser likes this.
-
04-02-2013, 02:35 PM #8Senior Member
- Join Date
- Sep 2011
- Posts
- 1,650
Thanked: 1341
Hmm I haven't tried that. I used the white point tool but the background was too noisy to get a good selection. Originally Posted by HNSB

-
04-02-2013, 02:36 PM #9Senior Member
- Join Date
- Sep 2011
- Posts
- 1,650
Thanked: 1341
Thanks! Just finished rescaling the Grelot. The steel seems pretty hard, it's been a bear to hone but I think it will shave great. The WB shaves a treat. They really were top quality. Originally Posted by JimmyHAD
gooser likes this.


 Reply With Quote