
Results 21 to 30 of 31
 94Likes
Thread: Custom Loom Strop
 LinkBack URL
 About LinkBacks
Threaded View
-
02-16-2013, 03:15 AM #1Senior Member


- Join Date
- Dec 2010
- Location
- South Florida
- Posts
- 13,530
Thanked: 3530 Custom Loom Strop
Hey Guys,
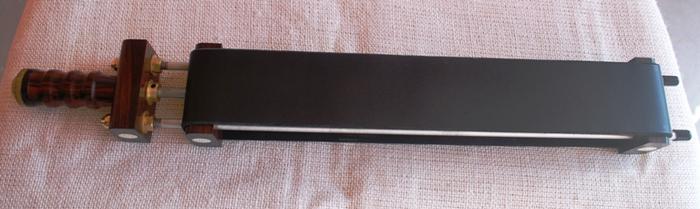
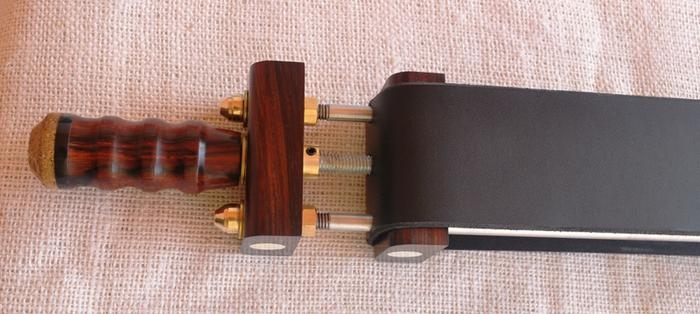
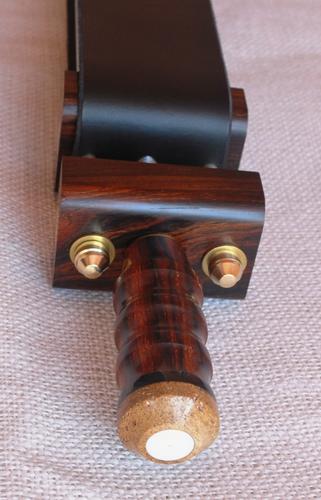
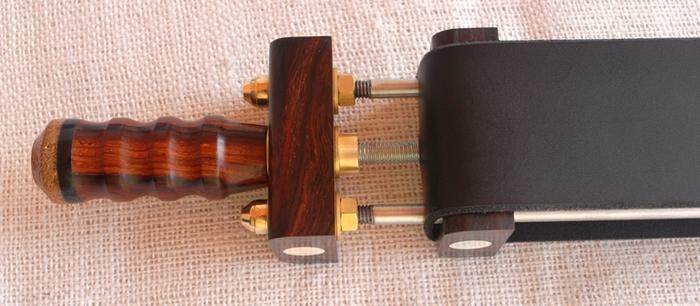
This custom loom strop has been seen before recently, but the photos were different & it was not mine at the time. I just recently acquired the strop from our own Pixelfixed. I asked him if it was alright to take some photos of it & post them again. The beauty of this strop & the skill put into it's construction deserved a thread of it's own.
Here is the description of the strop provided by Pixel when I obtained it.
"Hand made in very limited numbers ofthe finest esoteric materials
The componants of this creation are: exhibition grade Cocobolo (all from thesame billet)
Hand turned brass fittings,real pre-ban african elephant ivory inlays,handle isCoCo,Water buff horn, fossil stellar seacow bone and Ivory.
The leather is the finest, 8 oz black latigo,the stropping surface is 2.5 x 14in. O.A.L is approx 23 in.Fully adjustable thru a wide range of tension with adesign that affords extra adjustment to compensate for any leather stretchafter years of use.CONUS sales only,are perfect travel strops and ideal forthose that use pastes or sprays. "
Thank you Pixel for a fine item that will remain with me for as long as I'm above ground.


 Reply With Quote