
Results 1 to 9 of 9
 1Likes
 LinkBack URL
 About LinkBacks
-
05-16-2013, 04:14 PM #1
 making a roo strop speciffically sanding the leather
I have a piece of roo leather with app 400mm of usable length and a bit more on the end with some scars that will be where I attach hardware to, I think I will need to sand the leather a bit as there is varied texture, some is quite smooth while an area at the end with scars (prior to the scarring) has quite heavy texture. I have tried sanding an offcut and it looks as though it will work, I am planning to start with 120 grit working up to 1200 grit wet and dry. Anyone have any tips or sugestions?
Cheers edBread and water can so easily become tea and toast
-
05-18-2013, 06:13 PM #2
2.5 hours of hand Sanding and I've got something I am happy with, still a little texture at the end but the scars are gone. It is currently 3" wide but cups a little (concave) should I trim it to 2 or 2.5" or just try and flatten it out?
Bread and water can so easily become tea and toast
-
05-18-2013, 09:32 PM #3There is no charge for Awesomeness


- Join Date
- Aug 2006
- Location
- Maleny, Australia
- Posts
- 7,977
- Blog Entries
- 3
Thanked: 1587
I've had a few hides where the quality was a bit variable. I sanded some pieces and left others alone as a quick experiment. Unless the scarring was very pronounced it wasn't really necessary to sand it, though of course it doesn't hurt either (just make sure you are careful to remove any bits of grit that may be embedded).
The cupping could be due to how you attached the hardware (have you done that yet?). I found on my 3" versions that 3 rivets/whatever helped, as well as making sure the hardware has a straight part at the attachment point (I used a D-ring: see the sticky thread in the Strop forum). Kangaroo is quite thin, so a little cupping won't matter a lot when stropping as the weight of the razor will flatten it out as you go along.
James.<This signature intentionally left blank>
-
05-18-2013, 10:24 PM #4
No hardware has been attached yet, though it will have a good straight edge, any recommendations for grit removal? The 120 will be easy enough to see. But am not sure about 1200 :-/
Bread and water can so easily become tea and toast
-
05-18-2013, 10:28 PM #5There is no charge for Awesomeness
- Join Date
- Aug 2006
- Location
- Maleny, Australia
- Posts
- 7,977
- Blog Entries
- 3
Thanked: 1587
I used a damp cloth and just made sure I was thorough.
Edit: If you haven't attached hardware yet you may find the cupping issue resolves itself once you do. Otherwise, at this stage you could probably try to flatten the cupping out by dampening it and forcing t flat under something heavy, or maybe just try folding it gently the other way. It's thin leather, so it shouldn't take much effort.
James.Last edited by Jimbo; 05-18-2013 at 10:31 PM.
<This signature intentionally left blank>
-
05-19-2013, 10:45 PM #6
Had to give it another light sand as I found that I could feel some roughness in one direction but not the other. Ifound that once I apply tension the cupping goes away, did a test with a kitchen knife and seems to work fine, alls I need to do now is refine my technique and for my razor to arrive. Thanks for the input James, this is all new to me.
Geezer likes this.Bread and water can so easily become tea and toast
-
05-22-2013, 12:17 PM #7
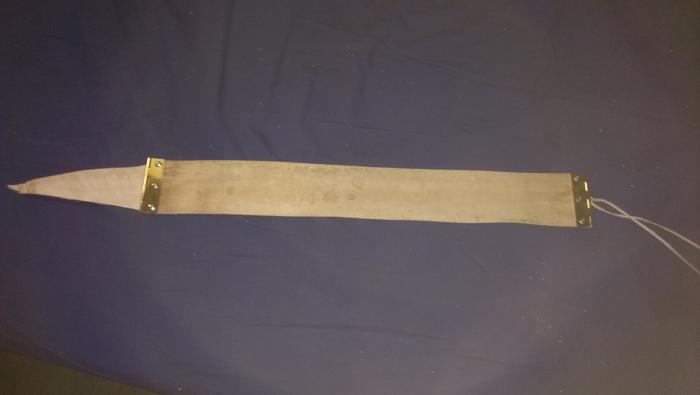
Unsure if it worked but here's a piccie of the end result.Bread and water can so easily become tea and toast
-
05-22-2013, 02:21 PM #8I used Nakayamas for my house


- Join Date
- Aug 2009
- Location
- Des Moines
- Posts
- 8,664
- Blog Entries
- 1
Thanked: 2591
Yes it will work, check this tutorial out Originally Posted by edhewitt

http://straightrazorpalace.com/works...-tutorial.htmlStefan
-
05-22-2013, 03:13 PM #9
Thanks, I have now finished the project thanks to a pair of brass hinges, and have a safety (blunt) straight razor to practice my technique on.
 Bread and water can so easily become tea and toast


 Reply With Quote