
Results 1 to 10 of 10
 1Likes
 LinkBack URL
 About LinkBacks
-
07-12-2013, 02:51 PM #1Member

- Join Date
- May 2013
- Location
- Minnesota
- Posts
- 74
Thanked: 6 So, what exactly am I looking at?
Hello SRP,
I just purchased my first straight from an antique store and would like to know the following:
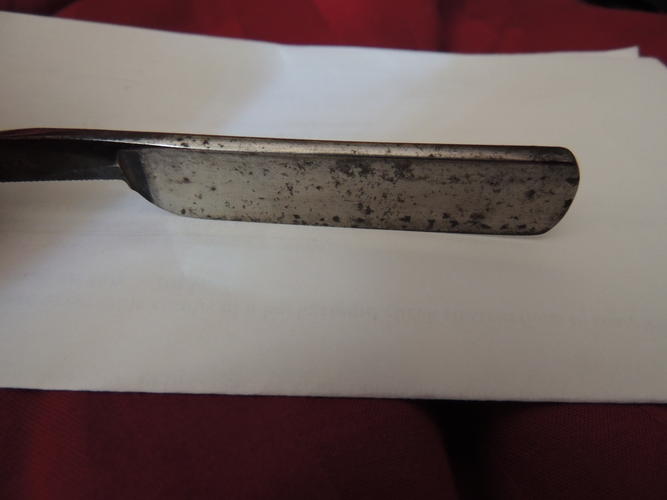
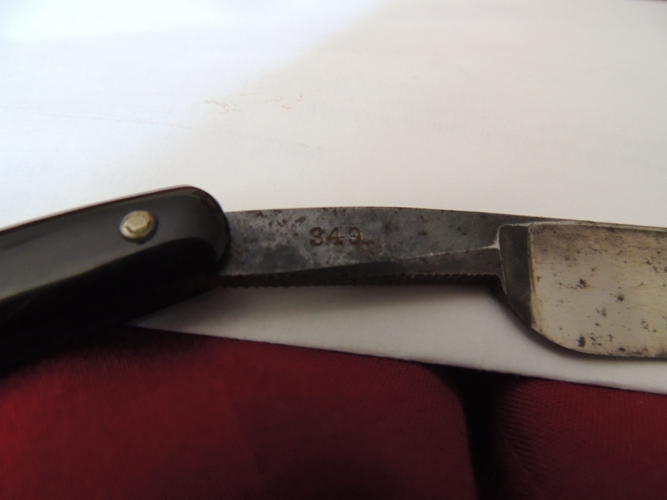
A.) What type of damage/wear am I looking at? There are no chips and nicks on the blade or the scales that I can see/feel
B.) What is the cost/time that would be required to make this razor look almost like new (i.e. Restoration cost for the type of work that needs to be done)?
Any insights would be greatly appreciated. Below are the pictures that I have of my razor;

I'm really looking forward to hearing what the experts say on this.
Thanks,
Natz
-
07-12-2013, 03:21 PM #2Senior Member

- Join Date
- Jun 2012
- Location
- Manchester, England
- Posts
- 137
Thanked: 32
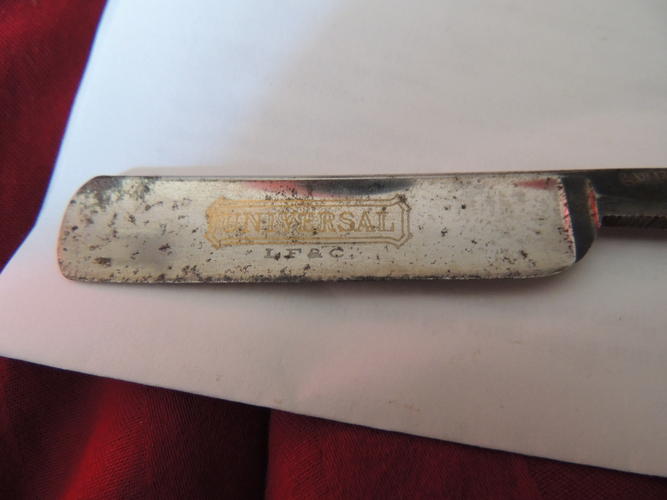
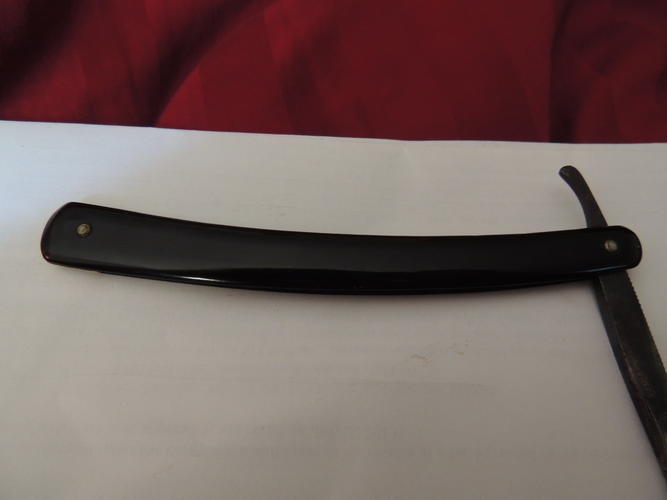
Ooh!! I like the scales, they look to be in good nick. The blade doesn't look to have too much wear either although I can't tell what the blade edge is like from the pictures. It needs unpinning and a good ol' 'clean' IMO, if you want it looking new you might have to sacrifice the gold wash to get the blade up to a mirror finish. Would be rather difficult to get rid of all the dark spots otherwise. Good look with the restore and post some pics when it's done!!!
-
07-12-2013, 03:29 PM #3Senior Member


- Join Date
- Feb 2013
- Location
- Haida Gwaii, British Columbia, Canada
- Posts
- 14,457
Thanked: 4830
I can't tell from the pictures how bad the rust and pitting is along the edge. That is usually the biggest are of concern to me, because that is the area that needs to be able to achieve a smooth bevel and polish to a super fine edge in order to be able to shave with it. Rust and pitting away from the edge is of no consequence and doesn't even have to be removed to make a good shaver. Rust removal is usually done by hand sanding and there is a section is the wiki (library) where you can find all that.
-
07-12-2013, 03:32 PM #4Senior Member
- Join Date
- Jun 2012
- Location
- Manchester, England
- Posts
- 137
Thanked: 32
Yes, as rezdog said its the business edge of the razor that raises the most concern. But if you do want it looking 'like new' the whole blade will need sanding and polishing as well.
-
07-12-2013, 04:04 PM #5Senior Member


- Join Date
- Sep 2010
- Location
- Oslo Norway
- Posts
- 1,848
Thanked: 438
There really is no way to say how much work it needs, apart from doing it.
What you are seeing is rust. Depending on how deep those small spots are, it could be almost no work to quite a bit.
Judging from the pictures (always dodgy) it seems there is no active rust (active rust = red rust, inactive rust = black rust)
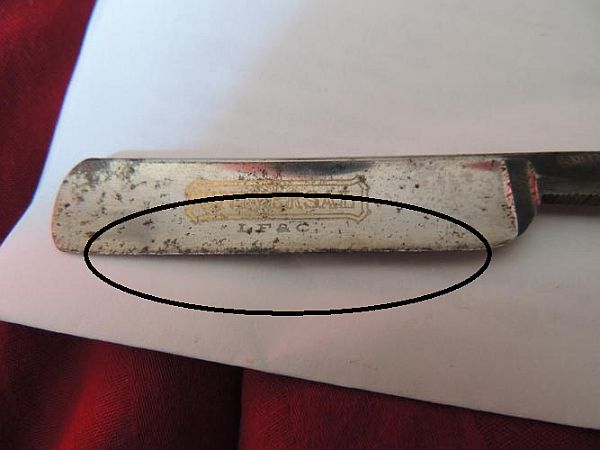
Unfortunately, rust does not neccesarily spread only on the surface, it can dig in quite deep. Oh, the gold etch is going to have to be removed.
All that being said, I would say that it's a good candidate for a makeover. Looks to be used only lightly, with modest hone wear. With a little luck, the black on the edge will just wipe off.
Best of luck with it.
-
07-12-2013, 05:48 PM #6Senior Member

- Join Date
- Jul 2008
- Location
- Knoxville, TN
- Posts
- 874
Thanked: 312
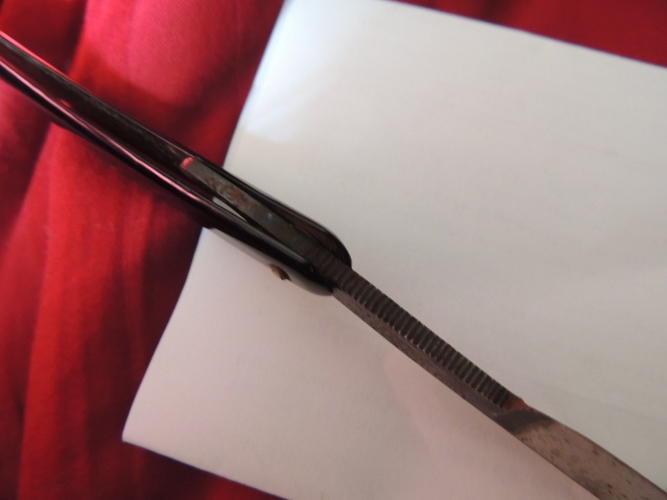
The edge of the razor seems to be the biggest problem area. Sanding with progressive grits from 600 to 2000 should give you a presentable razor. The amount of shine will be in proportion to the amount of elbow grease you apply. The tang appears to be blued or blackened by the manufacturer as an aid to reduce rusting, but this only applies if the razor has been properly maintained over the years. Closely examine the area (circled) to see if the rust has eaten into the shaving edge. If so, it may require a good bit of work to restore the bevel before honing .
Regards - Walt
 HARRYWALLY likes this.
-
07-13-2013, 02:43 AM #7Member
- Join Date
- May 2013
- Location
- Minnesota
- Posts
- 74
Thanked: 6
I looked at the edge you circled, no nicks, but there are some black spots there as well. I'd like to keep the gold wash, but I want to get a mirror finish more, so I guess I can sacrifice the wash :-(
If I were to send it off to be cleaned and restored, how much would it set me back? I don't really trust myself to do the work with it being my first time. Who would you recommend for the work?
-
07-13-2013, 03:06 AM #8Senior Member
- Join Date
- Jul 2008
- Location
- Knoxville, TN
- Posts
- 874
Thanked: 312
You can contact any of these people who offer restoration services in the classifieds. But, if you are a reasonably able-bodied person with an average amount of eye/hand coordination, you should be able to do the sanding yourself. It just entails rubbing a sheet of sandpaper across the blade until you are satisfied with the amount of rust/discoloration that has been removed. As they say, "It ain't rocket science".

Regards - Walt
-
07-13-2013, 04:33 AM #9Member
- Join Date
- May 2013
- Location
- Minnesota
- Posts
- 74
Thanked: 6
Guess I'm just overly-cautious. If it wasn't something I really cared about I'd throw caution to the wind and do the work myself, trial and error style. Plus there's the whole unpinning deal as well. Maybe on my third or fourth razor I might get one that needs a little more TLC and make it into a DIY project, but not for this girl. Originally Posted by Walt

-
07-13-2013, 05:32 AM #10'with that said'


- Join Date
- Aug 2010
- Location
- Walla Walla in WA State USA
- Posts
- 11,260
Thanked: 4238
Natz: Originally Posted by Natz
You ARE being overly cautious about not wanting to at least try to clean up that blade!!
Im in the minority as I like to start with a high grit like 2000 wet-n-dry just to see what it might entail. I then go down to 1000 grit, then an 800 and if it looks like it needs some heavy sanding I go down to 220 and then work back up!
You dont necessarily need to up pin the razor!!! I just cleaned up a razor thats on its way home up north. Im hoping he will post the after pictures as Im at the mercy of my kids for pictures and they werent available to take any. Heres the link to his razor that had similar questionable areas, such as the edge.
http://straightrazorpalace.com/works...ml#post1171222
The owner wanted to make sure that the etching was left intact; I was able to go down to only a 400 grit and then start back up and finished with 2k grit and then Mothers Mag Wheel Polish, and it looks great!
It also took a nice edge!
I didnt un-pin it I worked the area between the scales with some artificial steel wool, and then used a Popsicle stick with the sandpaper. It works well!
OH! A Popsicle stick works well to get into the grooves on the shank!
Give it a GO!! All you have to lose is a little investment in some Wet-n-Dry sandpaper (please use 3M) and your time!!
While its your first razor there will be others and when you show what you did with your first razor it will be impressive!!
If you are indeed dead set on attempting to see what you can do with that razor PM me and Ill let you know who my favorite restorer and honer is.


 Reply With Quote