
Results 1 to 6 of 6
 1Likes
 LinkBack URL
 About LinkBacks
-
08-30-2013, 05:03 PM #1Junior Member

- Join Date
- Aug 2013
- Posts
- 8
Thanked: 0 Wish me luck - First time restoration!
Hi All,
I am particularly new to the world of straight razors but have worked in engineering for a few years now so hopefully some skills may transfer over for my first restoration!
I picked up this rather sorry looking Barber & Sons wedge at a local antique shop and feel that it would be the perfect candidate for my first time and could turn into something rather nice...hopefully!
I will try to update the progress regularly and appreciate any advice anybody would like to contribute along the way, as well as any info anybody may have on this particular razor.
I believe the scales to be ivory but they may be bone. I would like to keep them if possible and clean them up. I would like to try and keep the whole job as sympathetic to the original as possible.
Many thanks in advance for any help and advice!
-
08-30-2013, 10:30 PM #2Senior Member


- Join Date
- Jul 2013
- Location
- Kitsap County, WA USA
- Posts
- 1,549
Thanked: 351
Best of luck. What method are you planning on using? There are some great articles in the Wiki. highly recommend looking them over for some ideas.
The older I get the more I realize how little I actually know.
-
08-30-2013, 11:04 PM #3Junior Member
- Join Date
- Aug 2013
- Posts
- 8
Thanked: 0
Thanks. I have removed the scales but am wondering if there may be too much damage to save the cracked side. This may be a good opportunity to learn how to make some!
As this is my first attempt I am going to play it safe and polish by hand, working slowly through the different grades.
I have already removed a lot of rust from the blade which is already looking pretty good. The tang is very heavily pitted and I need to try and balance removing the pitting and losing the makers stamp.
Once it's finished I will send it off for honing. I've had a look at some of the posts and reckon they will prove invaluable.
-
08-30-2013, 11:23 PM #4Senior Member


- Join Date
- Mar 2012
- Location
- Thunder Bay, Ontario, Canada
- Posts
- 17,324
Thanked: 3228
Sounds like you are off to a good start by going slow and doing it by hand, good luck to you. Judging by the style of the blade and scales she is an oldie but others more expert should be able to say for sure. I think you might be right on the scale material. I would try my hardest to salvage the scales if they are ivory. You might be able to glue them to a liner but again those more expert could comment if that is possible.
BobLife is a terminal illness in the end
-
08-30-2013, 11:24 PM #5Senior Member

- Join Date
- Feb 2013
- Location
- Haida Gwaii, British Columbia, Canada
- Posts
- 14,444
Thanked: 4828
I'm not sure that you need luck as much as patience. All the restore work I have done to date is hand sanding. i think what you really need is patience. I really like my 8X visor for restores. it allows me to see the details very clearly. Good patience!
-
08-31-2013, 03:02 AM #6Senior Member


- Join Date
- Nov 2012
- Location
- Across the street from Mickey Mouse in Calif.
- Posts
- 5,320
Thanked: 1184
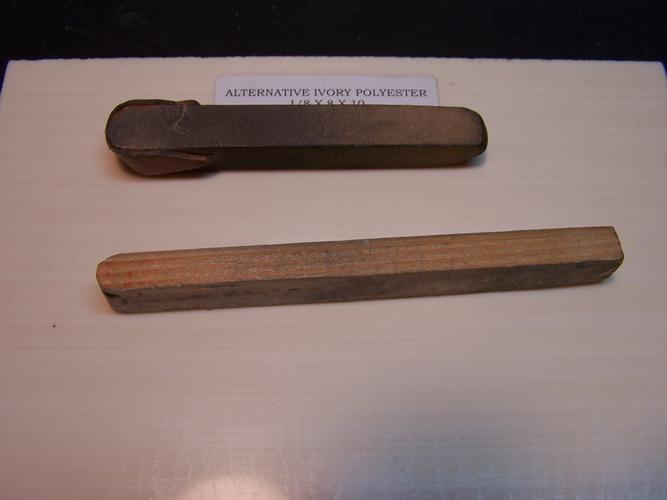
There was a thread opened not to long ago on Ivory ID. Most times they are very thin scales. Very thin from the pictures I saw.
I just happen to have some faux ivory on the work bench just to give you an idea of the pattern. If you can see the lines.
I make sanding blocks for hand sanding. Then I cut the paper into strips to fit the width of the sanding block. I piece of leather helps hold the paper in place. I also have a small piece of 3/4 ply I cover with rubber I use as a platform to set the razor on. I can put the edge of the blade next to the edge of the platform and not sand anything but the blade. It just helps get the blade flat and in different positions and keeps it from moving around while I sand on it.
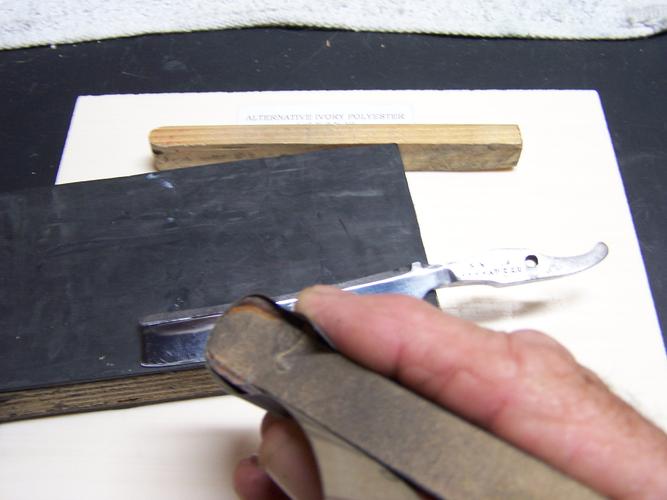
Saves the finger tips from fatigue and 1 swipe across the bevel, you will be bleeding.Last edited by 10Pups; 08-31-2013 at 03:05 AM. Reason: added details.
spazola likes this.Good judgment comes from experience, and experience....well that comes from poor judgment.
-


 Reply With Quote