Amazing restoration. Glad to see this example be brought back from the dead. I hope it's a great shaver when finished.
Printable View
Amazing restoration. Glad to see this example be brought back from the dead. I hope it's a great shaver when finished.
I think the frown has been working itself out during the polishing. It is hardly there anymore.
It's not much of a frown might just be a play of light when I looked at it that made it look deeper for me to ask.
Agree with Glen nothing major & even I (with my very limited skills) have honed a minor chip out that looked deeper than that frown with out breadknifing it first.
it's still looking great & can't wait to see the new horn on it when it is done.
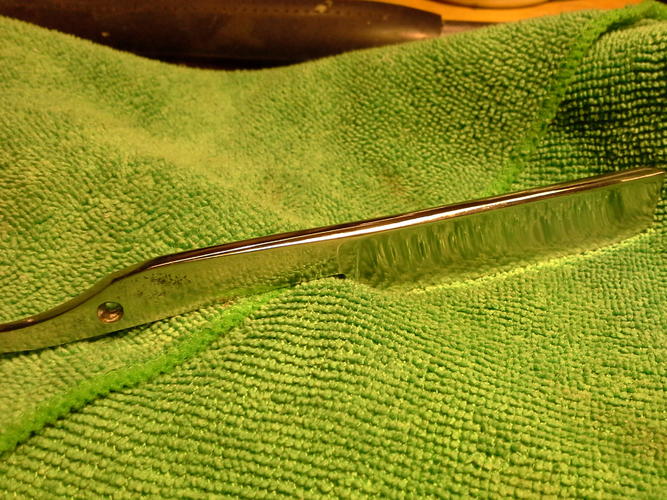
Attachment 142801after 800,1000,1500
Attachment 142802Attachment 142803
So was all the stamping on the tang gone like we.expected it to be?
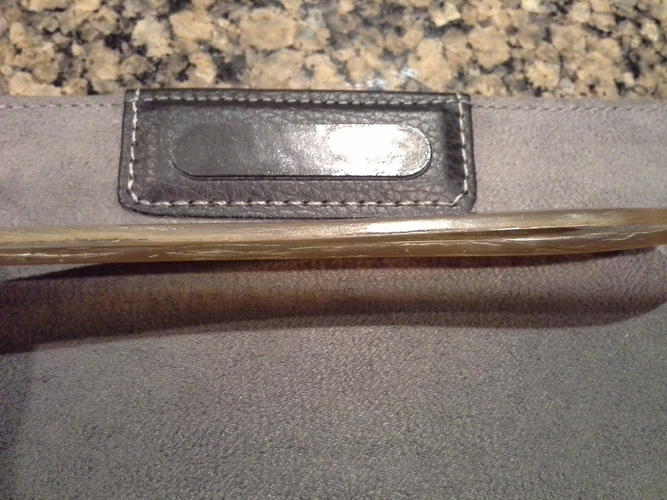
A quick dry fit bfore final polish.Attachment 142804otherwise known as a teaser
No, there are a few letters readable. I will get a closeup tomorrow.Quote:
Originally Posted by 2010johnjef
Cool man thanks
Remember to post a before and after picture. Gotta love a razor with character. Somewhere in the future I want to try and restore a blade like this. Right now my focus is trying not to see the ER using one!
Plenty of before pics at the beginning of the thread, but I'll post a side-by-side when done.
Thanks for doing that! With all of the confusion about which blade is which it should clear everything up!Quote:
Originally Posted by souschefdude
I'm so very glad I decided to join in just as an observer as you've been doing a wonderful job, not only on the razor but in keeping all of us up to date on your progress! You are doing some really nice work there! :tu
So I tried to straighten the front scale before, flattened between marble and glass. Not successful. So I built a rig, havent tried it yet, but he re is a pic.Attachment 142959
The two middle corks are mounted with the screws offset from center, so turning them increases the amount of pressure, therefor the bend, all the way from none to a big curve.Attachment 142960
These scales are from a DD satinedge.
That is a good idea!
This response is a bit off topic but useful to keep in mind.... I sometimes hand sand a blade while doing something else (watching a ballgame, talking with folks, etc) and have on occasion had the edge of the blade decide it wanted to be near bone again (my finger bones). It's sort of a sickening feeling actually hearing the metal hit my finger bone. Normally I'd drive to the ER to maintain my ER Frequent Flier status, but a few years ago I read in an SRP thread about yet another amazing property of CA (super glue).Quote:
Originally Posted by rmagnus
After I get a bone slice from a badly behaving blade I'm sanding, I rinse it off with water, apply a bit of alcohol, squeeze the wound together, rinse it off again, dry it, and dab on a bead of CA while maintaining the pressure while it dries. After it dries apply a wider bead of CA to hold the first one in place and continue to squeeze it until that one is dry as well and there's no sign of bleeding. Then I wrap a Bandaid around the finger. Unorthodox I guess, but it works well. So far no stitches from any blades and no infections.
My all-natural food/lifestyle wife thinks I'm probably introducing toxic chemicals into my bloodstream but no adverse effects that I can see. Obviously paying close attention to the sanding process would be a more intelligent approach, but in a pinch the CA certainly stops the bleeders and allow me to get back to hand sanding a few minutes later. Obviously not sanctioned medical advice but it works!
I learned this trick when I was in the culinary field.Quote:
Originally Posted by AirColorado
This is also a good time to mention that disinfecting a blade you are about to work on isn't a bad idea.
I would not recommend sanding a blade while thinking/doing something else though.
I do the same..
I may be wrong, but I was told CA's original use was for medics in the field.. rather than trying to stitch a little dab of CA glue closes the wound.
Maybe I should have super glued my finger at home instead of going to hospital a while back lol
Update.
Here is a closeup of the tang lettering thar was found under the rust:
Attachment 143116
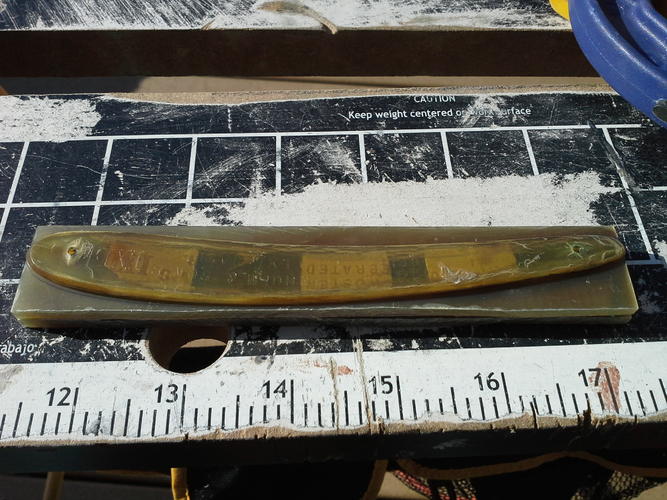
Here is the present condition of the scales.Attachment 143118Attachment 143119
Attachment 143120
The inscribed scale is the original front. The back scale is from a similar period and is in almost identical condition. There is a little delamination, staining at the tang pin, and a little warpage. The pin holes line up exactly.
The only difference is the front scale is slightly longer at both ends. This means I have to reduce the size of it by removing some material. The function will not be affected at all. But the question to the owner is, are you ok with that?
Three options here:
Modify the inscribed scale to match the back.
Leave them the way they are, with a slight mismatch front and back( still functional, but a little funny looking, especially at the wedge.)
Or make a new back scale. This of course will affect the look , with an old and a new side by side.
Probably do a new
REALLY? :thinking:Quote:
Originally Posted by 2010johnjef
IMO it would look better with each of them similar. :shrug:
Idk its a hard choice a new.scale is nice but so is a matching... I guess a matching instead..... wow that stamping was done.horribly lol
+1..................Quote:
Originally Posted by Chevhead
I am going to ask my Brother-in-law if it would be possible to cnc images onto scales.
IF this works out then all I would need is the EXACT measurements of whatever needed to be inscribed and it "SHOULD" be like a BRAND NEW SCALE!
This would be AWESOME if it worked!
The originals are STAMPED into the scales though....right?
Do you think a cnc version would work?
Idk man to be honest
I believe they are stamped. Dont know anything about CNC.
Johnjef, me neither. I like the look of the old scales. The razor is rough, i think rough scales go with it.
it should work very well. they can run sanding mops to clean it up and it should be very close to stamped.
It is a HOME MADE CNC machine though....Quote:
Originally Posted by RezDog
(He gots all da brains) :shrug::gaah::w";"
probably do the rough ones then.
I'd be willing to bet the original front with a matching back should look very nice with that blade. If it doesn't appeal to you in the end you can always get new scales at that point. If it were my restore I'd probably want to try the old ones first.
Attachment 143167the iriginal front scale after soaking in near boiling water for 30 seconds then putting it in the cork bending unit I made. Let it sit over night. Has a slight outward curve, which is what I was going for. There is a little inward curve at the center, have to work on that.
Next, time to make a matching rear scale. Actually I will make a full set while I am at it, for instructional purposes, and to give an option.
Attachment 143168
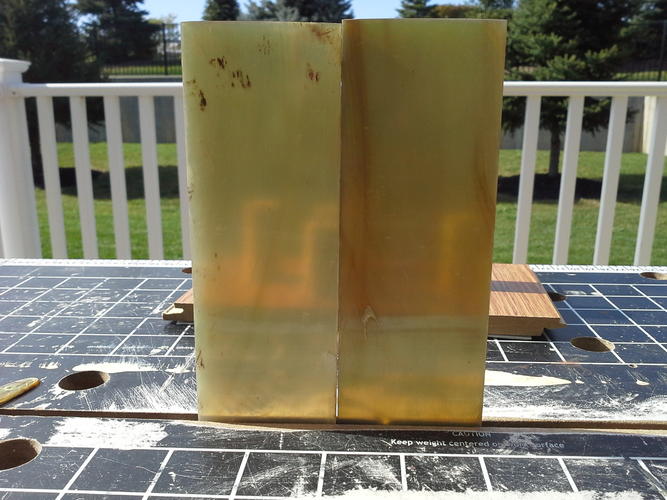
Here are the honey horns I have, gonna useone of the two middle ones, they are the most plain.
Attachment 143169
The one on the right is more yellow, that is the one.
With the center marked, use a hobby coping saw. I dont leave more than about 1" overhang when cutting, too much vibration.
Attachment 143170
Flip the piece around halfway thru, the coping saw wont reach all the way.Attachment 143171
Looking good.
Tape the two together. Shurtape doublesticky is what I use.Attachment 143175
Trace it out.
I tape the scale to ensure it doesnt move. Just a few small pieces.
Attachment 143176
Back to the saw, dont get too close leave about 1/8 inch.
Attachment 143177
A close view