To the dremel!Attachment 143178
Printable View
To the dremel!Attachment 143178
You certainly dont need this rig, but it makes things a little easier. Attachment 143179
Sand just to the line. Fine sanding removes alot of material, and you dont want to overshoot, especially when trying to match an existing scale.
General shape attainedAttachment 143195
Now to reduce thickness.Attachment 143196
The wood is there to guide for uniformity.
Looking great
Looking good. Next time, try the thinning step before you do the contour step, especially if your edges/cuts are true. You'll have more material sitting on the bench. Just my $0.02.
I have to contour first for 2 reasons.Quote:
Originally Posted by MikekiM
1, sanding down the thickness would make ig difficult to trace onto/ see the pencil line.
2 the dremel drum is not very wide. In fact it is just wide enough to do 2 passes.
I have thinned first before, using an orbital/vibratory type hand sander. That is another way to go. But I prefer this technique for these tools.
Obviously a belt sander would be the best, but for hobbyists without a ton of tools....
After dremel sanding at 60 and 120, i switch to hand sanding, using increasingly Attachment 143294Attachment 143295finer grits taped to a rounded stick for the inside curve, and a flat stick for everything else
Here I am beveling the edge of the scalesAttachment 143305
Side by side 400 grit done.Attachment 143306
A little thick, but we can take care of that.Attachment 143307
Did the last couple grits on the cork drum sander.
Then hand polish with a fiberglass buffing compound.Attachment 143312
After buffing with mothers on the wheelAttachment 143313
Separating carefullyAttachment 143314
Preparing to drill.Attachment 143315
Drilled1/16. Then hand drilled 5/64
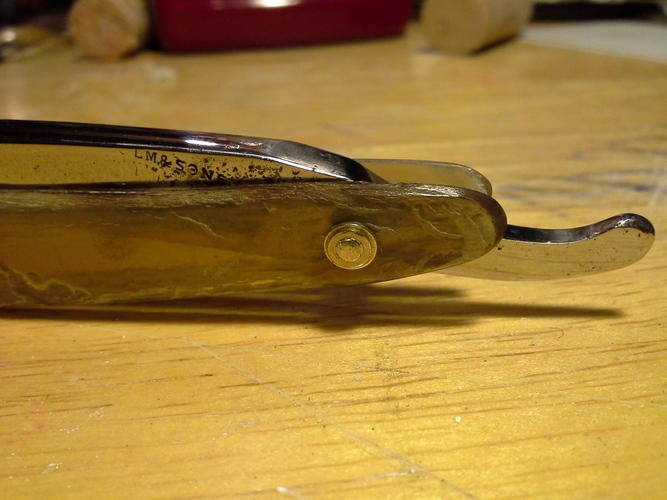
Attachment 143317Attachment 143318Mocked up with microfasteners.
the colour looks pretty good and the shape is of course a match. Looking like keeper to me
I think we call it Two Face.
Sounds good
it actually looks really unique with a brand new scale and one old original idk y but it looks good two face she is
I agree. I am gonna mess around with the other scales from the old english razor to see what can be
done with old horn, but I kinda like the look ofvthe old and new. Still have a few tweaks to finish her up.
It's too bad that there isn't really a technique for antiquing the new horn to give it an older appearance. Maybe there is
I considered adding scratches and wear marks.... but it would look as fake. Like hollywood types trying to look younger.Quote:
Originally Posted by RezDog
yes it does need to be gracefully aged!
Stone wash? Realy nice restore!Quote:
Originally Posted by souschefdude
Nice idea to tip the Dremel for the bevels.. The result is a uniformly beveled edge.
Did you do anything to thin them?
So I thinned out the scale. Started at 180,320,400,600,800,1000,1500,2000. Thistime I taped the scale to a piece of wood and put the sp on the bench. Sorry, no pics were taken.
Standard stuff.
Now, pinning. I mocked up everything with microfasteners, now have removed the microfasteners from the wedge end and put in the brass rod, with the washers on.Attachment 143489
The rod was cut with a set of wire cutters, then shaved down with a dremel stone.
I peen on the side of a hammer, using a tack hammer. Not the greatest, but it gets the job done.
A great tutorial is on srp by gssixgun.
I tape the underside so as not to get scratched up.
I peened the tang , nothing different to show.
I leavecabout a washer width of material of the rod to peen on both sides.Attachment 143490Attachment 143491Attachment 143492
To the hones!Attachment 143493
I am reminded how much I hate honing
Honed thru 8000. Tomorrow on finishing hone, strop and test shave.
The edge looks real nice thru a loupe. The pitting gave a little issue, but shoukd be worked out.Attachment 143498
I noticed you said that you used a tack hammer. I found a cheap "jewlers" peening hammer in the craft section of a "dollar/flea" market store. It's about 3 oz and once I cleaned up the face it works like a charm, and only cost $2. It's not well made, but its only use is peening razors so it works.
Looks awesome... The honing step is a love/thing. I still don't know how I feel about it.
I have a few small ball peen hammers.. hve yet to find a 4oz. But I have a jewelers hammer that I picked up at Harbor Freight that is really small. the upside is I am less likely to hit too hard. Downside is, it takes a little longer.
I see you have a pencil holding the blade up.. is that just to stand the razor up or did you leave the pivot loose?
Looks like you used different size stacked washers on the pivot and wedge/spacer. Is that just the way it looks or did you do that for a reason?
The wedge washers would have been my choice for both, i like that look better,, but thr front scale at the tang needed extra support of wider washers.Quote:
Originally Posted by MikekiM
So, just a thought on the different size of the scales..
There is a bit you can buy for full size routers and no doubt a jig or bit you can make to work with the Dremel, that makes following a pattern incredibly easy. In this case, the pattern is your original scale. The bit has a bearing mounted at the top, or bottom depending on how you want to mount your pattern and the cutting edge is/are exactly the same size as the bearing. If it were me, and I had your setup, bottom mounted bearing would be best, keeping in mind that you are mounting it in the Dremel inverted, so the bearing will actually be on top, closer to the chuck. You double stick tape the original scale to your scale stock after the stock has been rough cut. Scale on top and stock on bottom. Adjust the height so that the bearing rides on the very edge of the original scale and the cutting edge is cutting your rough stock. The result is an EXACT copy of the original. The good is it's an exact copy. The bad is, it's an exact copy, including any imperfections in the original which will get telegraphed to the new material as the bearing rides over it. You would insert this step after you rough cut with the coping saw and before sanding the bevel. Or not....
Nice work and great thread...
Gentlemen and ladies:
Two face ( now sitting proper)
Attachment 143545Attachment 143546
Coukdnt have asked for a better job she looks so much better now its crazy this razor looked like garbage before thanks so much
Some befores:Attachment 143547Attachment 143548Attachment 143549
Shave report in 30 minutes.