
Results 1 to 10 of 11
 2Likes
Thread: Help wanted for this W and B
 LinkBack URL
 About LinkBacks
-
10-19-2013, 04:48 AM #1Senior Member


- Join Date
- Dec 2012
- Location
- Perth, West Australia
- Posts
- 1,431
Thanked: 497 Help wanted for this W and B
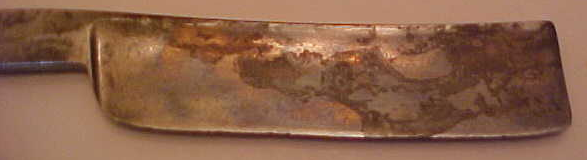
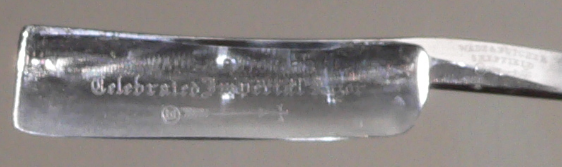
Hi there, I've just started cleaning this up to see what's underneath decades of neglect.
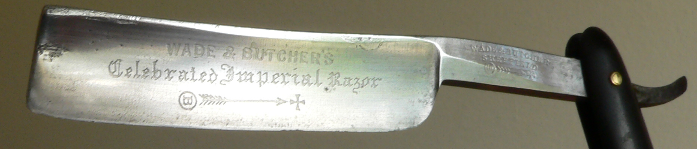
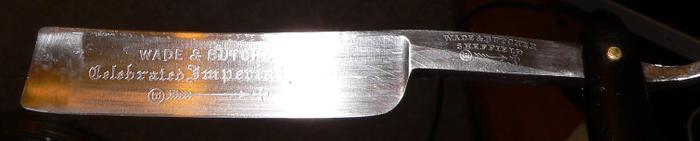
The etching on the blade and tang is in excellent condition, but the other side.......
The pattern suggests it was stained with 'something' that has turned into deep pitting.
I guess this means lots of elbow grease and wet'n'dry, but if anyone has some suggestions
or observations about restoring something like this, please let me know .
.
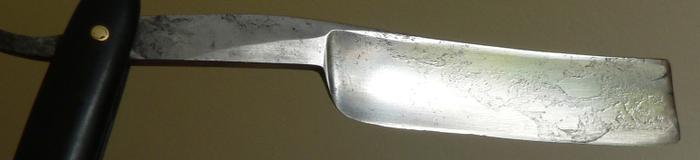
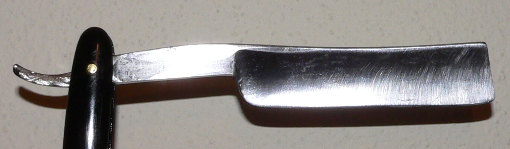
First pic is before and the next two are after a clean.
 http://straightrazorplace.com/workshop/18504-welcome-workshop-how-do-i-where-do-i-what-do-i-answers-here.html
-
10-19-2013, 05:26 AM #2Senior Member

- Join Date
- May 2012
- Location
- Nuriootpa, Australia
- Posts
- 130
Thanked: 27
The back side of that razor looks pretty rough :-(
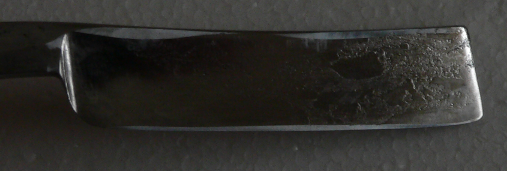
That pitting also looks to be pretty heavy right on the edge so some closer pics of that area would be helpful I think.
I would recommend that before you put hours of hand sanding into that one, try and set a bevel on it and see if you can get a clean bevel from under all that pitting. that should give a pretty clear indication of what sort of work is ahead of you in regards to that razor.
Good luck!
Nick.
-
The Following User Says Thank You to Naallen12 For This Useful Post:
bongo (10-19-2013)
-
10-19-2013, 05:29 AM #3Sinner Saved by Grace

- Join Date
- Jul 2012
- Location
- Corning, CA
- Posts
- 598
Thanked: 133
Have you done a bevel set to check that the rust is not too deep through the edge?
Scars don't matter much to me but a rusted out edge is a serious problem.
Jonathan
-
The Following User Says Thank You to Datsots For This Useful Post:
bongo (10-19-2013)
-
10-19-2013, 05:59 AM #4'with that said'


- Join Date
- Aug 2010
- Location
- Walla Walla in WA State USA
- Posts
- 11,226
Thanked: 4237
Here's some examples of what can happen when you put a little time and care into bringing a razor back from the dead and only with some 3M Wet-n-Dry, Mothers Mag Wheel Polish, some crumpled newspaper, some old T-shirt material and some of your time!!
http://straightrazorpalace.com/custo...n-cleanup.html
Here's another:
http://straightrazorpalace.com/works...ml#post1189414
The cleaned up razor appears in post #6!
Both were honed on a King 1200/Norton 4/8K and finished on a Naniwa 12K. I used only cloth and leather with no pastes!!!!
There is no reason not to 'try' to get a razor cleaned up and shave ready!!! In fact I think it would be a shame not to put forth the effort of at least trying!!
Both Razors gave Very Nice Shaves!!!!!!!!
Sanfte Rasur, mein Klingenbruder!
(Smooth Shaving My Brother In Blades)Our house is as Neil left it- an Aladdins cave of 'stuff'.
Kim X
-
The Following User Says Thank You to cudarunner For This Useful Post:
bongo (10-19-2013)
-
10-19-2013, 06:25 AM #5Senior Member
- Join Date
- Dec 2012
- Location
- Perth, West Australia
- Posts
- 1,431
Thanked: 497
Thanks guys
Well, a little time on the 1K Naniwa and everything seems O.K. so far.
Sorry about the bad pics....
 http://straightrazorplace.com/workshop/18504-welcome-workshop-how-do-i-where-do-i-what-do-i-answers-here.html
-
10-19-2013, 06:07 PM #6Sinner Saved by Grace
- Join Date
- Jul 2012
- Location
- Corning, CA
- Posts
- 598
Thanked: 133
Looks like the rust didn't get too deep. Have you decided whether to save the etch and some of the scars or go for a pristine mirror look?
Jonathan
-
10-19-2013, 06:28 PM #7Senior Member
- Join Date
- Dec 2012
- Location
- Perth, West Australia
- Posts
- 1,431
Thanked: 497
I think I'll sand around the etching as best I can. Originally Posted by Datsots

This is after 1 hour of 400 grit:
 http://straightrazorplace.com/workshop/18504-welcome-workshop-how-do-i-where-do-i-what-do-i-answers-here.html
-
10-20-2013, 02:34 AM #8the deepest roots

- Join Date
- Feb 2011
- Location
- Seattle
- Posts
- 1,221
Thanked: 169
After you've polished it to your liking, I would work on straightening out that bevel and spine. It seems to me that a frown may be forming...
-
The Following User Says Thank You to TwistedOak For This Useful Post:
bongo (10-20-2013)
-
10-20-2013, 03:12 AM #9Senior Member

- Join Date
- Jun 2013
- Location
- NRH, TX
- Posts
- 124
Thanked: 23
It looks like you're doing a good job on taking care of it. Still trying to find a good WB myself to restore.
bongo likes this.
-
10-20-2013, 06:42 AM #10Senior Member
- Join Date
- Dec 2012
- Location
- Perth, West Australia
- Posts
- 1,431
Thanked: 497
Time to unpin this as I've gone as far as I can without damaging the scales.
Which are in excellent condition by the way !!http://straightrazorplace.com/workshop/18504-welcome-workshop-how-do-i-where-do-i-what-do-i-answers-here.html


 Reply With Quote