
Results 1 to 10 of 14
 14Likes
 LinkBack URL
 About LinkBacks
-
11-24-2013, 10:15 PM #1Member

- Join Date
- Jun 2013
- Location
- Berkshire, UK
- Posts
- 62
Thanked: 19 A little advice on getting the finish improved on this restoration...
Hi all.
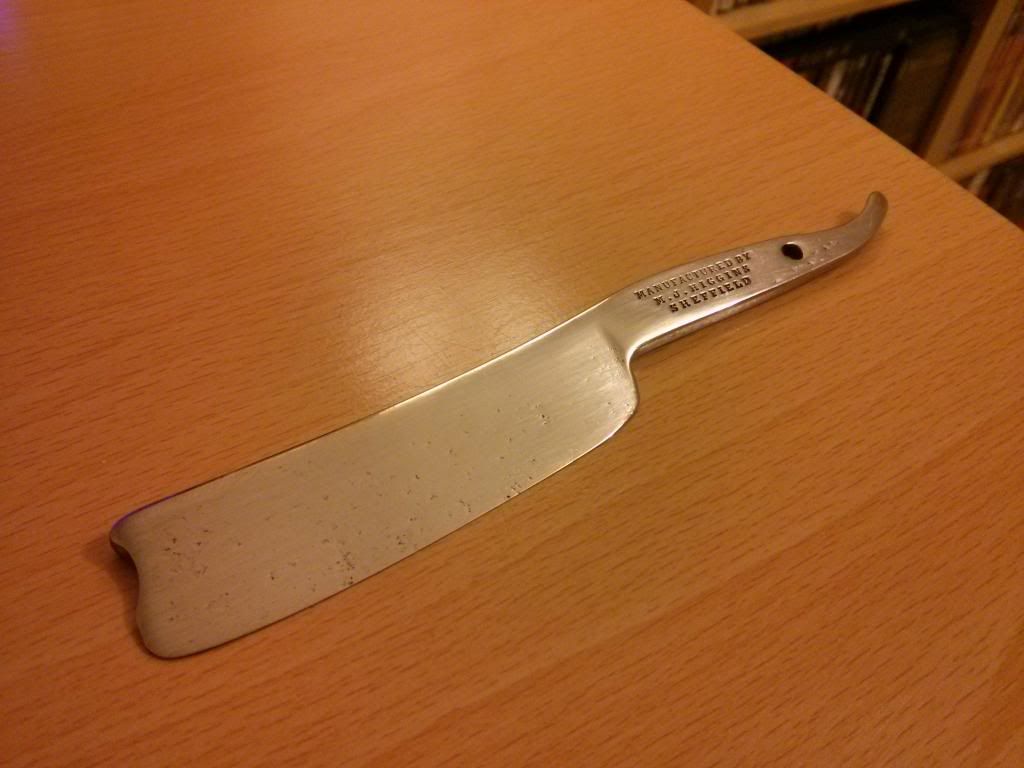
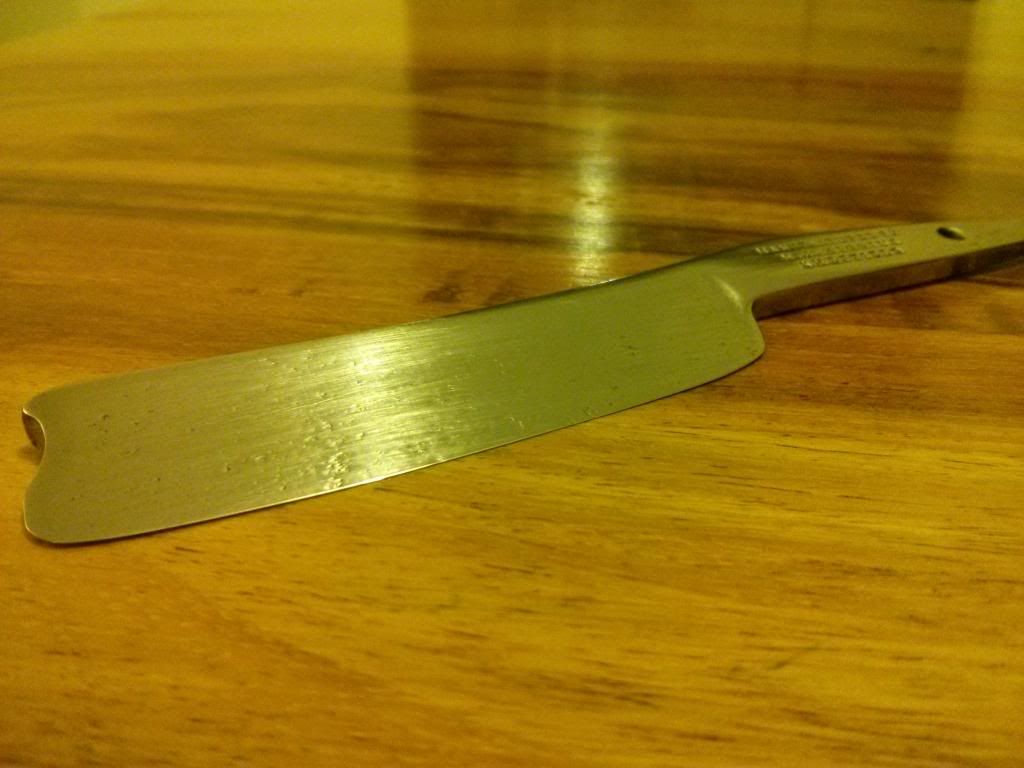
Current project is this lovely little barbers notch near wedge. It was pretty nasty when I got it - patina all over, which when it was sanded off revealed all over pitting - albeit thankfully uniform in depth.
I've been working it with greaseless compound on my little bench buffer, 80, 120, 180, 300 & 400 grit progression - this is a new exercise for me, and the first time I've restored a razor with greaseless compounds. Anyway, I'm just not yet happy with the finish. As can (I hope!) be seen from the pictures, the sanding marks are still quite visible - so I assume this simply means I have moved through the progressions too quickly??? I am happy to have some of the pitting left over when I'm done, but I would like the finish a little better than it is.
Any advice greatly appreciated!
Thanks!
Regards,
Al.
-
11-25-2013, 01:03 AM #2Senior Member


- Join Date
- Jul 2013
- Location
- Kitsap County, WA USA
- Posts
- 1,549
Thanked: 351
Well, sometimes you can't get all of the pock marks out without compromising the integrity of the blade. If it is a meaty wedge, then yes, you need to stay at the lower grit(s) until the marks are gone, then move up the grit levels. (Learned this the hard way hand sanding a blade).
The older I get the more I realize how little I actually know.
-
11-25-2013, 01:59 AM #3Senior Member


- Join Date
- Jun 2013
- Location
- Gladstone QLD AUSTRALIA
- Posts
- 3,245
Thanked: 804
I would say more time on the sand paper and going through the grits in each cross direction with a solid backing to remve the previous scratch marks.
and less time on the buffs would give a cleaner crisper finish?
but I don't do any mechanical buffing only hand buff after final sanding so maybe I see it differently.
but I notice that when I see heavy buffing on blades it rounds everything off loosing the edges & it tends to make the pits bigger as if it drags them out like a run or a teardrop, if you know what I mean, rather than just taking the high spots off around them. JMOSaved,
to shave another day.
-
11-25-2013, 02:01 AM #4Senior Member

- Join Date
- Sep 2013
- Location
- SoCal
- Posts
- 248
Thanked: 48
+1 no reason to leave the 80 grit compound. You have some substantial pitting to remove. My concern would be the damage near the bevel about 1/3 down from the tip of the blade. Just be careful not to over heat the blade when polishing.
Johnus likes this.
-
11-26-2013, 02:15 AM #5Senior Member

- Join Date
- Apr 2009
- Location
- Boulder County CO
- Posts
- 1,004
Thanked: 127
Sometimes I have to work up to 600 grit on the wheels or sander before I can really make out what still needs to be removed. So you haven't lost much. I'd go back to 300 or even 180 and see how that's working to remove the scratch marks for a while. Most of those pits may have to stay though. It's a judgement call as to how thin you want to take the blade down versus leaving a few pits. Also watch the edge carefully, before you know it you'll lose an 8th inch or more of width if you grind it out using 80 grit for too long. Look at the rounded shoulders - if you didn't get it like that then you've already removed a good amount of metal. Personally I think you're at the right width right there. I'd smooth out the scratches and learn to love the pits. But it's your blade and you may feel more strongly about pitting than width.
-
11-26-2013, 03:02 AM #6Senior Member

- Join Date
- May 2011
- Posts
- 344
Thanked: 237
Some great observations and tips here. I would add that to get the finish that I that you are wanting, you may need to take your progression higher in terms of grit. From the outset pits sometimes appear to be surface but it is amazing how deep they really can be. It has been my experience that the buffer is better suited to the final stages vs earlier unless you confident that you can maintain the crisp lines of the razor. Some of these older razors already have muted lines so I do not presume to know on this particular razor or not, but from my vantage point, you have made a great start. You have what appears to be a good oldie there with a great stamp. I would suggest that you consider leaving some of the more stubborn deep pits and concentrate on a hand sanding progression. Perhaps begin at this point with a 400 grit wet dry sand in a circular motion until you feel that you have come to a uniform surface aside from the deeper pits. I would then sand using the same grit horizontal until you feel you have accomplished the same. ( getting rid of all the circular lines. For me it is always beneficial to not be too stingy on the paper. Use a fresh piece, frequently. The intent here is to get it sanded very well with 400. From here, you might jump to 600, same sanding process and then 800. Once at 800, you could then use some compound on the buffer such as black magic and carefully buff the blade. The polish the compound gives will show you, vividly all of the sanding marks that are left behind and give you an idea of where you stand. Depending on your preference, you may feel that a shiny appearance is not what you want for this blade. If you opt for a shiny finish you will then need to take your progression further even beyond 3k. If you feel the blade is better suited for a even hand polish (which is very nice I might add) then you would jump back to the hand sanding and beginning with the 800 and work to around 1500. At the 1500 point an even, parallel with the blade finish, can look great! I would also suggest that you integrate your sanding process in progression to include the tang and tail also so things are uniform and even. To keep the stamp nice and crisp, I sometimes use a flat sanding block with paper over this surface so I am not digging into the stamp and rolling the shoulders of the lettering. Hope this is helpful. You are well on your way, just need to methodically work through the process.

Best Regards Ken
-
11-26-2013, 07:23 PM #7Member
- Join Date
- Jun 2013
- Location
- Berkshire, UK
- Posts
- 62
Thanked: 19
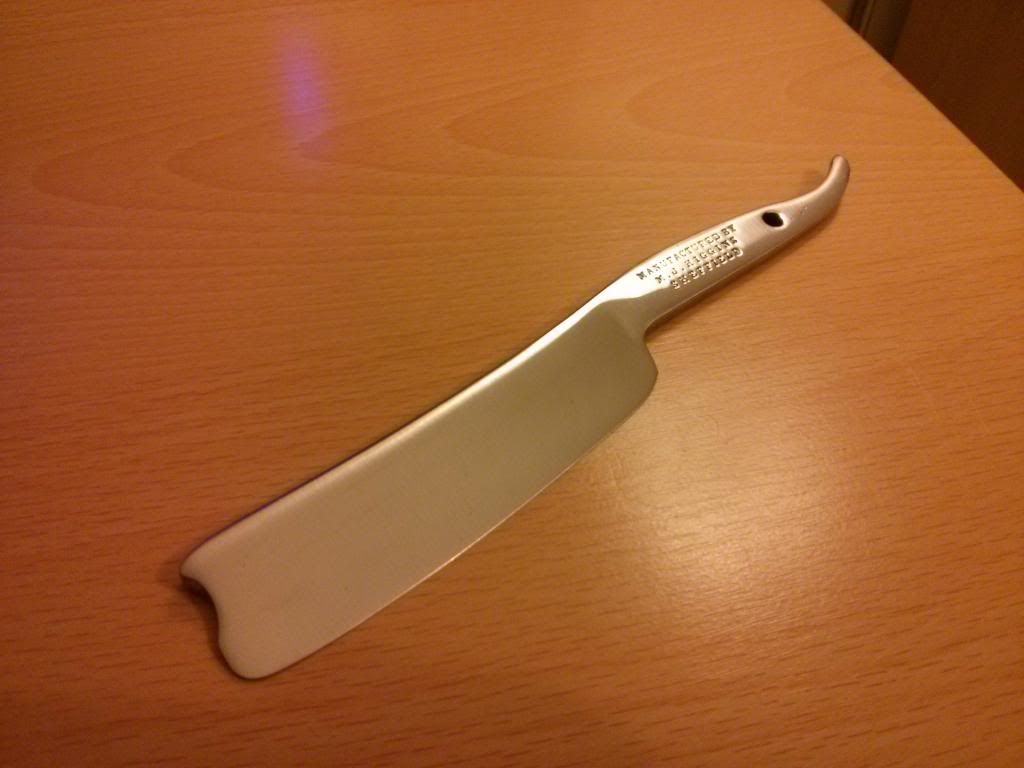
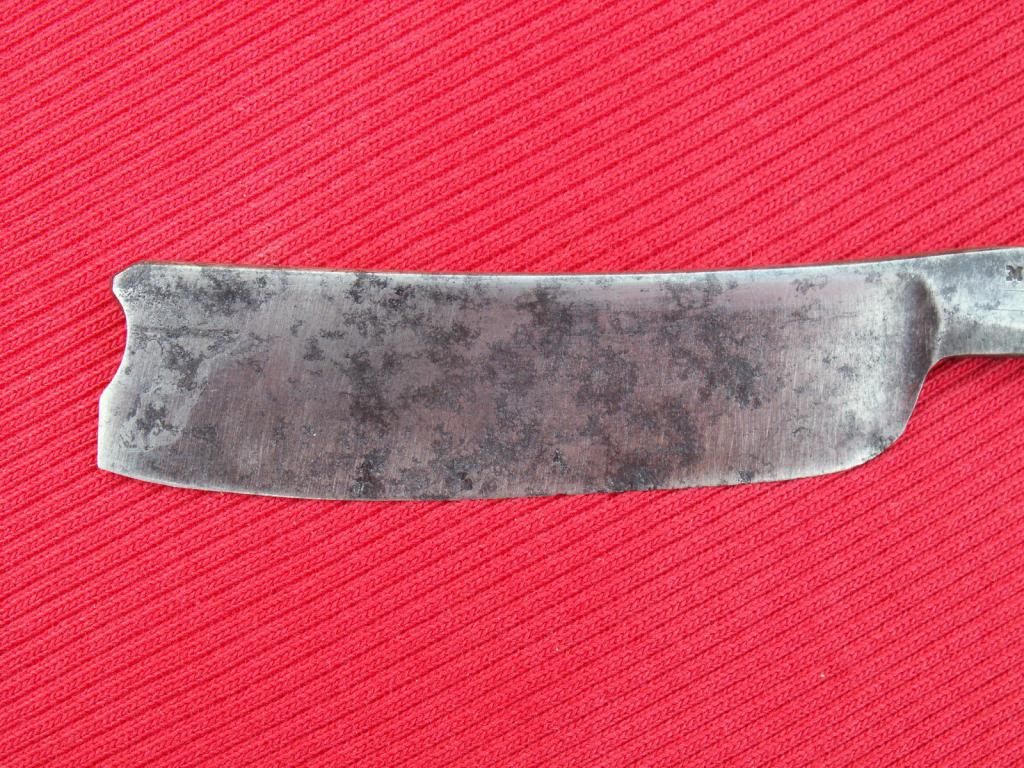
Thank you to everyone for your valued input - really appreciated. I took it back to 80 grit, and followed through the progression again. Taking more material off the blade made it look much better. As can be seen from the 'before' picture, the work has clearly reduced the blade width, but its still about 6/8 all along, so I'm happy with it. Just need to rescale and hone it now!
Exactly what I found! Originally Posted by Substance

Thanks again.
-
11-26-2013, 08:51 PM #8Senior Member
- Join Date
- Apr 2009
- Location
- Boulder County CO
- Posts
- 1,004
Thanked: 127
Yeah that's it!
-
11-26-2013, 09:10 PM #9Senior Member
- Join Date
- Jun 2013
- Location
- Gladstone QLD AUSTRALIA
- Posts
- 3,245
Thanked: 804
looking great now
so is that just with buffs & paste or back to hand sanding with??
& how long did it take you to do it the second time??
cheersSaved,
to shave another day.
-
11-26-2013, 09:44 PM #10Member
- Join Date
- Jun 2013
- Location
- Berkshire, UK
- Posts
- 62
Thanked: 19
It was 80, 120, 150, 300 & 400 greaseless on the bench polisher, about 15 or 20 minutes on each I'd say. This time around I kept the razor horizontal at all times, rather than flipping it on its end and working from the tang down to the toe - It seemed to work better. Then I finished with 3200 & 6000 micro-mesh, only about 5 minutes with each. Its by no means a mirror finish - more a satin look. But thats what I prefer! Originally Posted by Substance
-
The Following User Says Thank You to KrytonsJaw For This Useful Post:
Substance (11-26-2013)


 Reply With Quote