
Results 21 to 29 of 29
 6Likes
Thread: Robeson Shuredge
 LinkBack URL
 About LinkBacks
-
12-10-2013, 05:54 AM #21

Perhaps I didn't make myself clear. I am talking about pins that are flush with the scales. There is no head. There will be no filing. That would damage the scales.
-
12-11-2013, 01:12 AM #22Senior Member


- Join Date
- Nov 2012
- Location
- Across the street from Mickey Mouse in Calif.
- Posts
- 5,320
Thanked: 1185
Well skip that step then :<0) Sorry I missed the flat part. I wonder if the scales have been counter sunk ? Still your key to success is drilling right into the center. I would make a custom center punch tip for the first hit. Very sharp and easy to see where your at. Even watching under magnification while doing it to make sure. Working your way up in diameter until you get close enough to pick what's left out by hand. Pin vise would be the tool to use if you want to be 100% positive of no scale damage. Just pretend it's a bomb and one wrong move. Poofffff !
AirColorado likes this.Good judgment comes from experience, and experience....well that comes from poor judgment.
-
12-11-2013, 03:12 AM #23Senior Member

- Join Date
- Apr 2009
- Location
- Boulder County CO
- Posts
- 1,004
Thanked: 127
It's all a really touch and go thing sometimes. Sometimes they just pop out and sometimes they're stubborn buggers. Wish I knew why. Once the collars are off they're all essentially just like the ones you're seeing there Sous. The key is to go sloooow. Rush it and your bit walks - with a bit of your scale.
What 10Pups does is the same way I do it. One thing I'll add is on scales I'm really trying to protect I tape a piece of metal to the scale with a 1/16th hole (or a bit larger if there's a collar) over the pin - it helps some if the bit walks on you - even using this go very slowly - touch the bit to the pin, wait a second, pull back, repeat until the pin fails or you have some depth you can put a hole punch into.
-
12-11-2013, 03:35 AM #24Senior Member

- Join Date
- Feb 2012
- Location
- Menominee,MI
- Posts
- 1,624
Thanked: 325
A few of the ones that I de-pinned I used flush cutters and was able to just snip the head off. You have to be careful though cause the cutters can dig into the scales and mark them or even crack them if they are really tight and don't allow the pin to pull up any. I usually try the cutters first, but if I notice that they are going to cut in I might try drilling the pin out. On the other hand if I don't care about the scales doesn't matter how the pin comes out.
-
12-11-2013, 03:35 AM #25
Thanks for the great tips guys. I do the bit of metal thing already with the hole drilled thru, for regular pins and washers.
I am thinking of making a simple jig of some sort to ensure the bit doesn't wander, Something that would attach itself to the scale and allow centering of a hole.
And I will be getting the pin vise.Euclid440 likes this.
-
12-11-2013, 03:53 PM #26Senior Member
- Join Date
- Apr 2009
- Location
- Boulder County CO
- Posts
- 1,004
Thanked: 127
As far as the Dremel press thing, I don't really drill the pins out completely, rather I get a hole going in it that I can place a small diameter hole punch into. Sometimes the pin fails and drops out while drilling, but normally it stays tight and I'm just putting a little hole into it. Here's what I do to keep the bit from walking when drilling out pins using the Dremel press (I do it the same way for creating pivot and wedge holes into scale material) :
1. Start a hole with the pin vice until there's a bit of indentation
2. Take the scales to the press, place it on the base, and lower the bit until it's centered in the indentation but don't turn it on yet.
3. If you desire (and know how to do it) lower the upper reach of the press so the bit sits just inside the dent you created in the pin. I don't do this for a few reasons.
4. Keep the scales on the base with the bit resting inside the indentation and hold the scales as securely as you can with one hand
5. Keeping the bit inside the pin, using the other hand turn the Dremel on (I hold the lever down with my shoulder so there's a hand free to turn it on - once the drill is on, hold the lever with a hand) Don't drill your hand!
6. Keep the scales secure and move the bit up and down (but not really out of the hole) at one second intervals. You're not steady drilling but touching at intervals. This is important especially if you have celluloid or bakelite scales.
Sometimes I only need 10 or 12 "touches" and can take the scales to the bench and tap it out with a tiny hole punch and 8 ounce hammer. You're not forcing it as much as coaxing it with the hole punch. When tapping pins out with the hole punch I do it over a little piece of 2x4 with a 1/2" deep hole drilled into it with crosshairs drawn to indicate the center of the hole - keeps the scales from cracking and the crosshairs help to see where the hole is. Sometimes I'll just use 2 pieces of scrap wood that are about 1/4" apart - just depends where I am in my shop.
-
12-12-2013, 12:49 AM #27the deepest roots


- Join Date
- Feb 2011
- Location
- Seattle
- Posts
- 1,221
Thanked: 169
to use the pin vise on removing pin heads I hold the razor down under the outside edge of my hand. with the same hand i use thumb and index finger to hold the bit in place, and with opposite hand i twist and add pressure... a little gymnastics but i can usually free a blade without damaging the scales this way.
-
12-15-2013, 03:15 AM #28Senior Member
- Join Date
- May 2013
- Location
- Des Moines, IA
- Posts
- 295
Thanked: 60
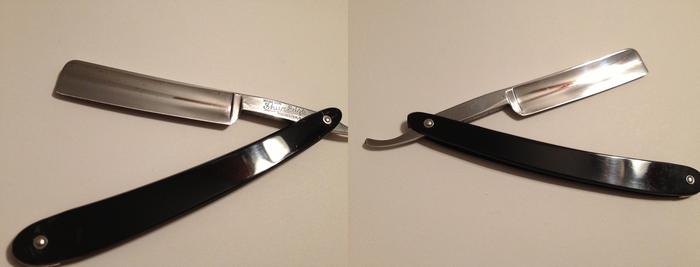
Thanks for all the tips! Practiced on a couple other old razors I wanted to clean up and certainly did less damage to the scales. Decided to toss the Shuredge back into the original damaged scales for the time being. After all, it's about cutting whiskers, not looking pretty, right?
 Soon to take it and another cleaned up razor to the hones. You can see the scale damage around the pins, and my ugly peening job. (one of the washers got damaged somehow against my vise.
-
12-16-2013, 04:45 AM #29
Failed again tonight. Thought i had it drilled out enough to tap it out. Nope! Dang


 Reply With Quote