Maybe you could varnish the smell away.Quote:
Originally Posted by Gasman
Printable View
Maybe you could varnish the smell away.Quote:
Originally Posted by Gasman
I had squirrels in the attic the way some people have bats in the belfry. They were persistant. I also have plenty of mature trees, and the squirrels have housing in them like a condominium. But I guess they wanted someplace more weather-tight, so they moved into my attic. They learned to manipulate the soffit covers on the roof ends and loosen them enough to gain entry into the attic. I finally had to glue the soffits on. But that was not enough. No sir. They just chewed through the soffits (wooden) and were back in business nesting in the attic. So I finally put three layers of stainless steel screen over the soffits, stapling it in place neatly, and spray painted the screen the color of the house so you really can't see them. Squirrels (so I have read) hate the taste of stainless steel, and it's not that easy to chew through, so they finally relented and moved back to tree nesting.
SWMBO has been asking me for years to put out bird feeders and a bird bath because she loves birds and bird watching. I fanally caved to her will last summer and put out two hanging bird feeders, a hummingbird feeder, and a bird bath. Since then the squirrels have had a field day feast and water oasis on me. They can't get up the pole to the hanging feeders because I invested in a foolproof squirrel baffle, but they get plenty of fallout from these feeders due to sloppy bird eating. And they take full advantage of the daily fresh water and fountain in the bird bath. I don't mind squirrels, but they can become a challenging pest problem.
Squirrels have a problem with me.
Ya see..Im descendent to a long line of squirrel killers. If ya's ever in need, I'll contact the boys.
Attachment 343552
The yungins would like ta thank ya for the viddles. Works been slow. :rofl2:
On a serious note....I have killed and eatin my share of um. Tree rats..:beer1:
I have hunted squirrel, when I was a young teen in upstate NY. With a 22 bolt action Marlin and a small scope. Too easy if you knew where to hunt and had patience. I'd sit on an obliging log and just wait. Soon I'd see a squirrel or two and it was finito for him or them. They are (or were) surprisingly good eating. Probably because of their diet. I no longer hunt in any fashion. The last hunting I did was for Pheasant about 10 years ago. But I happen to like wild game, especially when marinated, then cooked over open flame.
I honestly thought about using a pellet gun to get rid of some of the squirrels in my back yard, but they are not bothering me, and they no longer want (or at least have given up on) gaining access to the home, so I leave them be. When they were trying to move in to my attic, I tried rat poison, and via eBay I bought some poison designed especially for squirrels. Neither worked. They just don't eat the poison. The so-called "Squirrel Poison" was a total ripoff. It was nothing more than whole peanuts mixed with rat poison. The squirrels would simply pick through the mix, take out the peanuts, and leave the rat poison behind.
I hate squirrels with every fiber of my being... pathologically so. I used to hunt and eat them but here they get a parasite in the muscle at certain time of the year. It is fine to hunt the in season but once I skinned one but the flesh was covered in these little nodules. It gave me the heebee jeebees and I haven't eaten one since. Although I must admit I still use them for target practice to keep my aim sharp withy bow.
Attachment 343575
I think you are talking about Bot Fly larvae, or "Warbles" as I have heard them called. When I was a young teen hunting squirrels, I had no knowledge of this issue. I became aware of Warbles when I was in my late 20s I don't think that these larvae will hurt you if ingested, they are simple protein with no toxins that I know if. But I am sure it's off-putting to discover them if you are skinning the animal for cooking.
Yep, their nasty little things. When I find them on them, they become food for the forest floor.
So, the FBU scales are still a work in progress.
Attachment 343769
My patch didn't quite match exactly for color or texture. In addition, somehow the shape is off a little. I don't know if I sanded too far or if it didn't match exactly to begin with. So I traced the shape of the other on the back of my wax paper then flipped it over and taped the repair side to it.
Attachment 343770
Attachment 343771
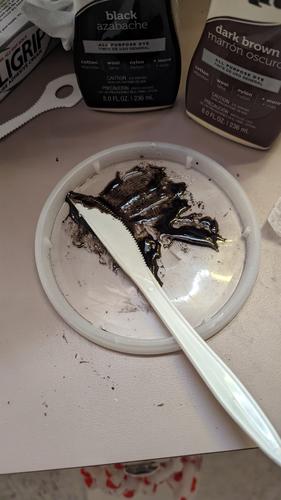
Then I made some more epoxy without the charcoal dust or saw dust, just a couple of drops of brown and black Rit dye...
Attachment 343772
...and filled out to the line.
Attachment 343773
That should even out the color and fill out the shape.
We'll see how that works out.
Lotta sanding there, paul. I always use CA over repairs like that. Then I polish out the scales to blend the repair. I much prefer the matte black finish, more. When possible, of course.
Good advice Mike. I started to used CA but I have used it before where it still needed color and it didn't work out so well. Maybe I just don't have the knack of it yet.
With epoxy I try to do it Bondo body fill style. I'll grate a bunch of while it is still curing to get the rough shape then let it cure hard before sanding the rest.
Some roughout work with a file.
Attachment 343778
Attachment 343779
Attachment 343780
Attachment 343781
Attachment 343782
Now I'll let it cure for several days then sand smooth.
Gotta few in play myself.
Attachment 343785
Then its the heavy work.
Attachment 343786
Gitatit Paul.! Several days..!! Watchu talkin bout...stuff is workable in 12-24 hrs. :whipped:
Sweet Mike. I currently have the fast setting kind which is good and bad depending on what you use it for. It will get harder after a few days; I mean like rock hard.
A little more progress
Rough sand out
Attachment 343796
First coat of CA
Attachment 343797
Should have used the pens before the first coat but I wasn't sure if it would be needed until after the first coat was sanded out.
Attachment 343798
Still need to buff but the shape is right (except that little chip on the back edge that the patch missed. I may just leave that) and the color is right and no obvious patching.
Attachment 343799
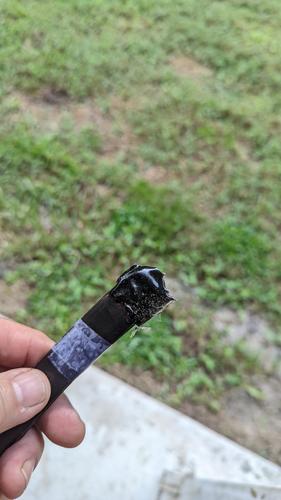
Filling in some chips n bug bites, on a few of these scales for Nippers goodies.
Tathra had also PMd me about how I go about this. Sooo.
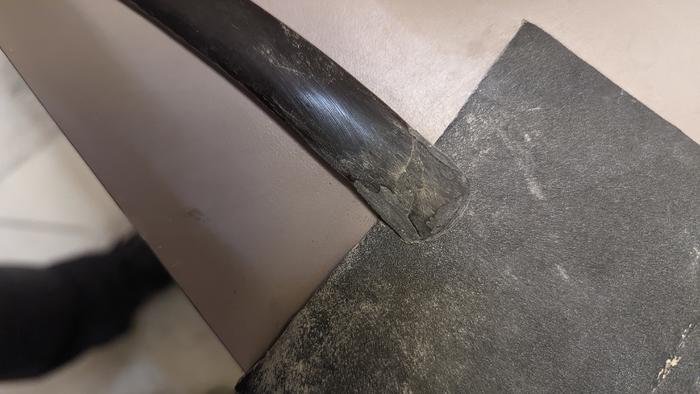
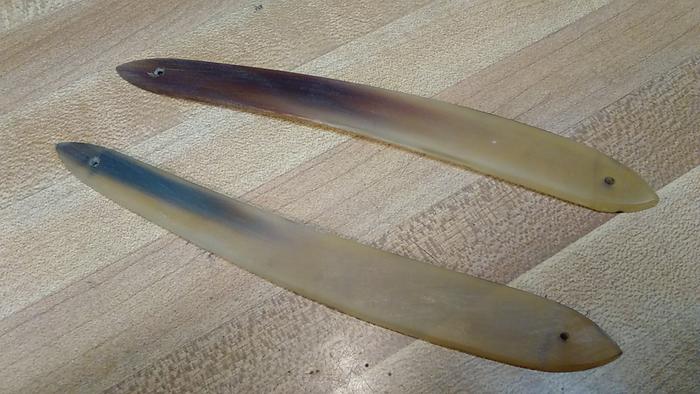
Sand the scales with 220 grt. wet/dry. Removing as much of the dry/weathered horn as possible. Careful.! Don't get um too thin, only within reason.
I've sanded the crap out of quite a lot of um, and still not thinned them out much. Like this sweet set.
Attachment 343851
Attachment 343852
Can't wait to see how they are, after they come out of the oil bath.
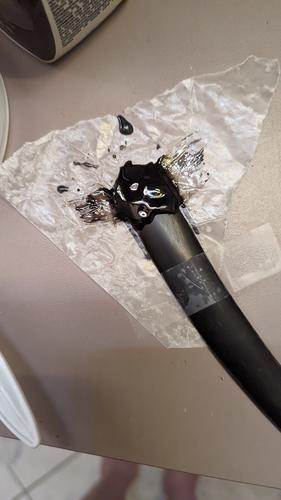
After sanding, wipe clean with denatured alcohol. Then apply pieces of scotch tape to the outside of the scales, over the repair areas. I do it this way, so the tape acts as a mold to hold the epoxy while I work it in with a toothpick.
Attachment 343853
Attachment 343854
Attachment 343855
BTW... This is how I repair the edges of scales, that have chips, bug bites, or where blades have smashed into them when closing, causing damage.
Hope that helps ya Tathra
Note for those that don't know..!!
If your going to dye your scales...do not do any repairs using CA.
DYE WILL NOT PENETRATE, AND CAUSE FISH EYES IN YOUR FINISH. !!!!!
They'll be FUBAR.! :roflmao
Attachment 343856
I save the CA till after the dye, then bring the scales to a gloss finish, instead of the matte black, look.
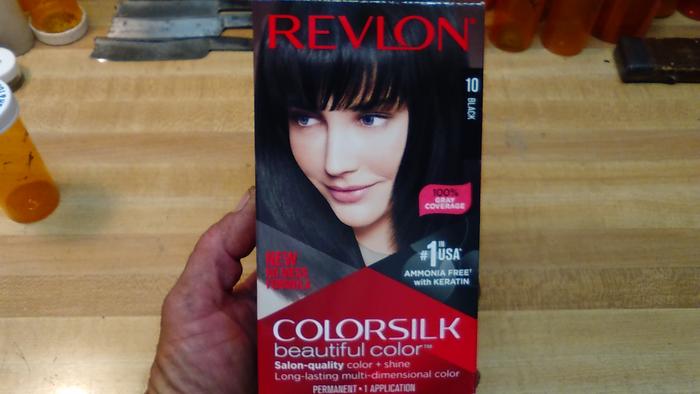
My preferred hair dye.
Attachment 343857
Your favorite hair color Mike? I say "just let it go grey! You can't stay young looking forever!" :)
Wash that gray right out of your hair Mike
Thanks Mike. That's a great help :rock:
From the outback, to the land down unda. Your more than welcome. :chapeau
Black black number 1. Oh, i see its number 10. I thought you were going by Type O Negitive (song).
Lord I will be glad to get back to some razor work!
Just stabbed a 383. I almost never pull a hood to extract/install an engine. I would have to enlist help and then I would owe someone. And where do you store it? Chances for nicks and scratches are great. Then getting it lined-up again,
Learned long ago to turn it sideways, clear the oil pan and begin to lower it while swinging the hoist over to the other side.
took 15 minutes!
Attachment 343873Attachment 343874
LOL Where to start to comment on that..........................
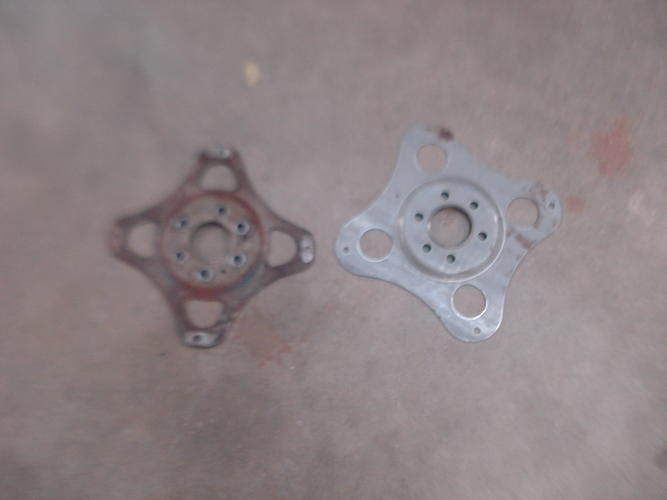
Well, I have a comment. Tom changed the torque converter to one not so radical and never checked the flex plate fit.
Back out and the parts house came through...Attachment 343876
Dirty tricks!
Definitely different.Quote:
Originally Posted by sharptonn
Man, the truth, Steve! I am becoming well-versed in 'Moparisms'. ;)
Damn. Sucks when that happens.
Well, if that's the worst thing that happens, I will be ecstatic! :y
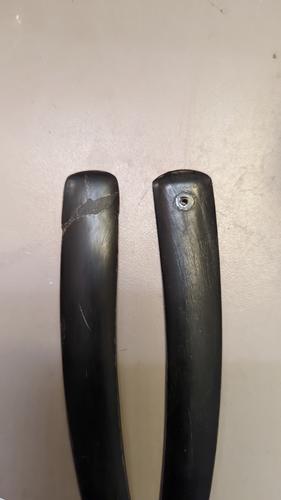
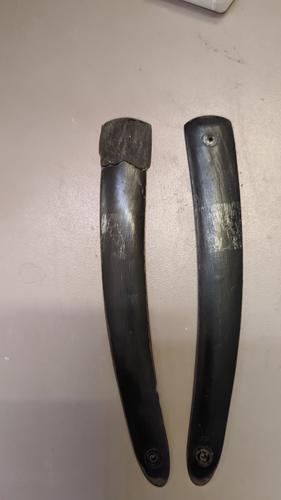
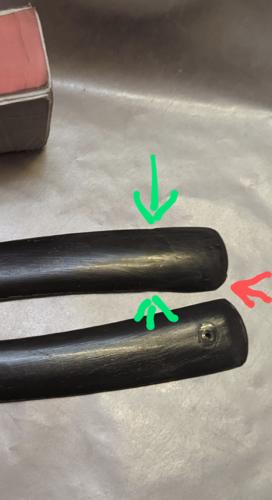
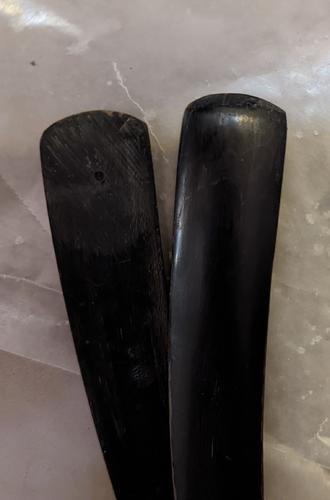
So, as of last post I had gotten the repair on this FBU scale pretty close but I still had some shape issues. Namely it was two spots where the patch didn't quite reach (green arrows) and the corner was not quite a hard square point like the other one (red arrow).
Attachment 343879
Of course the shadow at the bottom exaggerates it some but still, close but not close enough. I have not been able to leave it alone, and I have improved it but that corner I just can't seem to get as crisp as I want it.
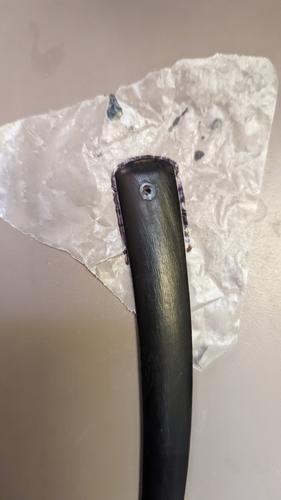
Attachment 343880
It meets well and the shape matches closely whenock screwed together. Just drives me nuts.
Still, considering how it started I am pleased with the overall repair.
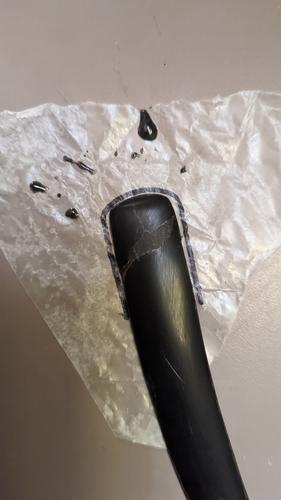
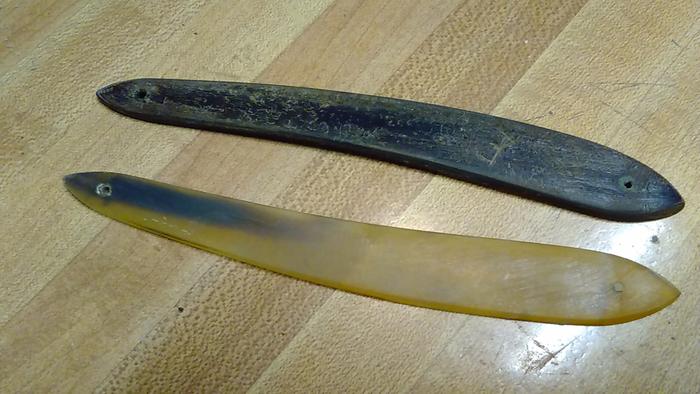
Attachment 343881
Attachment 343882
It had been cracked, broken, split and a poor repair done before I got it.
Let's hope it survives the drilling and pinning
Sometimes it’s all in how you hold your tongue, one of my tech professors told me Tom.
Truer words never spoken..
He’s also the one that told me to ‘see with my fingertips’..
:tu
Paul, sometimes you can bolt them together and contour sand them to match.
Slippery slope....
I was thinking about doing that but , for the reason you point out I was hesitant. I'd hate to do all that work then spoil it.
At least you can fix it...right.
Trial n error, how ya think I figured it out.
Divine inspiration...child prodigious nature ...hand of God maybe?...:shrug:Quote:
Originally Posted by outback
Attachment 343891
Sanded, repairs requiring epoxy, file/sand repairs with 220, 600, 000 steel wool.
Wipe clean with denatured alcohol, let dry.
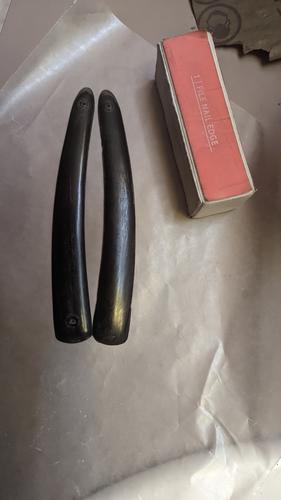
Mix up dye, place scales in 1qt. Ziploc bag and cover with entire contents of dye, solution. Gently mix contents, making sure all gets coated. This is the most set's I've ever done, all at once. Curious if I shouldn't have used two boxes of dye. Dunno, pretty mean stuff, definitely recommend disposable gloves. It comes with a set, but I barely get my fingers in them. Made for a woman, I presume.
Oh holy crap.! The transgenders will have one more thing to whine about.! :cry: :roflmao
Attachment 343895Quote:
Originally Posted by outback
...
Just knocking out some blades to go with the scales I've had soaking for some time.
Attachment 344226
Attachment 344227
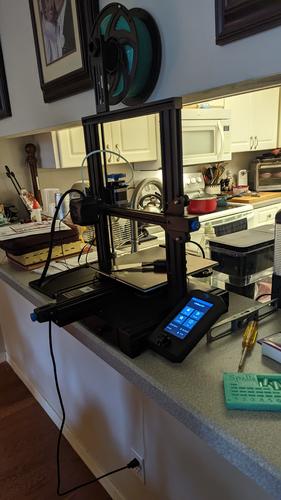
I asked my son to print me a small bust of Martin Luther.Quote:
Originally Posted by PaulFLUS
Attachment 344368
Maybe I should have been more specific?
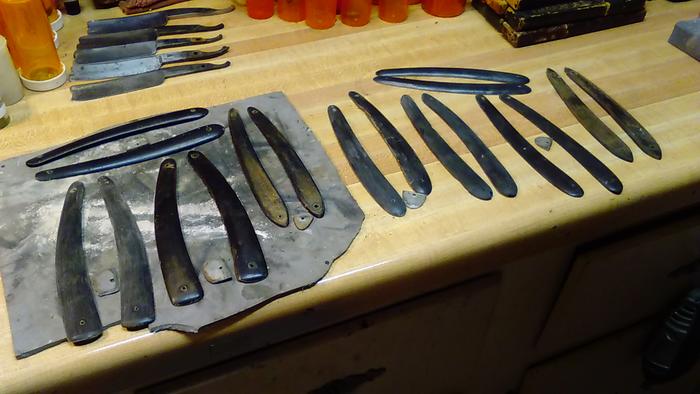
Finished the batch of blades n scales, from earlier.
Attachment 344556
From left to right.
Wade & Butcher. Celebrated hollow ground.
Attachment 344557
Reed Bros. Wedge (Sheffield)
Attachment 344558
A. Feist & Co. (Solengin)
Attachment 344559
Wade & Butcher. Medium Size Hollow Ground. (1/2 hollow).
Attachment 344560
Joseph Elliot. Silver Steel. Wedge. (Sheffield)
Attachment 344561
One I forgot..!!
Joseph Allen. NON-XLL. Barber's Rattler.
Attachment 344562
Next batch on the bench.
Joseph Allen NON-XLL. (pictured above)
Freddy Reynolds
Luke Oats & Co.
Roberts (Stubtail)
G. Johnson
American knife Co. (Plymouth Harbor, Conn.)
Attachment 344563
First up...the G. Johnson. Wedge...pits, rust, previous clean-up brick. :shrug:
Attachment 344564
Attachment 344565
Attachment 344566
Nice work, Mike.
Outstanding!