
Results 1 to 10 of 28
 47Likes
Thread: Restoration of 5 razors
 LinkBack URL
 About LinkBacks
-
01-15-2014, 10:35 AM #1Scheerlijk


- Join Date
- Feb 2013
- Location
- The Hague, the Netherlands
- Posts
- 1,184
Thanked: 164 Restoration of 5 razors
I was asked to restore BiscuitCookie's 5 razors, which used to be his great grandfather's. Following 10Pups's recent example, I'll be making pictures and posting my progress in this thread

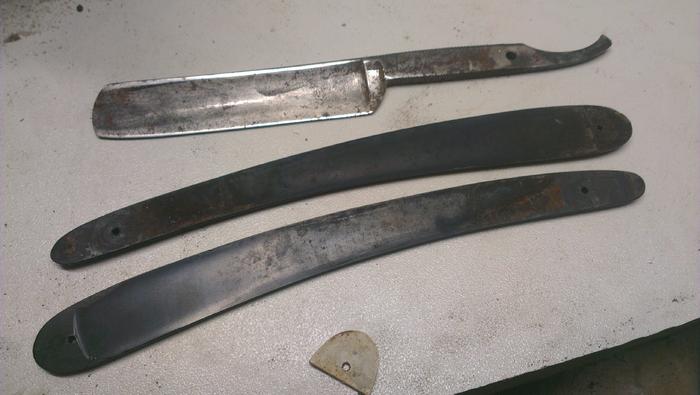
The razors:
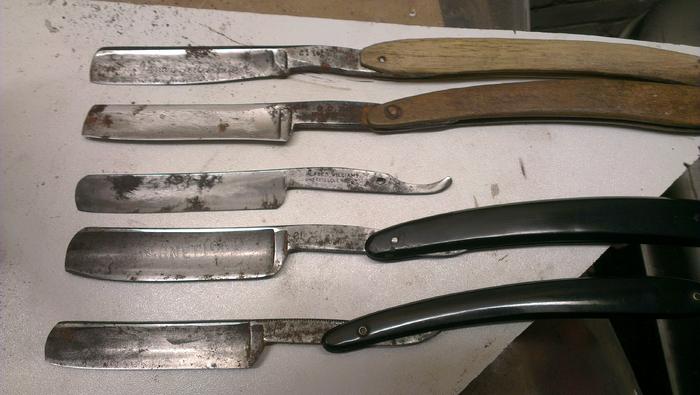
The top two have been honeda lot. Especially the razor at the top, which used to have two lines of text etched into it, of which little more than one line is left. The top two also have wooden scales made by BiscuitCookie's great grandfather. If I can, I will keep these scales and just restore the blades, as we thought it would be nice to save the original handwork. I'm not sure if they'll shave again.
The third razor is obviously naked. It's a wedge, but I fear the black patina in the middle has rotten all the way through regardless and it will not shave again. I will clean it up and give it some new clothes, it will still make a nice collection piece.
The bottom two appear to be in reasonably good shape. Mostly surface rust and the scales look dirty but good. Unpin, sand and clean thoroughly, repin and hone.
As an indication, here are four blades I worked on recently. The first two had a lot of patina. I left most of it on the first one, a Heljestrand, and sanded away a lot on the GB anchor next to it. The third razor, a Walter Witte from Rotterdam (where my girlfriend is born) was in pretty good shape, it only has minor spots left that my phone camera didn't catch.
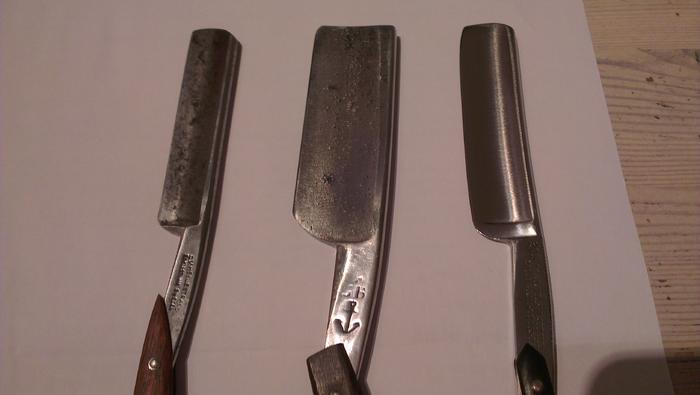
The fourth one, a Fänger, is a recent acquisition. The patina went just a little deeper than the Walter Witte and as I sanded only at 400 grit greaseless, it left shallow marks. The tang cleaned up really nicely, though, and it is waiting to get some new scales. I may try my first inlay transfer on this razor, but it will have to wait for the other five. Again, simple phone pictures, I tried to make the old patina marks as visible as I could.

Tonight, I plan on unpinning the five razors and doing a first 400 grit greaseless buff to see what's underneath the surface rust.
Thanks for watching!Last edited by Laurens; 01-15-2014 at 10:56 AM. Reason: great grandfather, not grandfather
I want a lather whip
-
The Following 2 Users Say Thank You to Laurens For This Useful Post:
BiscuitCookie (01-15-2014), moostashio (01-20-2014)
-
01-15-2014, 10:54 AM #2Junior Member

- Join Date
- Jan 2014
- Posts
- 13
Thanked: 1
Can't wait to see them get cleaned up.
BTW they're my great grandfather's not my grandfather's.
-
01-15-2014, 11:50 AM #3
Be SURE to scrape off as much rust as you can FIRST.
BEFORE buffing with the 400.
Otherwise you can make that rust a MO FO to get off.
-
01-15-2014, 12:47 PM #4Scheerlijk
- Join Date
- Feb 2013
- Location
- The Hague, the Netherlands
- Posts
- 1,184
Thanked: 164
Thanks, I'll keep it in mind! I have had no problems going straight to the 400 so far, but I don't mean to start having them with these razors. Originally Posted by Chevhead
 I want a lather whip
-
01-16-2014, 09:15 AM #5Scheerlijk
- Join Date
- Feb 2013
- Location
- The Hague, the Netherlands
- Posts
- 1,184
Thanked: 164
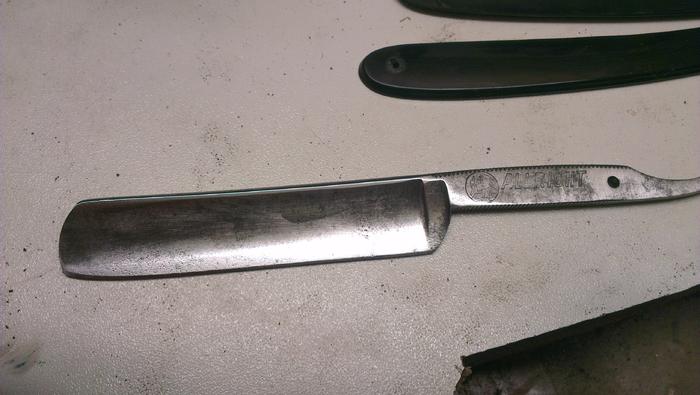
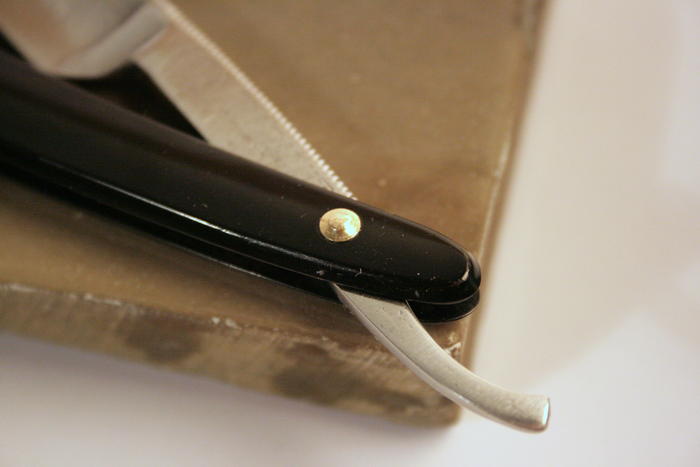
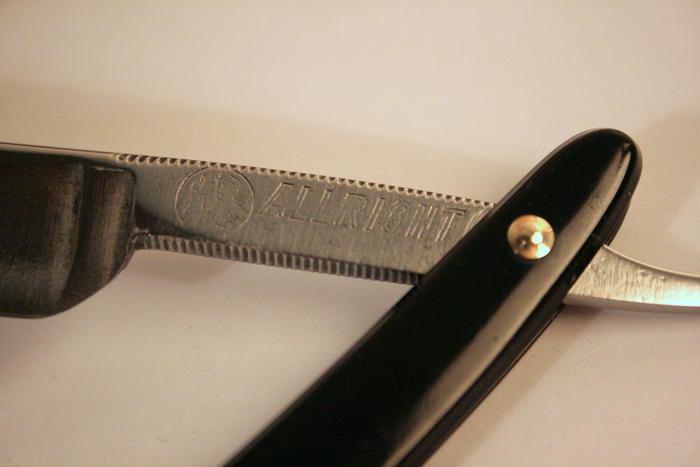
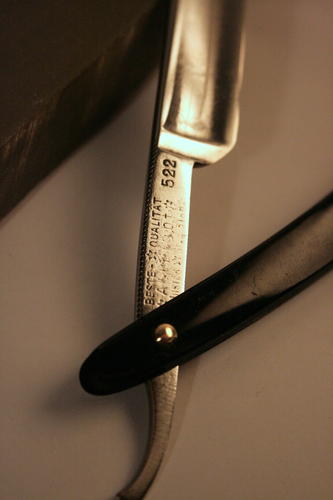
I did a little work on the bottom razor, an ALLRIGHT silversteel.
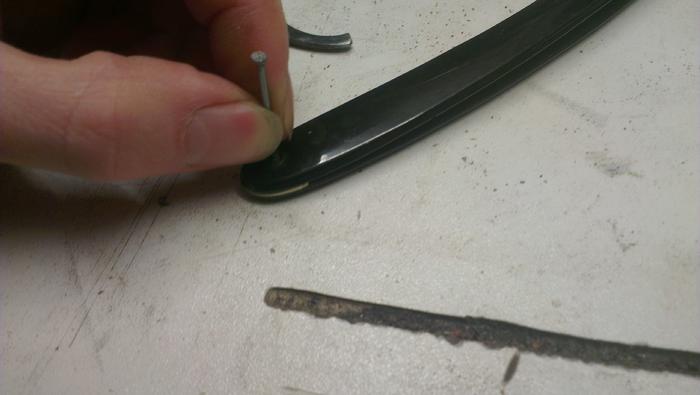
Unpinning without damaging the scales is one of the most difficult things, IMO. I made a cross in the pin with a Dremel cut-off wheel, drilled 1 mm or so using the drill press until the washer came off and then tapped out the pin (suspended over a hole) using a nail, the latter will stay in place thanks to the drilling hole.
I started out with cleaning the scales. Scraped some of the dirt off and buffed. This is halfway through the first scale, and how the blade came out of the scales:
Done buffing the scales, and a look of the other side of the blade:

Following Chevhead's advice, I scraped off most of the rust and then moved to 400 grit greaseless to remove surface rust. The previous owner appears to have sanded it from heel to toe, and there's some normal pitting.
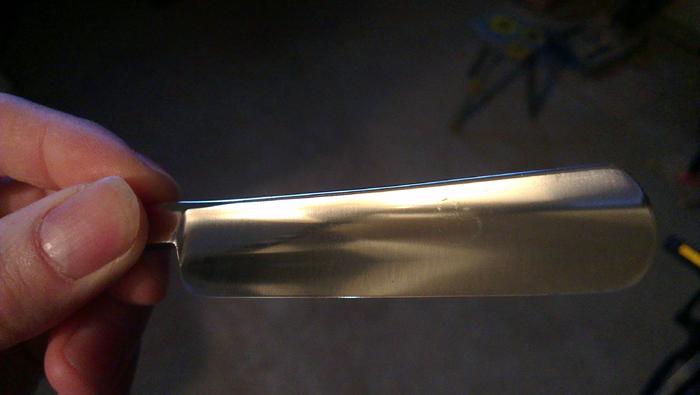
On to 80 grit greaseless. Most of the patina is gone, but some shallow pitting remains. I don't know if I should further sand that down, as I fear I will make it too thin. I also rounded off the heel a little to prevent honing problems. Lighting/angle were chosen to reveal as much of the pitting as I could.
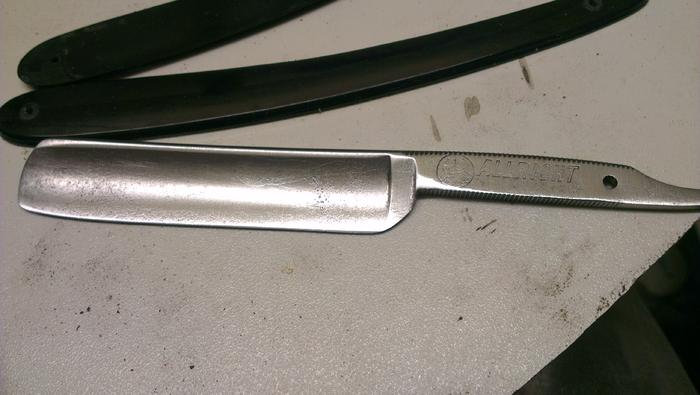
I would like to hear your opinions: should I continue sanding away with the risk of thinning the blade too much, or shall I leave it and move up the grits?JBHoren and ScoutHikerDad like this.I want a lather whip
-
01-16-2014, 09:33 AM #6Senior Member

- Join Date
- Feb 2012
- Location
- West Midlands, UK
- Posts
- 1,263
Thanked: 360
I'm intrigued that you started with 400 grit and then went down to 80 - firstly because 80 seems to be very harsh but also, why go down when you would need to go back up again to remeove scratch marks?
-
01-16-2014, 09:41 AM #7Scheerlijk
- Join Date
- Feb 2013
- Location
- The Hague, the Netherlands
- Posts
- 1,184
Thanked: 164
Just to get a clearer view of the patina and see if there was any need to take it down to 80. The 400 grit removed much of the surface rust, while leaving the metal mostly unharmed. If the stamps on the tang would have been too shallow, I would have left them alone. I'm sure more experienced people don't need this extra step, but I'd rather be on the safe side Originally Posted by UKRob
The 80 grit seems harsh, but this Satene Abrasive is actually quite gentle and useful for the removal of pitting.
I want a lather whip
-
01-16-2014, 10:09 AM #8Junior Member
- Join Date
- Jan 2014
- Posts
- 13
Thanked: 1
If you're not comfortable with sanding and are afraid of thinning it to much don't do it unless it's needed. At least that's what I would say.
As long as it can shave comfortably it's good even if it doesn't look as shiny. (No matter how much I wold love them shiny)
-
01-16-2014, 11:27 AM #9Senior Member
- Join Date
- Feb 2012
- Location
- West Midlands, UK
- Posts
- 1,263
Thanked: 360
OK that explains it. Personally I only go as low as 150 grit, then 300 then 400 with greaseless. Originally Posted by Laurens
-
01-18-2014, 09:15 PM #10Scheerlijk
- Join Date
- Feb 2013
- Location
- The Hague, the Netherlands
- Posts
- 1,184
Thanked: 164
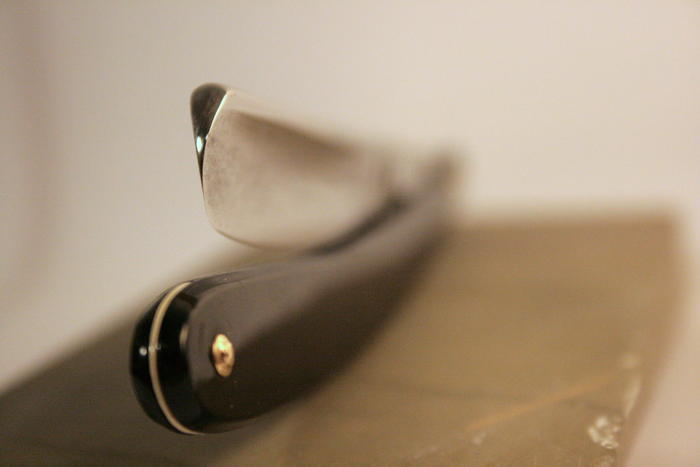
Updates! I finished the first one yesterday evening, had my first go at doming washers, following the simple steps I read in another thread.
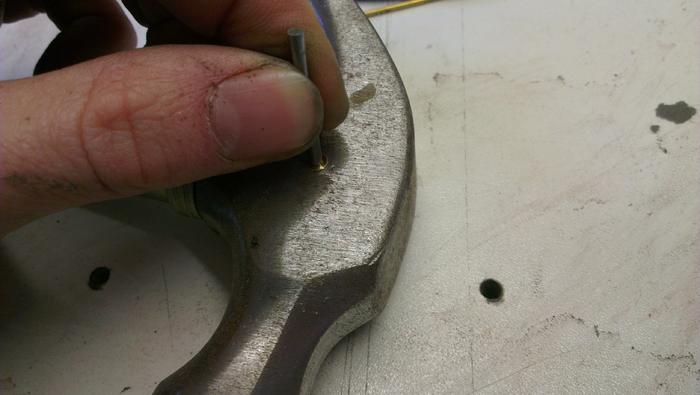
Drill shallow hole in side of hammer and make a punch that fits inside:
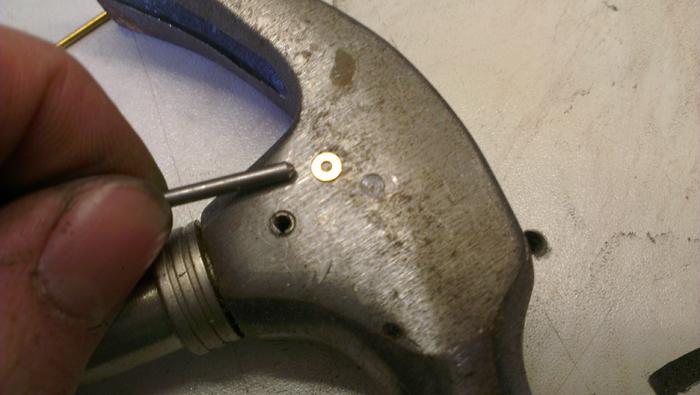
Hammer the hammer with another hammer
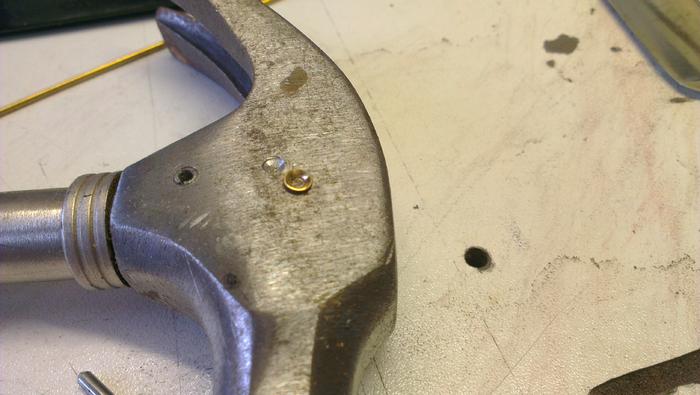
Done
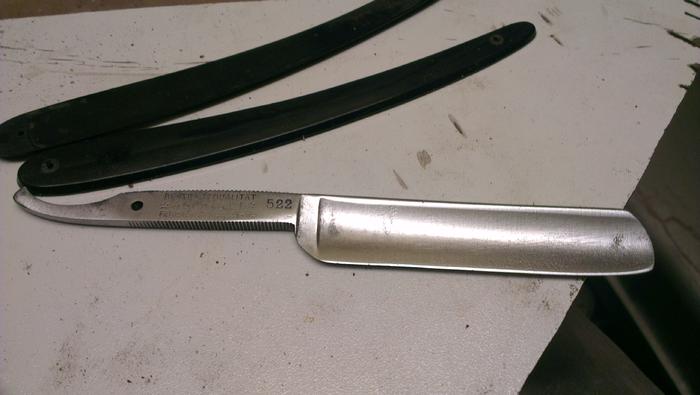
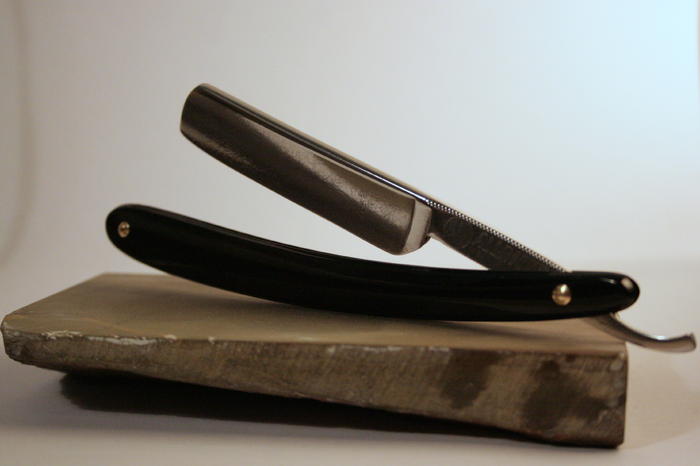
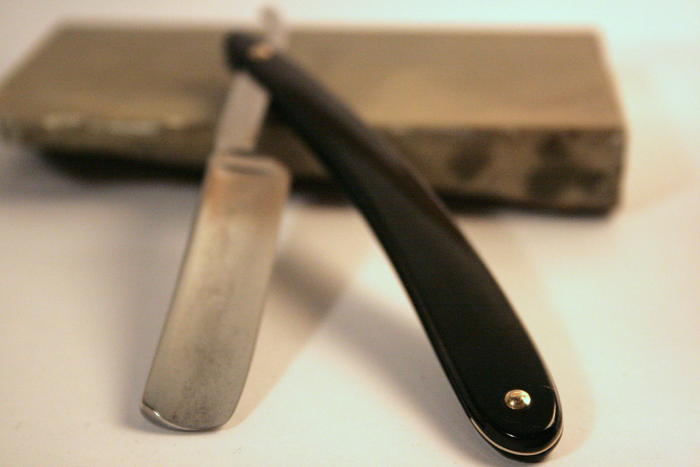
Here's the result. I really like the domed washers and the scales cleaned up just fine. This was the easiest honing razor I've had in my hands so far, got a good bevel in a few minutes and got the high grits right the first time.
Honing: Shapton 1-4-8-16K and unbranded Jnat with thin slurry. Great shave.
 I want a lather whip
-
The Following 4 Users Say Thank You to Laurens For This Useful Post:
BiscuitCookie (01-18-2014), Sandycrack (01-27-2014), ScoutHikerDad (01-18-2014), Sirtexan (01-20-2014)


 Reply With Quote


