
Results 1 to 10 of 42
 7Likes
Thread: Should I work on this TR Cadman?
 LinkBack URL
 About LinkBacks
Hybrid View
-
02-05-2014, 10:46 PM #1Senior Member


- Join Date
- Jan 2014
- Location
- New South Wales
- Posts
- 154
Thanked: 22
Little sanding jig I whipped up.
onimaru55 likes this.
-
02-08-2014, 09:39 AM #2Senior Member
- Join Date
- Jan 2014
- Location
- New South Wales
- Posts
- 154
Thanked: 22 Beginning to restore
Started work on the blade this afternoon. The 240 and WD40 has got most of the worst off. Bunnings had no idea what a crocus cloth was so wet'n'dry it is!
Should I keep going with the 240 further?
where the hinge is I cut little strips of sand paper.
I have scuffed the scales slightly when sanding will that come out with a polish?
How is best to use the Autosol? Just rub with a cloth and rub off turtle wax style?Last edited by nonick; 02-08-2014 at 09:41 AM.
-
02-08-2014, 10:20 AM #3Scheerlijk

- Join Date
- Feb 2013
- Location
- The Hague, the Netherlands
- Posts
- 1,184
Thanked: 164
That's starting to look good Originally Posted by nonick

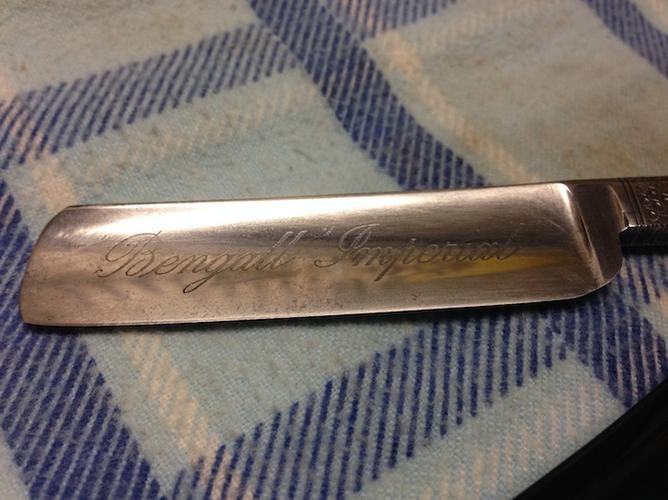
 Whether you go on with the 240 depends on how badly you want the last little stains to disappear vs how badly you want that great etching to be left intact. If you're careful, you can sand the spots at the toe a bit more without touching the etching, but there's a change it will leave the finish uneven. If it were mine, I'd move on up the grits and give it a nice polish, leaving the last patina intact.
As for the scales you hit, just polish won't take out the scratches. Try some fine sandpaper, start in the range of 600-1000 and move up to the highest grit you have, then polish. Of course, do this when the blade is at the same sandpaper grit, or you'll be going backward and forward everytime you slip up.I want a lather whip
-
02-08-2014, 11:09 AM #4Senior Member
- Join Date
- Feb 2011
- Location
- Tennessee
- Posts
- 128
Thanked: 24
I'd definitely go to a finer grit. Do what you can to get rid of the 240 marks without washing out your etching. I'd avoid the hinge area and not worry about the steel between the scales you cannot get to easily. When you get to the 800 to 1200 range on the steel use that polish and your abrasive in conjunction. The by product thereof will become black and messy pretty quickly. Laurens is correct in following your grit range on the scales to get rid of the damage done by the more coarse abrasive. You are working this project assembled so you'll have to be careful of the collateral damage and work both equally. Just be careful not to remove too much scale material, only that amount necessary to clean it up in a very careful manner. You should pretty quickly get to the point where you can make your final progress with the polish and a rag. At that point a good washing with hot soap and water, a hone, strop and shave will be your reward.
You're doing fine. Stick with it and take it slowly, methodical.
Regards
Chasmo
-
02-08-2014, 07:35 PM #5The Great & Powerful Oz


- Join Date
- May 2008
- Location
- Bodalla, NSW
- Posts
- 15,638
Thanked: 3751
Bunnings often have no idea. Originally Posted by nonick

As advised ,move to 400 now & progressively polish the scale scuffs as you go.
Rub the Autosol well in & polish off till cloth comes clean. Watch your fingers !The white gleam of swords, not the black ink of books, clears doubts and uncertainties and bleak outlooks.
-
02-09-2014, 10:54 AM #6Senior Member
- Join Date
- Jan 2014
- Location
- New South Wales
- Posts
- 154
Thanked: 22 Nearly done?
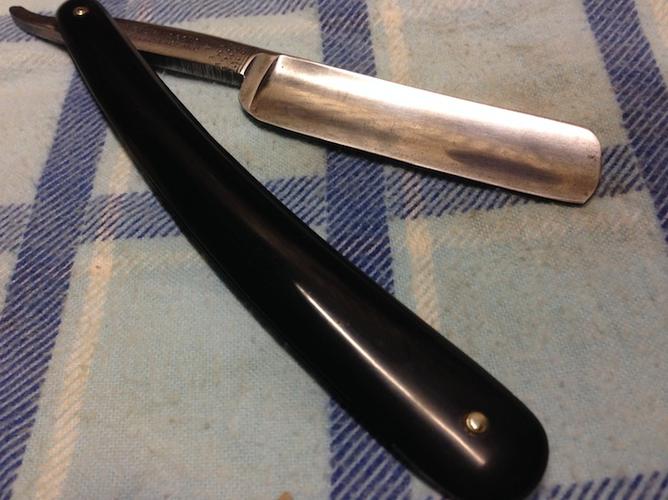
Well I worked up the grits and finished with the Autosol. Wow does that stuff make things shine?! It turned from a razor into a mirror.
There are still a few faint scratch marks from sanding.
The hinge pin is a tiny bit loose. When you close it there's enough play that the razor can catch the scales just as it closes. Is this normal? Would re pinning the hinge be a big job? Maybe I should just be careful.
Here are some pictures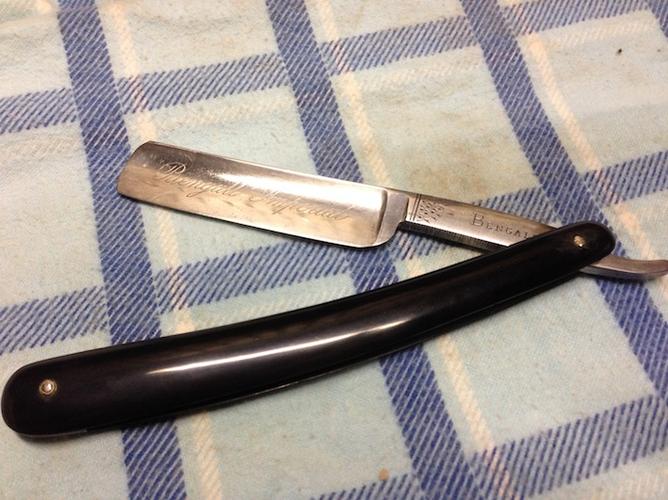
-
02-09-2014, 02:22 PM #7Senior Member
- Join Date
- Feb 2011
- Location
- Tennessee
- Posts
- 128
Thanked: 24
[QUOTE=nonick;1288385]Well I worked up the grits and finished with the Autosol. Wow does that stuff make things shine?! It turned from a razor into a mirror.
There are still a few faint scratch marks from sanding.
The hinge pin is a tiny bit loose. When you close it there's enough play that the razor can catch the scales just as it closes. Is this normal? Would re pinning the hinge be a big job? Maybe I should just be careful.
/QUOTE]
Well done Partner! You should be happy with those results. No, it isn't normal that the hinge pin is lose. What I would do first is to try to tightening up the existing pin to keep it original. What I don't know is do you have experience at peening? This is a delicate task, yep with a hammer, delicate....I know, but it is. My preference is for a cross peen or machinist's ball peen in the 2 ounce size and a flat hard, un-movable object such as an anvil. The anvil I use is only about 8 pounds but, it does a really good job. The flat of a heavy vice would suffice as well. I'll tell you how it's done and you decide if you want to proceed.
You must take extreme caution here because you can crack or break your scales.
Perhaps you should practice some peening (mushrooming) first. If you have a piece of brass rod lets practice with that if not use a regular nail. Flatten one end of the pin or nail and lock it in the vice. With your 2oz hammer tap around the outer circumference in a downward slightly glancing fashion. Look closely at what you are doing as you go so you'll learn how the metal reacts as it is being reformed. Go ahead and play with it. Peen a little umbrella then hammer it straight down a little and spread the umbrella even more. Get another one and place a steel washer over it and peen the nail down so the washer would become a fastener much like your razor's hinge pin is. You gain confidence playing in this fashion and what can you hurt in so doing? Once you get your courage up and want to go for the razor scale back the pressure on the hammer to a careful and gentle tapping.
I start with the razor closed. Lay one end of the hinge pin on the anvil, roll it around until you are sure you are point on with no scale touching the anvil. If you have a small tube that will rest on the pin's washer and allow the pin inside or a slightly opened pair of pliers use them to push down on the washer. This effort hopefully will take up any slack in the hinge. Then use the flat side of your 2oz hammer to gently peen the head of the hinge pin to tighten it. Go slowly and only a little at a time, I did mention to go slow and gently didn't I? If I didn't mention it please do go slow and gently. Just a couple gentle taps and see if you made any progress. Try again and don't be tempted to graduate to a full out whacking. Just tap, tap, tap to move the metal around to tightening up the hinge and not break your scales. Also, be mindful to hold the scales parallel to each other and not allow them to misalign. You'll be done when they are slightly snug, not tight, and close on center.
You will go slow and carefully won't you?
Regards
ChasmoBdnield likes this.
-
The Following User Says Thank You to Chasmo For This Useful Post:
deepweeds (02-09-2014)
-
02-09-2014, 11:01 PM #8The Great & Powerful Oz
- Join Date
- May 2008
- Location
- Bodalla, NSW
- Posts
- 15,638
Thanked: 3751
It's not difficult to repin but as already mentioned requires care. Here's a link to the library if you choose to have a go:
Un-pinning and re-pinning a razor - Straight Razor Place Library
Having handled that razor I would say the hinge pin is bent. You will not be able to tighten the closing point without increasing the friction at the fully open point without a new straight pin.The white gleam of swords, not the black ink of books, clears doubts and uncertainties and bleak outlooks.
-
02-24-2014, 10:55 AM #9Senior Member
- Join Date
- Jan 2014
- Location
- New South Wales
- Posts
- 154
Thanked: 22 Finished!!
Thanks everyone for their help and advice.
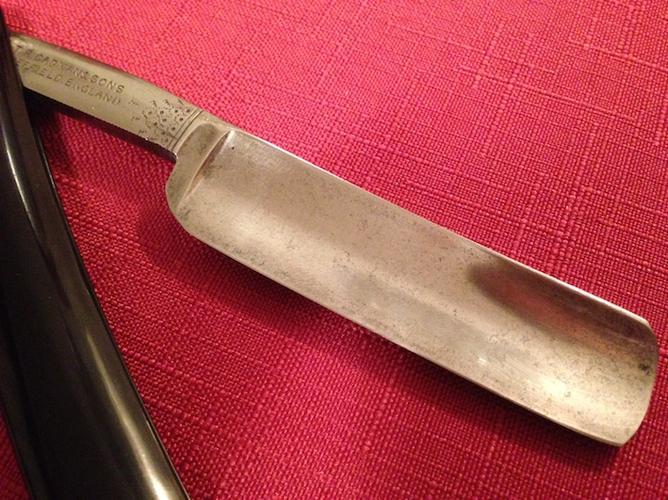
I sent the razor to Oz to hone and he also repined it and polished the scales and tang while he had the blade out.
Os I'm very happy with your work and recommend you to anyone in Australia for honing/restoration! He did a particularly nice job of polishing the scales where the hinge pin was. It looked like someone bashed it with a meat tenderiser to tighten the hinge some time.
So now it has a shiny sharp blade, tight pins and glossy scales I'm set to shave tomorrow!! With a rego sticker remover! It's even more satisfying than buying something.


 Reply With Quote