
Results 1 to 10 of 14
 5Likes
 LinkBack URL
 About LinkBacks
-
02-10-2014, 06:34 AM #1the deepest roots


- Join Date
- Feb 2011
- Location
- Seattle
- Posts
- 1,221
Thanked: 169 New method for sleeving oversized pivots
I was just repinning an old Sheffield blade tonight and came up with a simple and effective way to take up the slack in an oversized pivot. Note, it worked on a pivot hole that was not only larger than my sleeved pin, but also had a depression from the outside edge of the tang. Pictures make it clearer:
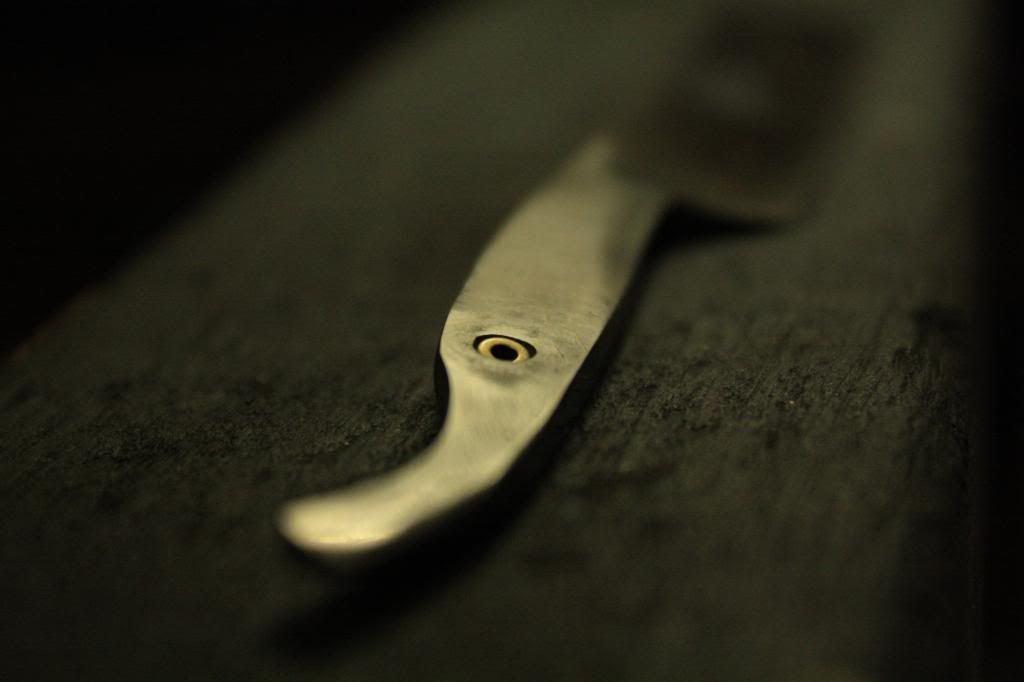
The example razor is a Joseph Allen & Sons. Note the negative space around the pivot hole
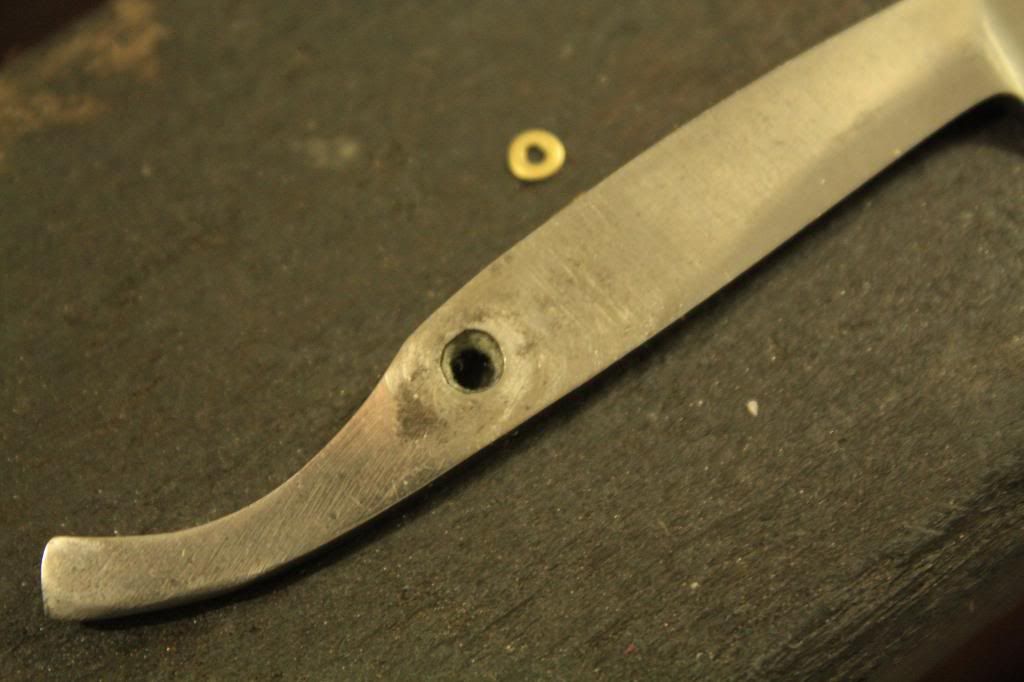
First we use the #0 flat washers (.065 x .125 x .017) which fit nicely inside the depression but did not slip all the way through the pivot hole:
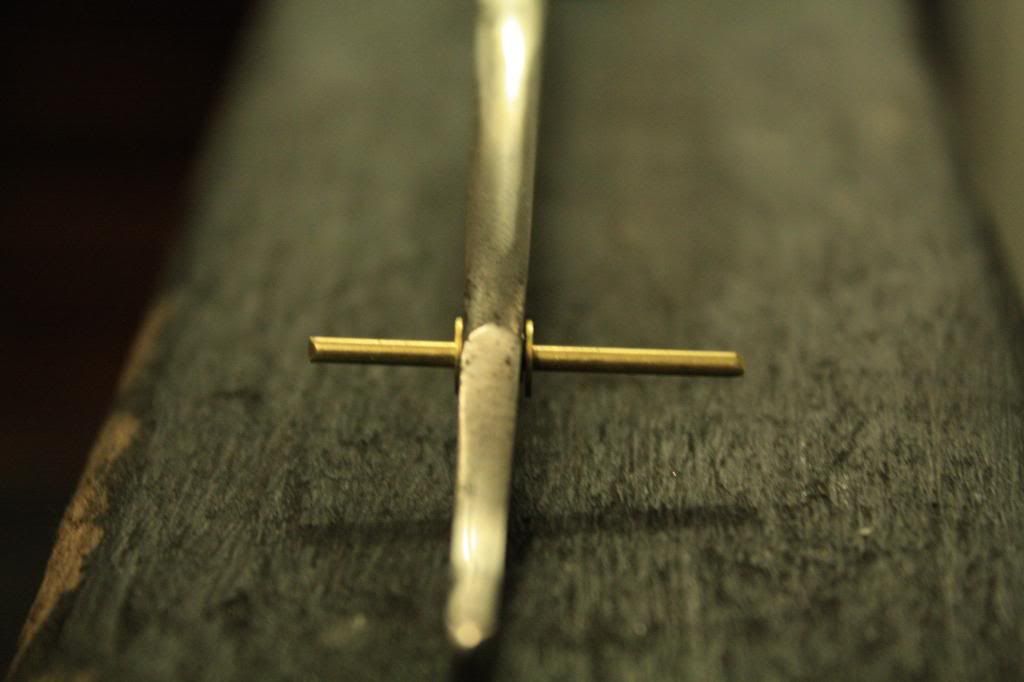
Following the #0 washers on each side, the wide washers (.062 x .188 x .015) act as a thrust washer and hold the spacer in.

and then a pic when the whole setup is snugged into the pivot.
The limitations to this method are:
If the pivot hole is too large and the #0 washers slip through (although you could still use the washers as thin sleeves I suppose) or the relief is too large for the small washer to take up enough slack.
Also, while I've seen this negative space pivot in more than a few Sheffields, if it is not present you may have to drill the relief yourself so the small washer will fit flush with the tang.
So far it has worked in practice with razor, I plan on trying it in the future. Enjoy!
-
The Following User Says Thank You to TwistedOak For This Useful Post:
Hirlau (02-12-2014)
-
02-10-2014, 12:56 PM #2Scheerlijk

- Join Date
- Feb 2013
- Location
- The Hague, the Netherlands
- Posts
- 1,184
Thanked: 164
This is a good idea, thanks! I suppose if the washer doesn't quite fit, you could try hammering it in with the point of a nail. It would deform like when doming a washer until it slips into the pivot hole. Haven't tried it myself, but I could see it work.
I want a lather whip
-
02-10-2014, 01:27 PM #3Shave This

- Join Date
- Jan 2014
- Location
- Pickering, Ontario
- Posts
- 1,036
Thanked: 183
Ingenious but I think the method of inserting brass tubing would be better. Even if you have to drill it out slightly, it would be less likely to shift or wear out. For very large holes you can insert smaller brass tubes into larger.
-
02-10-2014, 03:52 PM #4Member
- Join Date
- Jan 2014
- Location
- San Antonio Texas
- Posts
- 83
Thanked: 5
I thought about something similar. My method would be to fill the hole with epoxy and then stick a washer on either side to set up with the epoxy.
-
02-10-2014, 03:57 PM #5Senior Member

- Join Date
- Nov 2013
- Location
- Chesapeake, VA
- Posts
- 159
Thanked: 10
Great job! Heck the way I see it is what ever gets the job done. Now personally, like hart said, I sleeve mine with brass tubing. What ever floats your boat I guess.
Justin
I would rather be outdoors!!!
-
02-10-2014, 04:21 PM #6Senior Member

- Join Date
- Jan 2013
- Location
- Pennington, NJ
- Posts
- 274
Thanked: 36
For those who have not tried the brass tubing method, give it a go. It is cheap and easy to find at hobby shops and works really well. That said, whatever works works.
-
02-10-2014, 06:45 PM #7Have Married My Coticule
- Join Date
- Dec 2013
- Posts
- 318
Thanked: 39
I have a razor that suffers from a very sloppy pivot hole - one might describe it as a wizard's sleeve.
I'm considering trying the epoxy route since I'm not overly keen on drilling through the tang, which I imagine will be a right nightmare.
-
02-10-2014, 07:04 PM #8Shave This
- Join Date
- Jan 2014
- Location
- Pickering, Ontario
- Posts
- 1,036
Thanked: 183
I've drilled one (but have yet to put on scales) and expected it to be brutal. It wasn't in the least, surprisingly easy with a basic 1/8th bit that didn't need to take out too much metal. With a little reaming, the tube fits snugly and looks square. Originally Posted by Christel

-
02-10-2014, 07:12 PM #9Have Married My Coticule
- Join Date
- Dec 2013
- Posts
- 318
Thanked: 39
Hmmm, thank you for that! your reply has given me the confidence to sleeve it rather that just drill through epoxy. I'll. Just have to track down some tubing of the right size now.
-
02-10-2014, 07:18 PM #10Shave This
- Join Date
- Jan 2014
- Location
- Pickering, Ontario
- Posts
- 1,036
Thanked: 183
I got mine in a hobby store that primarily deals in trains. There are half a dozen sizes that are all sized to fit inside each other right down to the 1/16th rod. Originally Posted by Christel
Funny thing is the proprietor asked my what I was working on and when I told him he said another guy was in last week getting brass for a razor restore too.Last edited by Hart; 02-10-2014 at 07:21 PM.


 Reply With Quote