Results 1 to 10 of 13
-
02-27-2014, 03:47 AM #1Member

- Join Date
- Feb 2014
- Location
- Villa Park, Ca
- Posts
- 37
Thanked: 0 Trifecta! Introduction, Project Pics, and Questions!
Hey SRP Workshoppers (Workshoppians?), This is my first day as a member and my first post outside of the introduction forum. I know this is a long post, but I felt it was inappropriate to just start asking questions without some pictures to look at first

I have been using all the information in this forum for my recent project. I inherited my great grandfather's straight razors from when he was stationed in Germany. On another social website, I was able to learn more about them and decided to restore one of them: an early 1900s FW Engels. Now bear in mind I havent even shaved with a SR, but I decided that restoring a SR would be a good place to start .
.
Here she is straight out of the box:
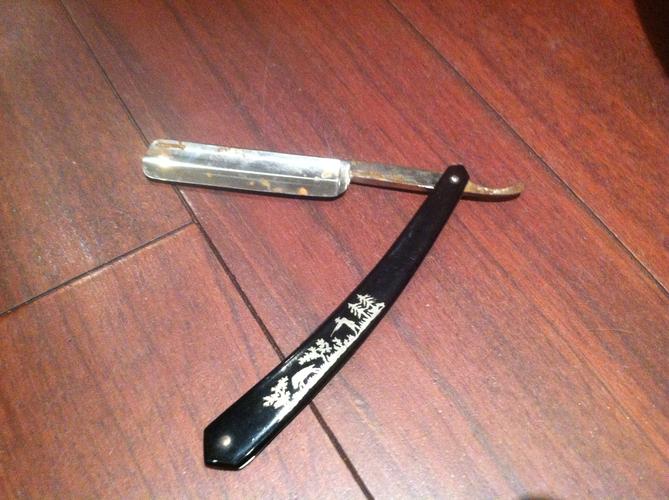
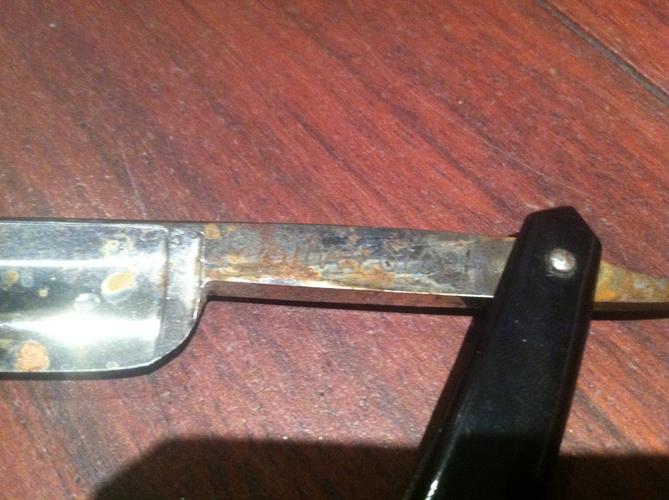
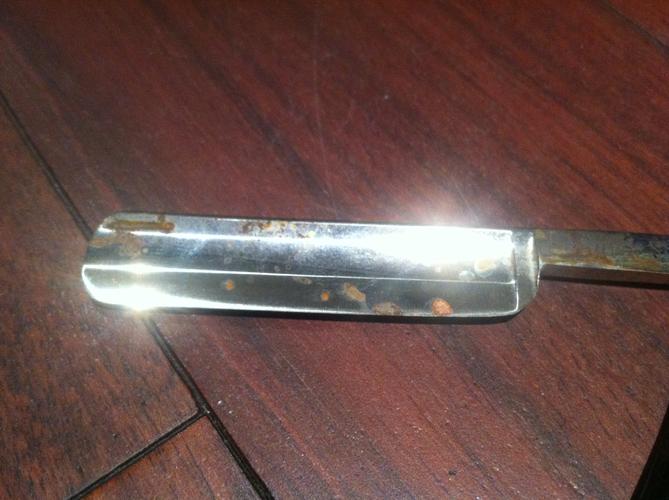
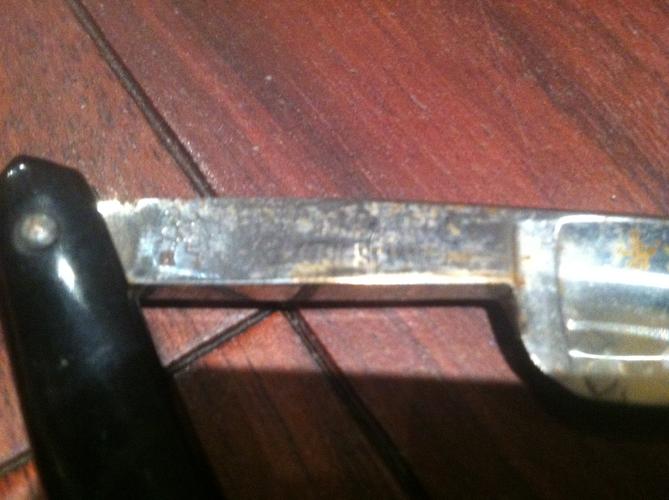
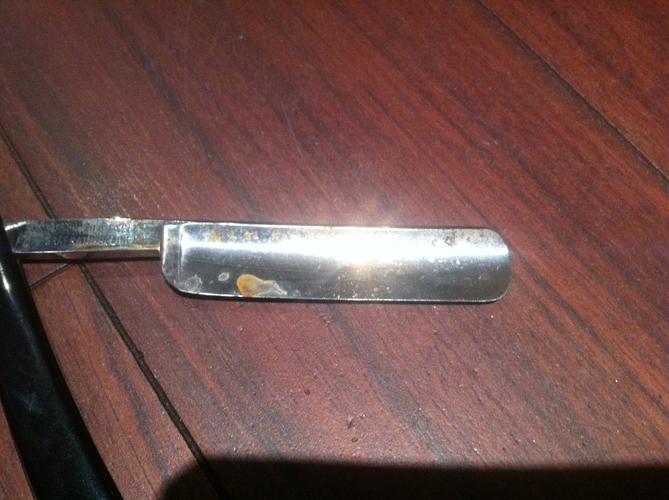
So I first busted out my Mothers Mag Polish and spent a good hour polishing the rust out of the blade. I apologize that I do not have good pictures yet of the blade. While cleaning the tang, I noticed there may be some active rust on the tang behind the scales. I looked it up and read how to remove the pins in order to get in there. I tried to remove the pin, but the 100+ year old plastic was having none of that; The scale broke. I found myself in a predicament. Long story short, I have history with woodworking, found the tutorials on this website, and went to work.
My local woodshop sells 1/8" x 3" x 24" and 1/8" x 1 1/2" x 24" hardwoods. Here I got Curly Maple for the scales and a nice piece of Paduak for the wedge.
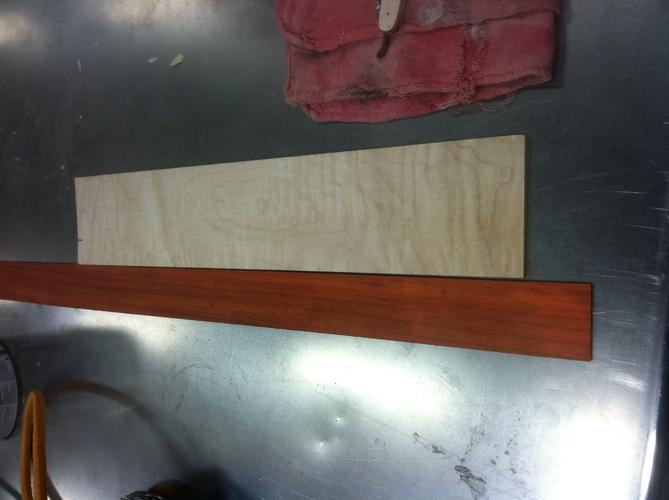
I found a pattern, cut it out, and double backed the two scales together. I then cut and sanded them down to shape.
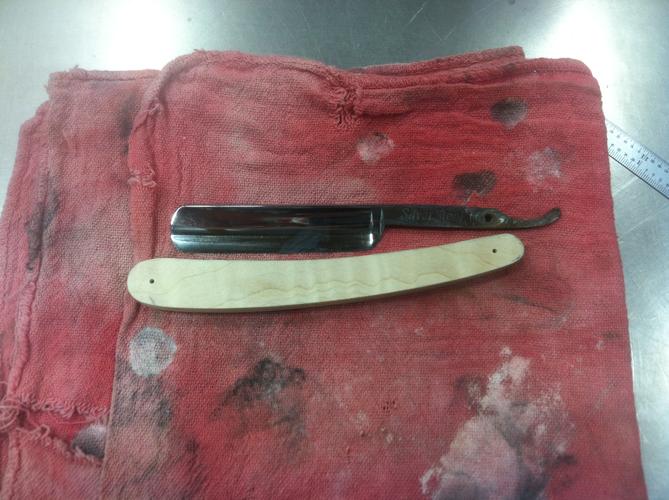
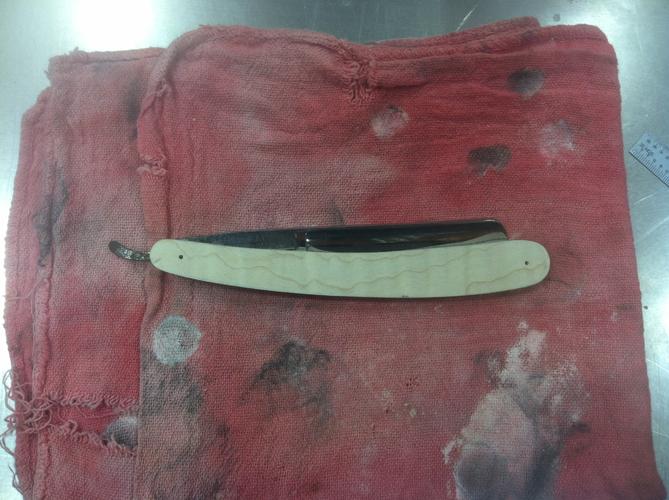
I made a few tweaks and started rounding the edges.
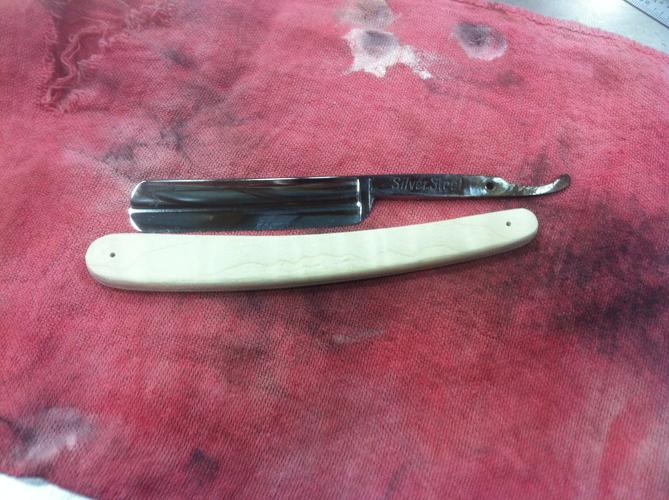
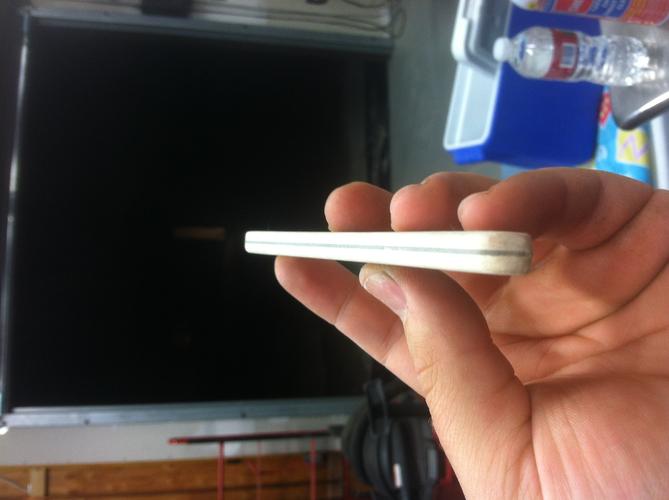
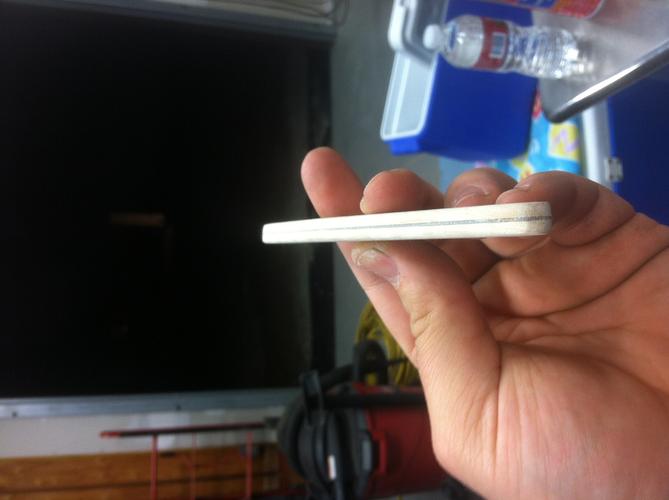
So after that nice long post, here are my questions:
1. Does everything look Kosher so far?
2. How wide should the scales be? They sit now just under 1/8"
3. What size should the wedge be? Is the angle all trial and error or is there an equation/method?
Thanks in advance!
-
02-27-2014, 03:57 AM #2Senior Member


- Join Date
- Nov 2012
- Location
- Across the street from Mickey Mouse in Calif.
- Posts
- 5,320
Thanked: 1185
I would test pin the razor, then see how much space I have to close. Wood does not bend like plastic so you may wind up with a spacer. Check out some of the restore shots with wood in the title and you will get some ideas. Until somebody comes along that has a specific plan. (give it 2 seconds.)
Good judgment comes from experience, and experience....well that comes from poor judgment.
-
02-27-2014, 04:00 AM #3Member

- Join Date
- Feb 2014
- Location
- Villa Park, Ca
- Posts
- 37
Thanked: 0
-
02-27-2014, 04:20 AM #4Senior Member


- Join Date
- Nov 2012
- Location
- Across the street from Mickey Mouse in Calif.
- Posts
- 5,320
Thanked: 1185
Well not the size of the tang but the toe of the razor. If it was as wide as the tang it would just pass right through. Nope you want to see how much to close it for where the blade rests on the scales. and make a spacer that wide. A wedge works by bending the material out to match the width at the tang when you pin it. So the scales are closer together at the toe. It would be easier to show you :<0)
Spacer instead of wedge yes.Last edited by 10Pups; 02-27-2014 at 04:24 AM.
Good judgment comes from experience, and experience....well that comes from poor judgment.
-
02-27-2014, 04:40 AM #5Member

- Join Date
- Feb 2014
- Location
- Villa Park, Ca
- Posts
- 37
Thanked: 0
-
02-27-2014, 04:55 AM #6

from what I remember & have applied from ready though the zillion posts here
scales - wood or horn about 1/8" thick each will work well
wedge thickness - this is the thickest part at the top of the wedge - measure the blade thickness at the point were you want the blade to rest in the blade, this is dependant on the grind by about 2 thirds the spine thickness maybe right
wedge angle - wedge angle should get the scales to be about 1/4" wider than the thickness of the tang at the pivot hole when the wegde is pinned &
some wedges can be wedged vertically as well as logatudinally if the tang is tapered vertically also.
pitty about the orginal scales they look great with the inlays, did they only break at the pivot as you may be able to use them on a shorter blade laterSaved,
to shave another day.
-
02-27-2014, 05:01 AM #7Member

- Join Date
- Feb 2014
- Location
- Villa Park, Ca
- Posts
- 37
Thanked: 0
I used a post in the tutorial section that said he started with 3/16" wood and "sanded them down". I didnt know what that meant. Next time Ill try a more detailed search. My apologies.
Okay, im starting to understand the blade positioning more. Thank you for the input!
My heart sank when it snapped. It snapped right at the pivot hole, almost straight up and down. I may have a contact who can laser etch wood (he retired) so I may give him a ring to see if I cant get the inlay image etched into the wood. But thats all a dream right now.
-
02-27-2014, 05:02 AM #8

JMO, I believe for that size blade, 1/8th inch is too thick. try about 3/32nds inch. That thickness will be plenty stiff and still have a visual balance with the spine.
~RichardBe yourself; everyone else is already taken.
- Oscar Wilde
-
02-27-2014, 05:07 AM #9Member

- Join Date
- Feb 2014
- Location
- Villa Park, Ca
- Posts
- 37
Thanked: 0
-
02-27-2014, 07:08 AM #10

if you shape & round the scales out it will reduce the over all bulk & the thickness some more
Saved,
to shave another day.


 7Likes
 LinkBack URL
 About LinkBacks


 Reply With Quote


