
Results 31 to 40 of 40
 96Likes
Thread: Warning! Contains blood.......
 LinkBack URL
 About LinkBacks
-
03-25-2014, 11:09 PM #31Senior Member


- Join Date
- Apr 2012
- Location
- Northern California
- Posts
- 664
Thanked: 109
Nice work! You literally put some blood, sweat, and tears into that razor.
-
The Following User Says Thank You to IamSt8ght For This Useful Post:
silverloaf (03-25-2014)
-
03-25-2014, 11:14 PM #32Senior Member

- Join Date
- Oct 2013
- Location
- vermont
- Posts
- 778
Thanked: 207
haha, yes I did! for some reason I don't see this thread on the list in the custom builts and restorations section anymore, any idea why?
Silverloaf
-
03-25-2014, 11:17 PM #33Senior Member

- Join Date
- Dec 2013
- Location
- Kentucky
- Posts
- 1,840
Thanked: 124
Usually builds go in workshop, final restores etc go in custum builds and restores. Ive had mine moved before ;-)
-
The Following User Says Thank You to DennisBarberShop For This Useful Post:
silverloaf (03-25-2014)
-
03-25-2014, 11:23 PM #34Senior Member
- Join Date
- Oct 2013
- Location
- vermont
- Posts
- 778
Thanked: 207
hey thank you man, that was very simple, that's exactly what happened! my apologies, I wasn't aware. should I remove the post with the finished pics and repost in custom builds and restorations? Originally Posted by DennisBarberShop
 Silverloaf
-
03-25-2014, 11:38 PM #35Senior Member
- Join Date
- Dec 2013
- Location
- Kentucky
- Posts
- 1,840
Thanked: 124
Id just make a seperate one there, either way, razor looks great!
-
The Following User Says Thank You to DennisBarberShop For This Useful Post:
silverloaf (03-26-2014)
-
03-26-2014, 01:14 AM #36Senior Member


- Join Date
- Nov 2013
- Location
- Vernon Hills, IL
- Posts
- 388
Thanked: 90
That looks awesome. The sacrifices we make to enjoy our love and passions. Originally Posted by silverloaf
I am very appreciative of all the knowledge and sharing each and everyone has provided me with. Look forward to future endeavors with many of you.
Gonzo
-
The Following User Says Thank You to Gonzo4str8rzrs For This Useful Post:
silverloaf (03-26-2014)
-
03-27-2014, 07:16 PM #37aka shooter74743


- Join Date
- Sep 2009
- Location
- SE Oklahoma/NE Texas
- Posts
- 7,285
- Blog Entries
- 4
Thanked: 1936
You might consider making one of these, sure makes things safer for you and the blade when handsanding:
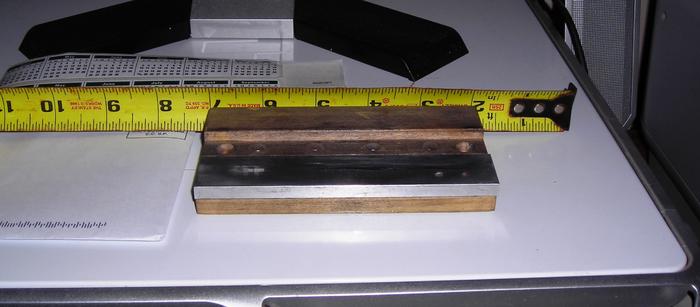
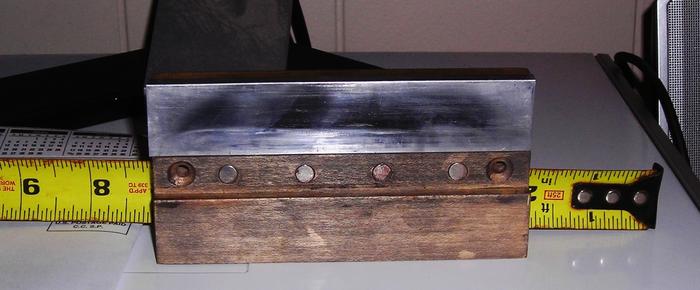
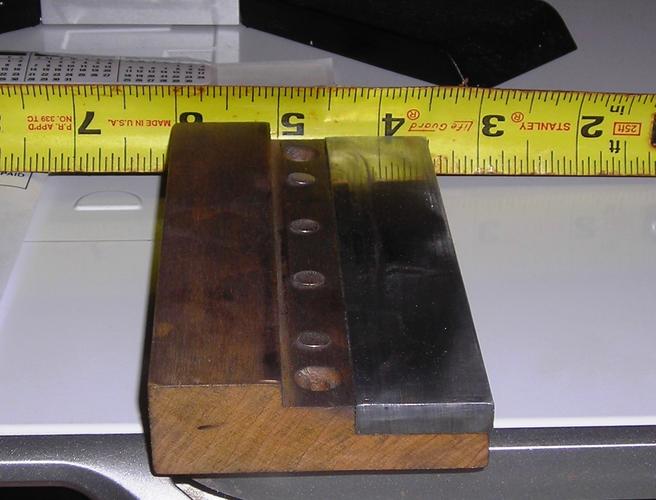 silverloaf likes this.Southeastern Oklahoma/Northeastern Texas helper. Please don't hesitate to contact me.
Thank you and God Bless, Scott
-
The Following User Says Thank You to ScottGoodman For This Useful Post:
silverloaf (03-27-2014)
-
03-27-2014, 07:55 PM #38Senior Member

- Join Date
- Aug 2013
- Location
- Black Bear, NJ
- Posts
- 1,672
Thanked: 171
Very nice, Scott.
I've gotten by with a simple 2x4x6. This 2x4 cut has just the right rounding of the edges to assist in bringing the rest of the blade in parallel with the face of the 2x4(spine hanging off a wee bit).
For my kung fu grip preventer, its equally as crude.
Looked around outside. Found two quickly. A nubby stick comfortable to the hand but tapered enough as one end where I can put a strip or two of that razor shipping bubblies under cut strips of wet and dry sandpaper over the "tapered" end. All retained by a rubber band. When I'm wearing a spot on the sandpaper, I simply unwrap one side of the rubber band and slide the paper forward/backward over the end or replace it.ScottGoodman likes this.
-
03-28-2014, 01:15 PM #39Senior Member
- Join Date
- Dec 2013
- Location
- Kentucky
- Posts
- 1,840
Thanked: 124
I had some scraps of laminate flooring laying around from laying flooring at the barber shop and I use the smooth backside, lay the razor blade flat and sand away, keeps the edge from being as exposed and dangerous plus its very durable vs the abrasives
-
The Following User Says Thank You to DennisBarberShop For This Useful Post:
silverloaf (03-28-2014)
-
04-02-2014, 04:09 PM #40Senior Member

- Join Date
- Nov 2012
- Location
- Sterling, VA
- Posts
- 271
Thanked: 92
Great work.
Good thing for Wolverine!


 Reply With Quote