Results 1 to 10 of 10
 18Likes
Thread: Setting up a restoration workshop
-
05-24-2014, 06:24 PM #1
 Setting up a restoration workshop
Hi everybody,
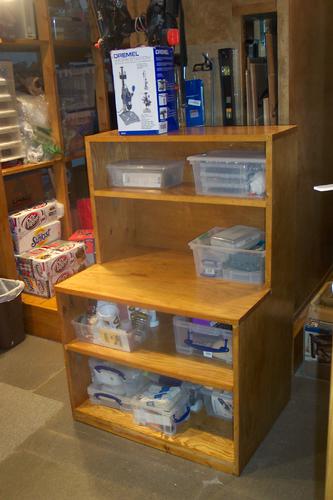
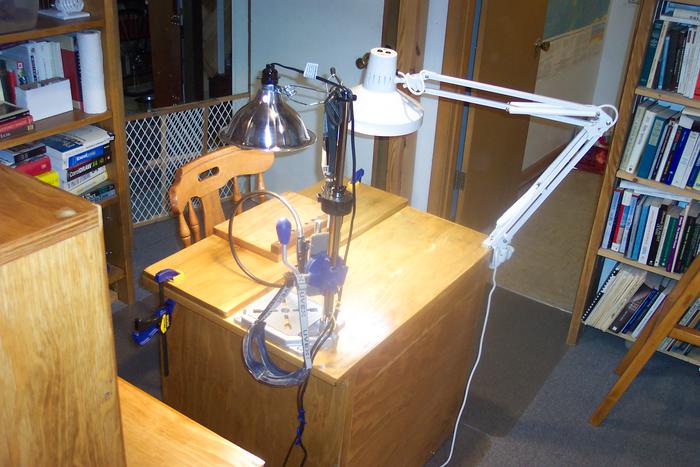
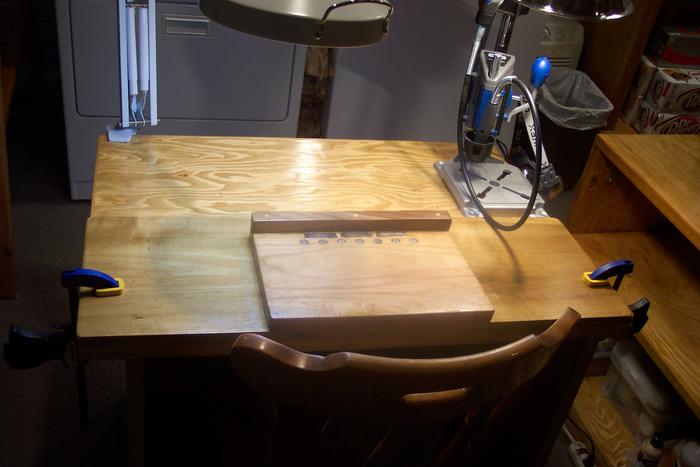
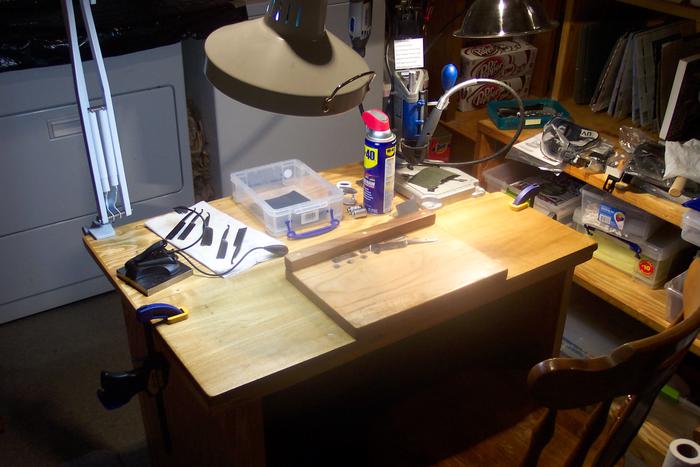
I started wet shaving about a year ago and began using straights about eight months ago. I've just now begun restoring. Still reading and watching tutorials. The past four weeks have been spent chiefly on building a set of storage shelves for restoration materials, a work table, and a razor jig. For the jig, I took hints from Paulx608 (http://straightrazorpalace.com/works...storation.html) and other contributors. Once the jig was in place, I lept in and started working, even though I haven't finished the long list of tutorials I have bookmarked.
Here, I'll post some pictures of the workshop:
Here's a closeup of the razor I'm working on now, an F. R. Reynolds "Unequalled" 6/8. There are three "before" shots and two "after" 60 grit sanding. The horn scales are soaking in neatsfoot oil. I'm planning to take the sanding up to 1200 grit and then buff with a Dremel and emery then crox:

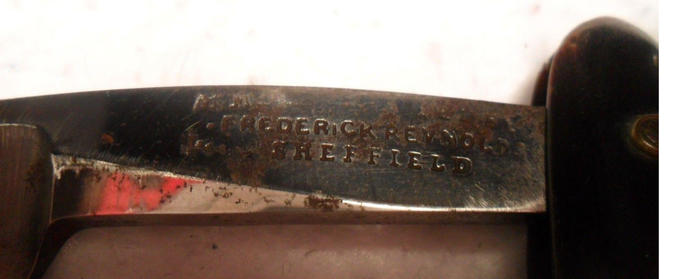


A couple of days ago, after watching Brad Maggard's 12-part video on restoration, I decided to get a two-speed buffer. Until that comes in, I'll just continue hand sanding on the jig.
Already got my first cut finger! So I figure I'm a blooded "veteran," though still a newbie restorer. Cuts teach caution, attention--lessons I'm learning.
For daily shaving rotation, I'm using about a dozen razors that are in good condition. For restoration, I have a bunch of razors I've picked up off eBay or from B&B. These are grouped into three classes: A, B, and C. The razors in class A are those I value most--little hone wear, blades in good condition, 6/8ths or larger. The B class razors either have heavier hone wear or more pitting, or are inherently less valuable.
I'll post a picture of the Class A razors queued for restoration (Wade & Butcher, Ern, C-Mon, Oxford, Frederick Reynolds, Wostenholm, etc.) :
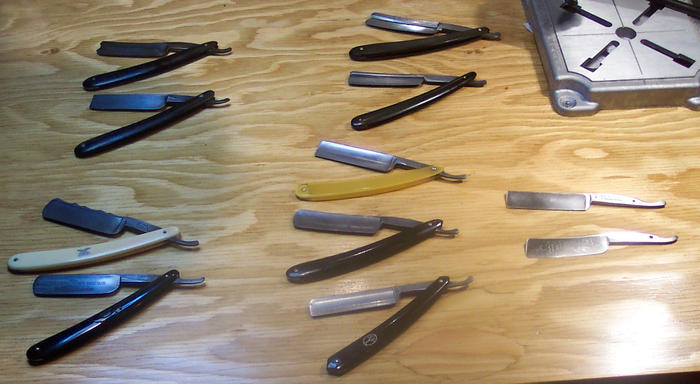
Two more class A razors coming in the mail, a Greaves 7/8 wedge and a W&B 7/8 wedge. Both have some rust but are big enough to tolerate substantial sanding.
I've learned a lot from this forum, and I've bought several fine razors off the SRP classifieds. Thanks, guys! I'll keep tuning in to learn more.Last edited by carrolljc; 05-24-2014 at 06:34 PM.
-
05-24-2014, 06:30 PM #2
-
The Following User Says Thank You to carrolljc For This Useful Post:
Geezer (05-25-2014)
-
05-24-2014, 07:50 PM #3

lookin good, cant wait to see the results!
Silverloaf
-
05-25-2014, 01:56 PM #4Senior Member


- Join Date
- Nov 2012
- Location
- Across the street from Mickey Mouse in Calif.
- Posts
- 5,320
Thanked: 1185
Nice set up. The buffers are another learning curve. Watch for disappearing stamps and rounded edges. You may also consider putting your buffer in a box or at least a place where the mess won't matter. Compounds spin off in all directions.
Good judgment comes from experience, and experience....well that comes from poor judgment.
-
05-25-2014, 03:48 PM #5

Thanks for the tip. I had been thinking about the box. Tony Holmes in England sent me a picture of his set up, which includes a box with an exhaust hose attached.

Last night made me a believer about the necessity of the box. I don't have the big buffer yet, but after hand sanding to 1500 grit, I put some iron oxide mixed with oil on a Dremel felt buffer and went over the blade. I then spent over an hour cleaning up the mess. Oily red spreckles absolutely everywhere. When I rubbed it with a paper towel, it smeared. Amazing how much red smearing occurred. I went through nearly a whole roll of paper towels cleaning it up (using Crud Kutter).
So for sure, a box! I ordered a dust collector too, so that I can attach a hose to the box, as in Tony's photo.
My set up is in a laundry room where there's a rack on which my wife dries delicate clothes. I have bookshelves lining the walls, too. So it definitely is not a place where mess won't matter. I've even been thinking of rigging up a curtain I can use when using the buffer. Not ideal, but I'll need to make accommodations for limited space--sort of like living on board a ship. The curtain could be just thick polyethylene (plastic drop cloth), which would be easy to clean and also translucent, so it doesn't seem so cramped.
I'll bear that in mind about watching for disappearing stamps and rounded edges. The hand sanding made it possible to focus attention on trouble spots while preserving the engraving on the blade. I finished the blade and am working on the scales now. Here are three shots of the blade:


The blade isn't perfect. There are to my eye one barely visible patch of slight pitting that I left so as not to damage the engraving and also three pin prick size pits that I wasn't willing to sand down to. Seemed a bad idea to sand away so much steel just to get those pin pricks out.
Joe
-
05-25-2014, 04:09 PM #6

Your workshop is coming along nice. Iron oxide + oil = paint. (depends on the oil of course) Just put a canvas behind the buffer in the box, and with the resulting art you can hang your paintings in a gallery.
 I bet it made a mess!
-
05-25-2014, 04:21 PM #7

I've been thinking about the curtain. I'd like to be able to roll it up and out of the way when it isn't in use. So I thought of those pull-down screens that are in classrooms, for movie projections. I could have thick plastic or thin canvas sheet with a wooden dowel rod at the base. It wouldn't have the nice self-retracting feature of screens. I'd have to roll it up by hand, but that wouldn't take too long. The rolled up curtain could be rolled onto padded hanging hooks on the ceiling. The ceiling is unfinished floor joists for the floor above, and is about ten feet high, so the rolled up curtain could be completely out of the way.
Jackson Pollock used spreckles and drips. Worked for him. Maybe I can have two sidelines--selling a few finished razors, and a few finished dropcloths. But then, you can't shave with a dropcloth.
Joe
-
05-25-2014, 04:23 PM #8
-
05-25-2014, 04:33 PM #9


Notice the use of iron oxide. Whats impressive is the skillfully applied black emery, and white rouge. Also crox, for a touch of complimentary color.
-
05-25-2014, 06:33 PM #10


 LinkBack URL
 About LinkBacks


 Reply With Quote
