Results 1 to 10 of 23
-
05-30-2014, 05:55 PM #1
 Plexiglass razor rack and microscope stand
A while back, I built a plexiglass razor rack:
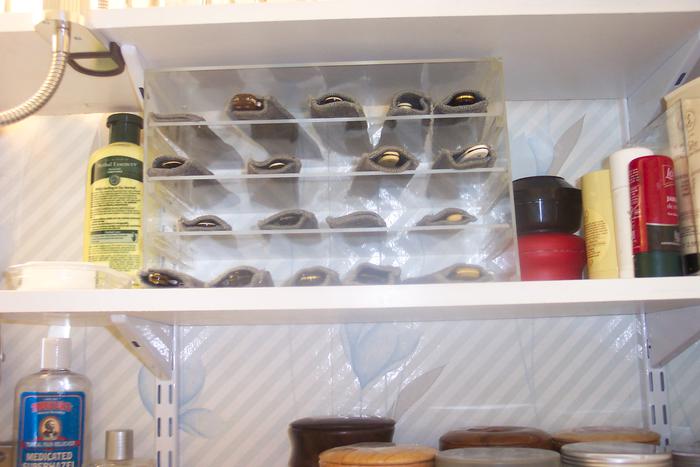
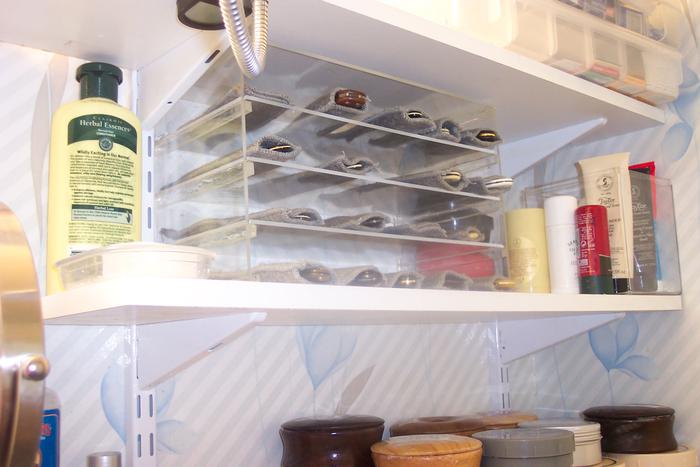
The shelves are held up by ledges epoxied to the sides:
The digital microscope I use for looking at edges while honing razors has a nice sturdy stand, but the stand is too narrow to slide razors across it comfortably. So I built a plexiglass platform to go over the stand:
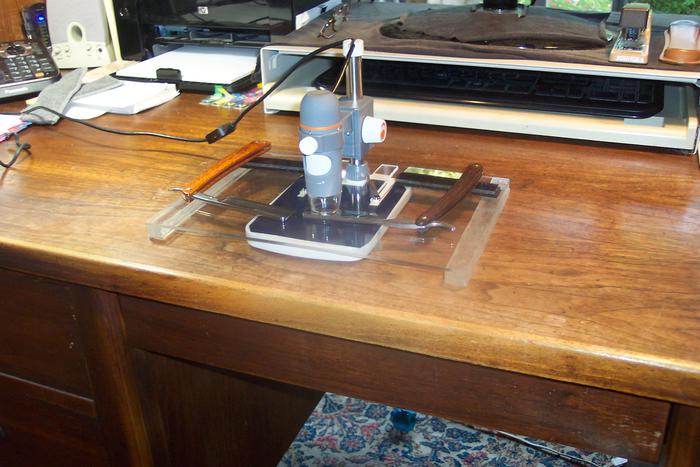
The materials used in both projects were (1) sheets of plexiglass, (2) a jig saw, and (3) epoxy. For the razor rack, I also used some Velcro. At the back of the platform there are plexiglass ledges on which to prop the handles of the razors.
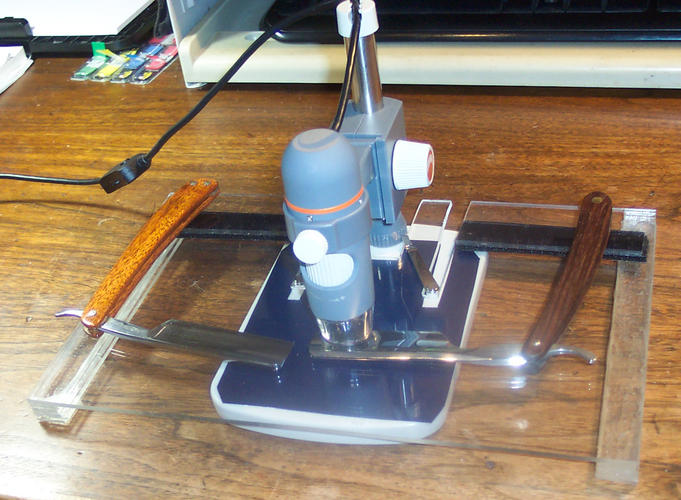
Propping the handles gives better focus and less light glare on the blade. I used Velcro to attach the ledges because I thought some razors might do better without the ledges. In practice, though, I never have not used the ledges. So if I were to do it again, I'd just epoxy the ledges in place. Occasionally, I need even more height than the ledges offer, so I have a stack of plexiglass rectangles glued together to form a prop higher than the ledges. I slide them up against the ledges and prop the razor handle on them.
Joe
-
The Following 5 Users Say Thank You to carrolljc For This Useful Post:
Geezer (05-30-2014), HaiKarate (05-31-2014), Hirlau (05-31-2014), MJC (06-05-2014), Neil Miller (06-02-2014)
-
05-30-2014, 06:01 PM #2
-
05-30-2014, 06:05 PM #3

Thanks. The razor socks are from Jarrod at The Superior Shave. Silicone and oil, they protect razors from moisture. Good item (especially if you live in a humid climate), but they are oily, leave an oily residue on whatever they touch, so the plexiglass is a good material to use for them. One could also use wood with a finish, but it's nice to be able to see the razors through the plexiglass. Wood would be a little easier to work with, perhaps. Could use small screws. With the plexiglass, the most difficult part was holding the sides and bottom in place while the epoxy dried.
Joe
-
05-31-2014, 04:01 PM #4Senior Member

- Join Date
- Jul 2013
- Location
- Dacusville,SC
- Posts
- 290
Thanked: 44
Very nice and creative use of the plexiglass.
Amateurs built the ark. Professionals built the Titanic!
-
05-31-2014, 04:24 PM #5Senior Member

- Join Date
- Mar 2011
- Location
- Corcoran, Minnesota
- Posts
- 665
Thanked: 170
Nice work. There is a solvent that works as a glue for plexiglas - it may be acetone. It's been a while, so I forgot the specifics. It works much faster than epoxy. Thanks for posting - I need something like that for my 'scope.
-
05-31-2014, 04:56 PM #6

See, thats how you mount those usb scopes. Theres a few many threads about this. But carrolljc posted a pic. Look and learn. Do I spy an old calculator in the background?? Wait that might be a remote. Its by the printer and speaker. Is that a toaster oven?? jk.
Last edited by HaiKarate; 05-31-2014 at 04:59 PM.
-
05-31-2014, 06:05 PM #7

The old calculator is on the other side of the desk. That to the left in this picture is an old phone. I might have been the last person in St. Louis to stop using a rotary dial phone. Now I'm pushing to become the last person to use a land line, and not to own a cell.
Joe
-
The Following User Says Thank You to carrolljc For This Useful Post:
HaiKarate (05-31-2014)
-
05-31-2014, 06:16 PM #8

I use an old vintage slide rule.
-
05-31-2014, 06:46 PM #9

Here it is...
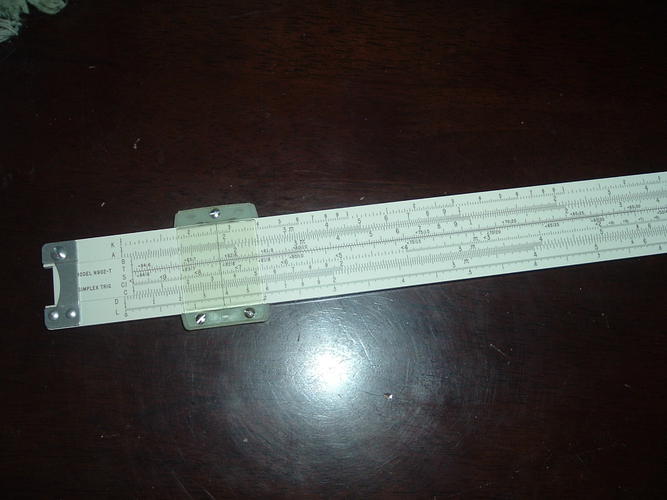
These thins work great!
-
06-02-2014, 04:57 PM #10Senior Member


- Join Date
- Apr 2008
- Location
- Essex, UK
- Posts
- 3,816
Thanked: 3164
For joining the ends, Acetone or Methylene Chloride - both act as a solvent-cement - work well. The edges have to be dead-on for the acetone as it is so thin - the methylene chloride is a little thicker but the edges still need to be quite accurate.
Methylene Ethyl Ketone (MEK) also works, but is even nastier than the Methylene chloride.
Anything cyanoacrylate-based (superglues) tends to stain and frost the surface if it touches it, and out-gassing from it also hazes acrylic.
I have used these at the University of the South Bank on a plastics course.
Super idea on the usb scope stand - well done!
Regards,
NeilLast edited by Neil Miller; 06-02-2014 at 05:00 PM.


 21Likes
 LinkBack URL
 About LinkBacks


 Reply With Quote
