
Results 1 to 10 of 13
 6Likes
 LinkBack URL
 About LinkBacks
-
06-12-2014, 05:11 AM #1Senior Member

- Join Date
- Sep 2013
- Location
- NW Indiana
- Posts
- 1,060
Thanked: 246 Little different approach to a restore
I picked up this older razor from eBay quite a while back and have had it in my lineup as a nice user after a little cleanup and full resharpening.
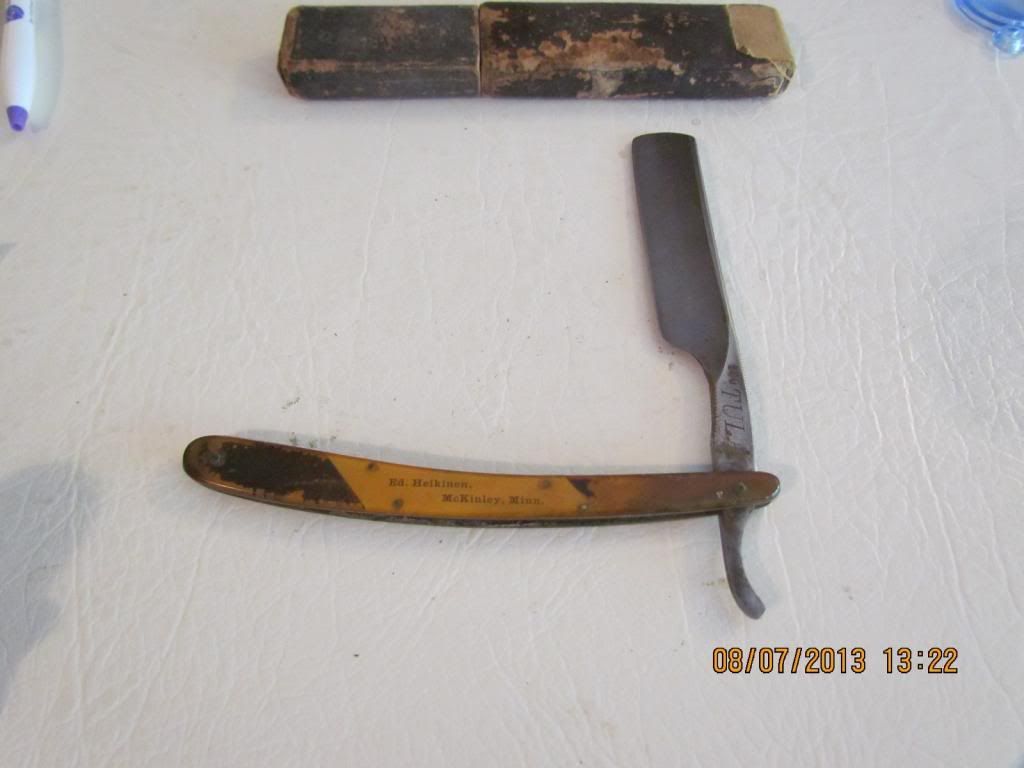
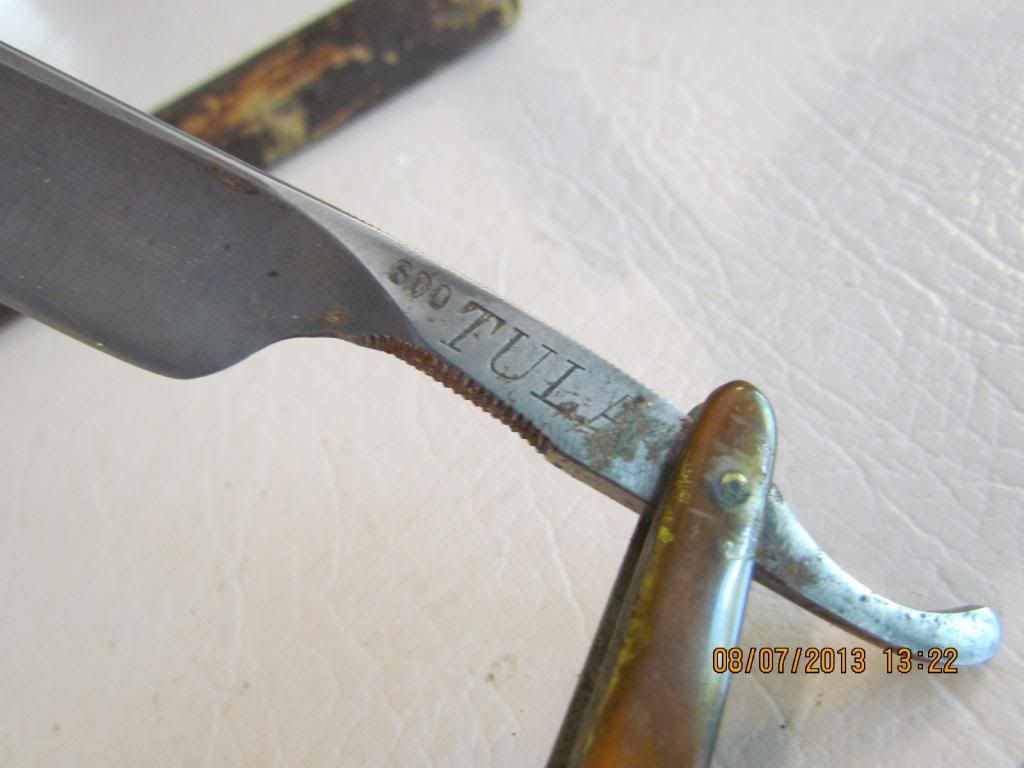
Recently I decided to try a new approach to a little more in-depth restore and also to make some new scales and liners for it. I'm still working on the scale and liners but thought I would show a couple of progress shots showing how the blade turned out, I really like it.
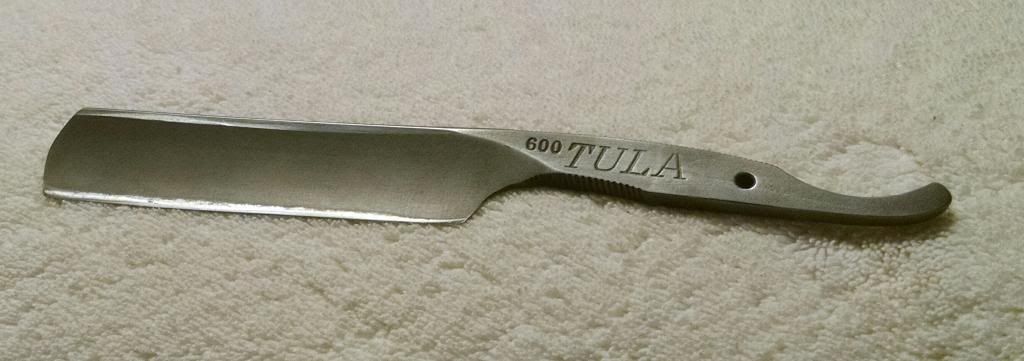
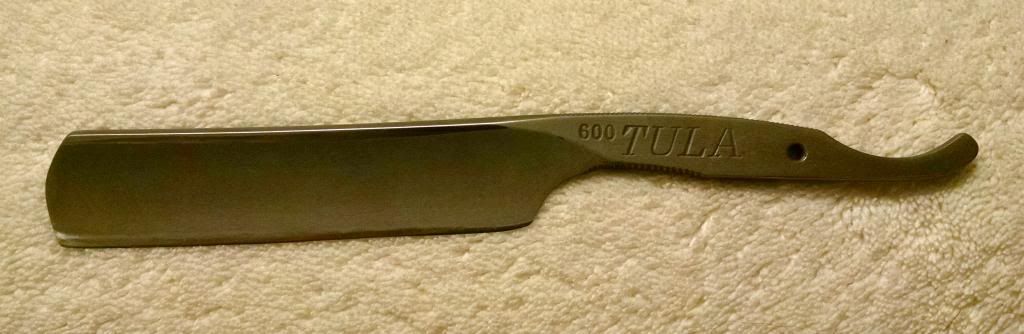
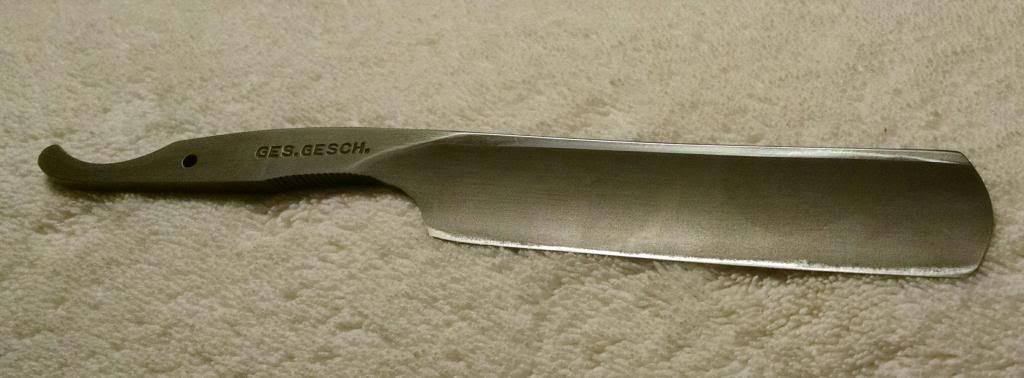
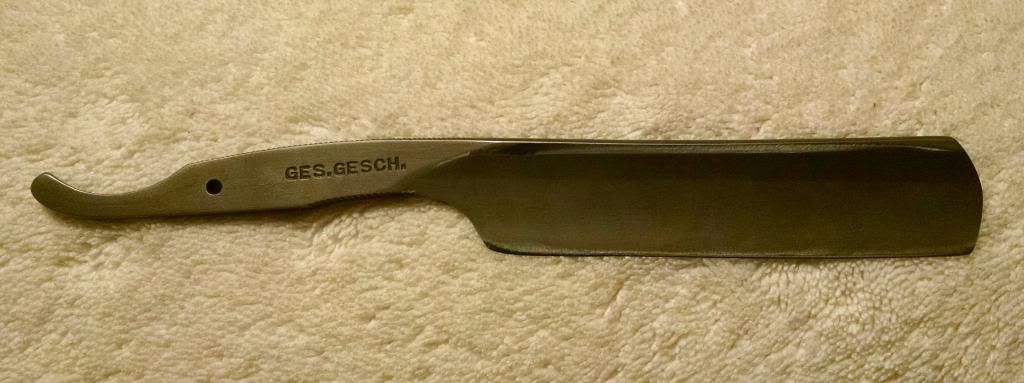
I also thinned the blade a good bit so it's now about .003" - .004" behind the edge. She really sings now - used to be more of a tinger than a singer.
-
06-12-2014, 05:19 AM #2Senior Member


- Join Date
- Dec 2010
- Location
- South Florida
- Posts
- 13,530
Thanked: 3530
The fact that your happy with her is all that matters,,,,thank you for sharing her.
-
06-12-2014, 12:32 PM #3Senior Member
- Join Date
- Sep 2013
- Location
- NW Indiana
- Posts
- 1,060
Thanked: 246
Looking at the photos I guess it isn't readily apparent either, but the original finish was actually polished. In the photos from the seller it looks not much different than my after photo. Actually they are drastically different. The finish is now a matte, dull grey except where the hone contacted. Looks quite neat to me. I just ordered some spalted hackberry to make the scales from.
Hirlau likes this.
-
06-12-2014, 01:52 PM #4illegitimum non carborundum


- Join Date
- Jan 2008
- Location
- Rochester, MN
- Posts
- 11,552
- Blog Entries
- 1
Thanked: 3795
What was the new approach?
mike1011 likes this.
-
06-12-2014, 01:58 PM #5Senior Member
- Join Date
- Sep 2013
- Location
- NW Indiana
- Posts
- 1,060
Thanked: 246
Acid etching rather than polishing like most seem to prefer. At least I haven't seen anyone else do it very often.
-
06-13-2014, 10:45 AM #6Member
- Join Date
- Oct 2013
- Posts
- 53
Thanked: 4
It's nice. How did you do it? I thought it was blued when I saw the pictures.
-
06-13-2014, 03:55 PM #7Senior Member
- Join Date
- Apr 2008
- Location
- Essex, UK
- Posts
- 3,816
Thanked: 3164
-
The Following User Says Thank You to Neil Miller For This Useful Post:
eKretz (06-13-2014)
-
06-13-2014, 04:18 PM #8Senior Member
- Join Date
- Apr 2014
- Location
- Yorkshire , England
- Posts
- 356
Thanked: 44
This Originally Posted by thunderbird47

 it would be nice to know how you got the effect.
-
06-13-2014, 05:25 PM #9Senior Member
- Join Date
- Sep 2013
- Location
- NW Indiana
- Posts
- 1,060
Thanked: 246
Thanks very much Neil, I also posted there. I'd be happy to share my process. The before pics are from the seller, and it's not real clear but the blade was originally polished or satin finish, but had extremely dulled. After I stripped the scale and liners I went over the whole blade with a small scotch-brite buff wheel in a die grinder. Got it all down to clean "parent" steel and then washed it well in acetone. Next I prepared a small pan of water on the stove with the range hood on high. I heated the water up to just below boiling and placed a small plastic container of phosphoric acid just large enough to submerge the full blade in the water. Prior to etching the blade I measured the thickness of the blade just behind the bevel and found it to be .007" - .008" thick. Donned a pair of nitrile gloves and dropped the blade in for about 5 minutes, then washed it in clean water and used #000 steel wool to remove the particulates/reactants. Measured behind the edge again to see how much had been removed, then repeated the process. Kept going until I got where I wanted to be thickness wise (.003" - .004") then grabbed the blade and scrubbed it with the #000 steel wool soaked in phosphoric acid to remove the particulates again to help even out the finish and remove any irregularities/streaks. Gave it a final wash in baking soda and water to neutralize the acid, then got to work with the hones and stropped. Afterwards I oiled the blade and wiped it clean. Now it has a very nice dull matte grey finish except where the hones did their work.
I picked this up for the scales:
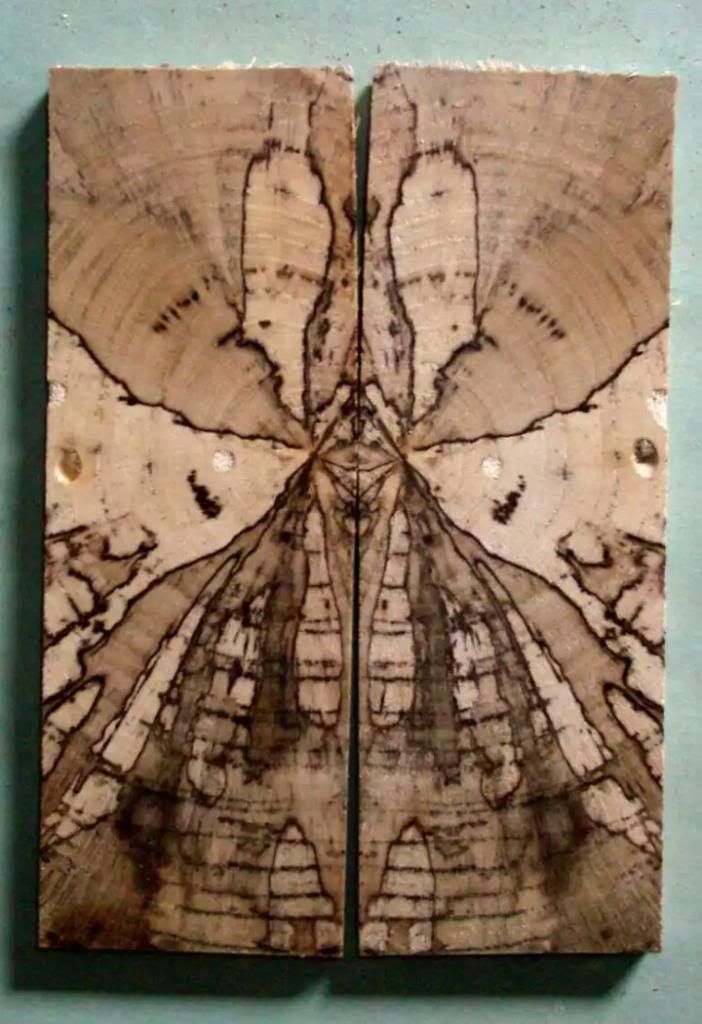
I'm planning on red liners with a black wedge and brass washers and pins.
-
The Following User Says Thank You to eKretz For This Useful Post:
mike1011 (06-13-2014)
-
06-15-2014, 07:41 AM #10Senior Member

- Join Date
- Jun 2014
- Location
- Eads, TN
- Posts
- 1,042
Thanked: 161
Does anyone else see a Jimmi Hendrix at the Filmore poster here or am I having flashbacks? Originally Posted by eKretz
By the way, I love that finish on the blade .


 Reply With Quote
