
Results 1 to 7 of 7
 12Likes
 LinkBack URL
 About LinkBacks
-
07-29-2014, 07:11 PM #1Senior Member


- Join Date
- May 2012
- Location
- Oxford, Al
- Posts
- 1,605
Thanked: 407 My first adventure in custom bolsters...
About 2 months ago (I've had to work on this in pieces b/c of school) I decided I wanted to do some custom bolsters for a blade I was restoring for myself. So, I set off trying to find some info on going about this; unfortunately I pretty much found nothing other than I cut them out shaped them and glued them on; here's the pics of the finished razor. After a few PM's and "it's a pain it's not worth it, or I would just find some old scales to rob," I decided I would just figure it out as I went, planning, experimenting and the like, and try to document it as best I could (sorry I'm not a photographer); in hopes that someone else might see this and decide to give it a go. On a skill level of 1-10 I would say this is about a 6-7; you need some basic metal working skills like using a grinding and cutting disk, and a basic concept of measuring and planning way ahead for the unexpected, and patience like no tomorrow; if you like to knock something out in a weekend be prepared to spend a good 4-6 hours a day on the these. Honestly a little here and there is ideal; b/c planning your next move is going to save you a lot of frustration and $$ in the end. My tool list included: dremel with the metal cutting and grinding wheels, diamond or steel miniature files (you can get a set of kobalt which is what I used for $30 at lowes),chasing hammer (same you use to peen the pins), a small vice w/ rubber teeth to prevent marring and a ton of sanding later, your scales and wedge made and ready to be finished (this has to be done first to get your initial measurements from), digital calipers, 5 minute epoxy, small stirring sticks (you'll see later), sharpie marker, straight edge, and sandpaper in grits 180 or 220, 320 or 400, 600, and 1200 (personally I used greaseless compound on my variable speed grinder for the final sanding, buffing compounds of your choice and metal polish to put the final luster on.
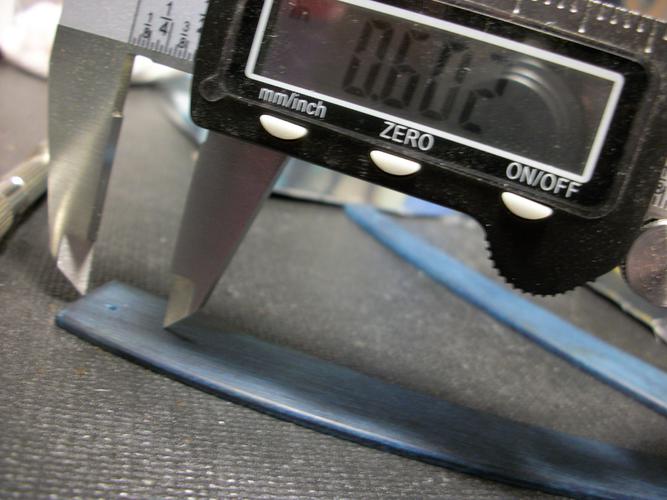
First I lined up the scale on the 0.001" thick SS sheet stock I decided on for the bolsters to gauge about how far back I wanted the bolsters to go; then used the calipers to measure from the tip of the scale to my stopping point for the bolster. I did this front and on the pivot end of both scales. Next I measured the width of tip and pivot of each scale and recorded that measurement.

Here is the length I settled on (the calipers are set in inches by the way).
Next I took 3 points: the front of the scale and the two sides and measured the thickness of both scales tip and pivot,; this is your wrap around length if you want the bolsters to wrap around the scale; if not you can skip this step. If your measurements vary some say 0.105 on the bottom side and 0.107 at the top, take the larger of the two; this will leave more of the steel hanging over when you wrap the ends over, but you will grind this excess off later so no worries!
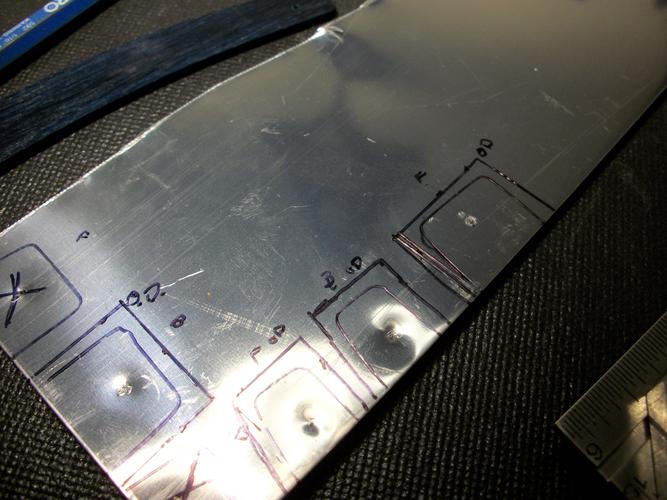
Next I used a sharpie to trace an outline of my scale ends onto the steel, then took my measurements of the wrap around from earlier and calipers and measured from the outline and marked the front and sides and used the sharpie and straight edge to connect them. Next I lined up my pin holes, marked and used a 1/16 punch to indent the hole to be drilled later for the pins. Next I took a carbide awl and scratched my outlines into the steel. This helps later with cutting b/c the awl/scratch leaves a small ridge for the disc to ride in leaving a straighter more precise cut.
Next off to the drill press, I set the press at 330rpm the lowest speed on mine, and used Norton honing oil as a lubricant (a machinist friend of mine recommended this as this is what he uses for small projects).
Next I used the calipers to lay out my pattern with the sharpie, the blackened areas are the places that will be cut out later. Once I laid out I took the awl and scratched in the pattern onto the steel. Now to cut, I put on the metal cutting blade onto my dremel, clamped a flat piece of wood onto the edge of my bench, then clamped the sheet with the areas to be cut hanging off the edge, then just follow your lines!
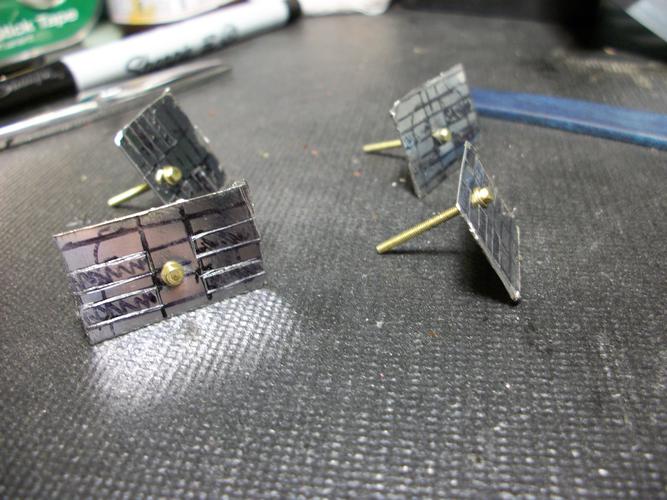
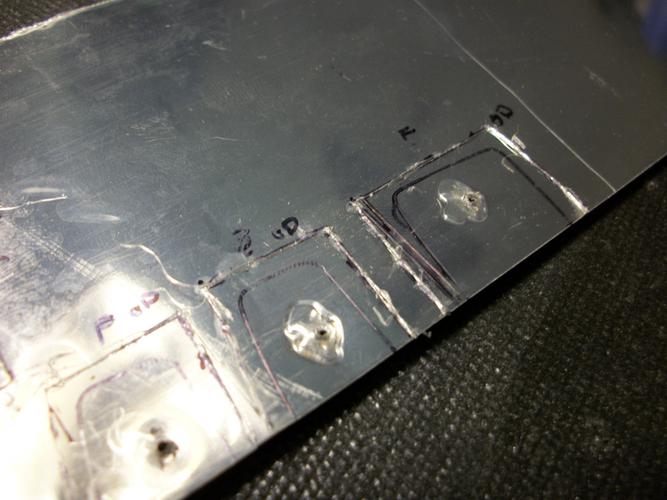
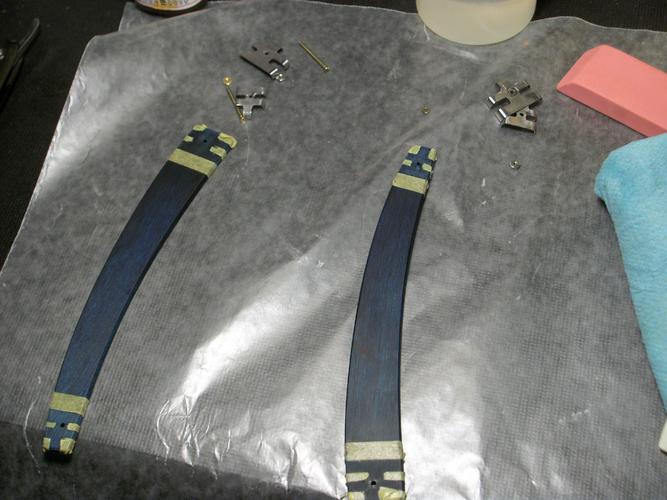
After that step I placed the bolsters in the vice and used the grinding disc to get the basic shape of the bolsters, and took then to the scales to see how the pattern lined up. Then the diamond files came out to file the final shape in. Here is the final shape; I've masked off where the bolsters end here, and do the same over the exposed areas of the dymondwood; you'll see why later.
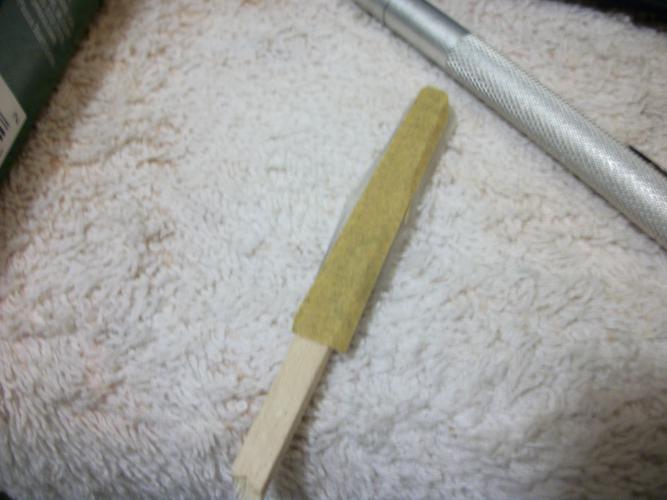
Next I used the stir stick broken in half, double stick tape, and sandpaper to sand the inside edges to 600 grit.
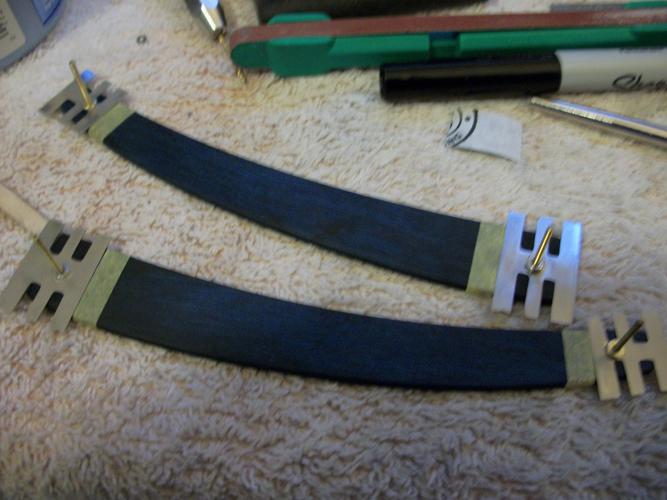
Now is just the matter of wrapping the excess around, for this I used the chasing hammer and a jeweler's anvil to lightly tap the bolsters into shape, and masked the exposed areas. In the pic below I have the bolsters removed so you can see why I masked them off...now I only have to take 180 or 220 to these exposed areas to "scuff" up the dymondwood so the epoxy adheres, this will save you from having to resand the whole shebang later, and will help w/any squeeze out so you won't have a ton of excess epoxy to sand off later too!

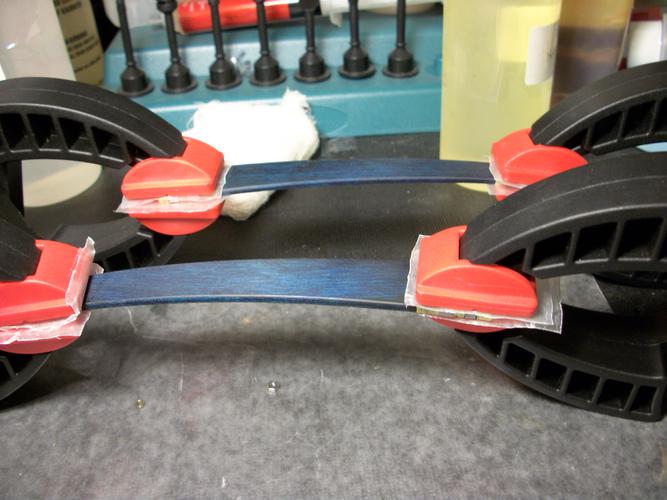
Next I put butchers paper over the tips of my clamps so nothing gets stuck together, and used a small modelers brush to brush the epoxy on; a trick here is to put some 0-80 bolts upside down (the head coming out of the bottom of the scale) to hold your bolsters in place when you place them on, then just pull the bolt out and gently clamp them, just enough to make sure they don't slide around...again, GENTLY IS THE KEY HERE!

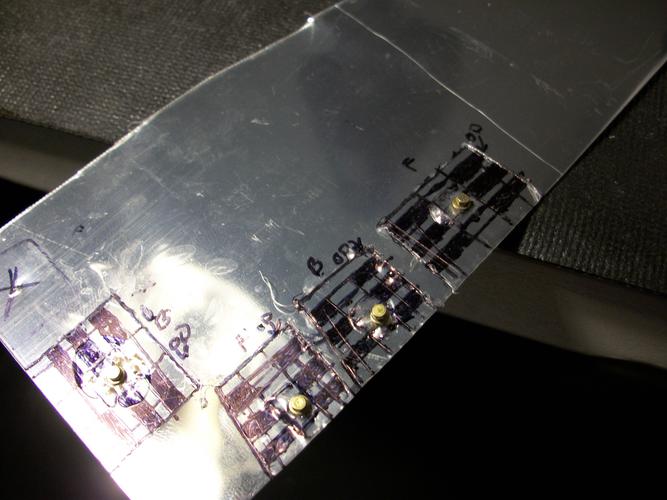
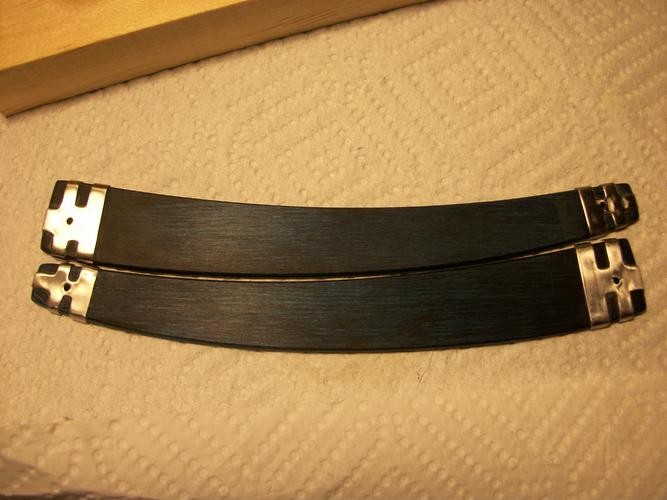
Now after two days of curing, the clamps come off along with the masking tape, then just grind off the excess overhang on the bottom sides, and sand the bolster up to 600 or 1200 grit and buff, I cheated here though... I left the tape on after the clamps came off and went to greaseless compound on my grinder to speed the whole sanding up, you can go either way it's up to you. The pic below is the finished bolsters, but I haven't buffed the scales and bolsters yet, that pic will go into the customs section when the razor is back together and ready to hone. I hope this helps and I'll be glad to answer any questions as best I can, just PM me and I'll respond as soon as possible. Are these the best in the world...not close, but I think I did ok for my first attempt at something like this. Thanks for looking, and check out the final pics coming soon!
 Mastering implies there is nothing more for you to learn of something... I prefer proficient enough to not totally screw it up.
-
The Following 9 Users Say Thank You to tiddle For This Useful Post:
BobH (07-29-2014), carrolljc (08-05-2014), criswilson10 (07-29-2014), Dafonz6987 (10-22-2015), Hirlau (07-29-2014), McBrautigam (07-29-2014), rolodave (07-29-2014), str8fencer (07-29-2014), THEBIGSNOWMAN (02-14-2016)
-
07-29-2014, 08:30 PM #2Senior Member

- Join Date
- Jan 2014
- Location
- Petersburg,Indiana
- Posts
- 1,209
Thanked: 262
Awesome work!!!!
scotishcavalir and ChopperDave like this.We have no control of what other people do or say to us, but we have control to how we REACT !! GOD BLESS
-
The Following 2 Users Say Thank You to Walterbowens For This Useful Post:
ChopperDave (04-16-2015), tiddle (07-29-2014)
-
07-29-2014, 09:44 PM #3Senior Member

- Join Date
- May 2014
- Location
- Easley, SC, USA
- Posts
- 1,861
Thanked: 480
Nice job! I love bolsters.
Some people never go crazy. What truly horrible lives they must lead - Charles Bukowski
-
The Following User Says Thank You to criswilson10 For This Useful Post:
tiddle (07-29-2014)
-
07-29-2014, 10:06 PM #4Senior Member


- Join Date
- Feb 2010
- Location
- California
- Posts
- 4,833
Thanked: 1841
You can be proud of that work. Thanks for sharing the process. I am sure it will give some members who have been thinking of doing this a great education.
Bob
"God is a Havana smoker. I have seen his gray clouds" Gainsburg
-
The Following User Says Thank You to lz6 For This Useful Post:
tiddle (07-29-2014)
-
07-29-2014, 10:42 PM #5Senior Member
- Join Date
- May 2012
- Location
- Oxford, Al
- Posts
- 1,605
Thanked: 407
I hope so, one thing I would do different is make a construction paper template first to trace onto the sheet; would have saved me two hours of measuring and remeasuring each line before making it permanently with the awl.
Mastering implies there is nothing more for you to learn of something... I prefer proficient enough to not totally screw it up.
-
07-29-2014, 10:54 PM #6
Good work and excellent instructions. Thank you for sharing.

DaveIf you don't care where you are, you are not lost.
-
The Following User Says Thank You to rolodave For This Useful Post:
tiddle (07-30-2014)
-
10-22-2015, 05:37 PM #7Senior Member

- Join Date
- Jul 2015
- Location
- Colorado
- Posts
- 540
Thanked: 79
Thank you so much for posting this! I love when someone has the know how and they decide to share the knowledge instead of keeping it to themselves... I will seriesly be using this thread when I make my bolsters!


 Reply With Quote


