Results 1 to 10 of 10
 27Likes
Thread: A really simple setup for photographing razors.
Threaded View
-
08-28-2014, 09:02 PM #1
 A really simple setup for photographing razors.
This thread is intended to be a place for tips and setups that help to get better pictures.
Initially, I'm going to just post the relatively simple setup I've made. Later I'll go into why it works and what it's doing. Hopefully, people more knowledgeable than I will also chime in.
For now though, here's my setup:
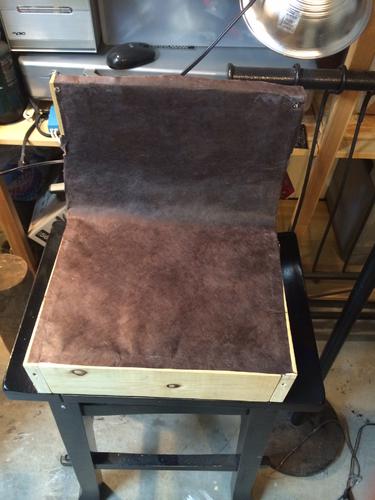
It's very simple. Some lumber, wood screws, cardboard and heavy brown paper.
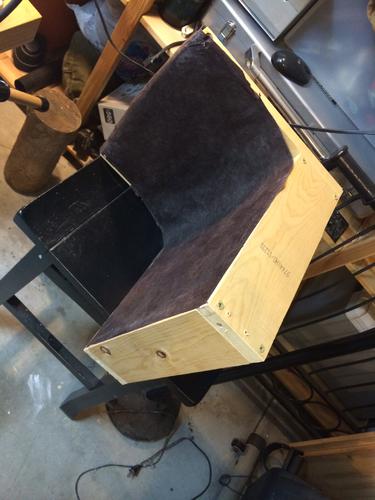
That's a side-view.
I screwed the lumber together, glued cardboard over the gaps to form a semi-sturdy base, then glued an attractive, thick paper over top of that. Originally I thought I'd use just the paper, but later on I thought it'd look better if I put a sheet of plexiglass on top. From there I've kept modifying it. until I arrived at my current setup.
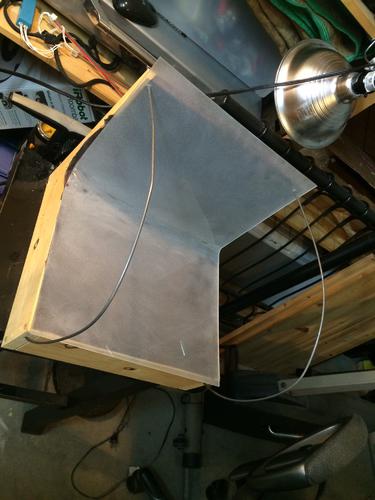
Here's the basic shape of what I'm currently using.
The surface is a sheet of plexiglass that I bent, then used an orbital sander on the back-side of. That gives it the milky-but-still reflective look.
The steel rods are to support a cloth draped over the whole thing, like so.
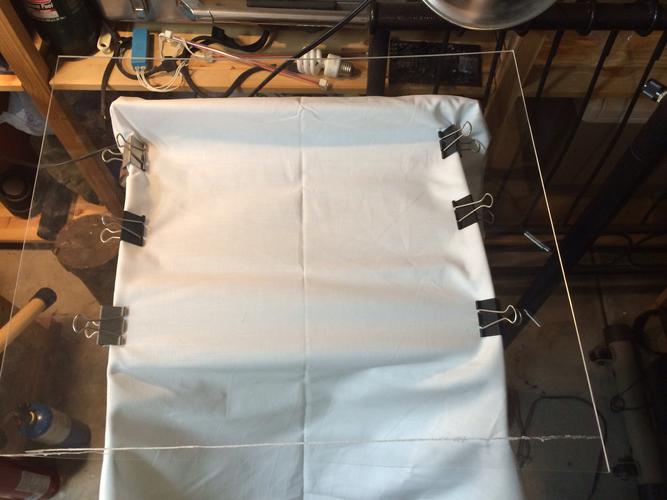
The binder clips pinch the fabric around the rods so they don't leave black lines in the reflections. The plexi on top is so I can set the lights on it.
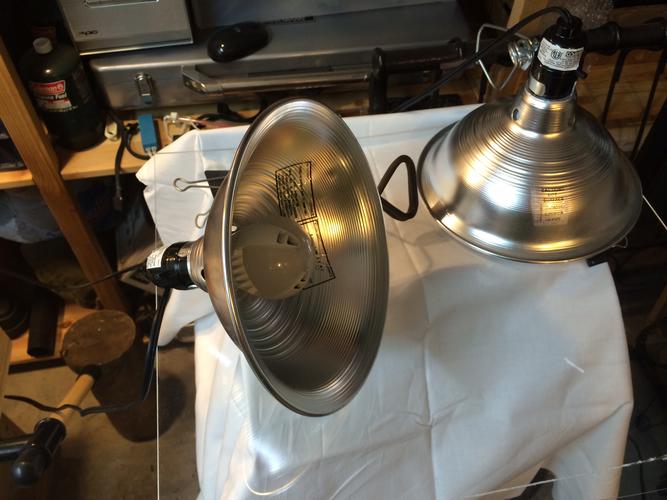
I'm using cheap clip-on lamps and 800 lumen, 6500k balanced LED bulbs. The bulbs are a bit more expensive than a CFL, but they'll last a LOT longer and they don't get even as warm as that. If you're going to follow what I've done, I highly recommend CFL bulbs at a bare minimum, because otherwise the lights will melt that plastic.
Here's the whole setup powered on:
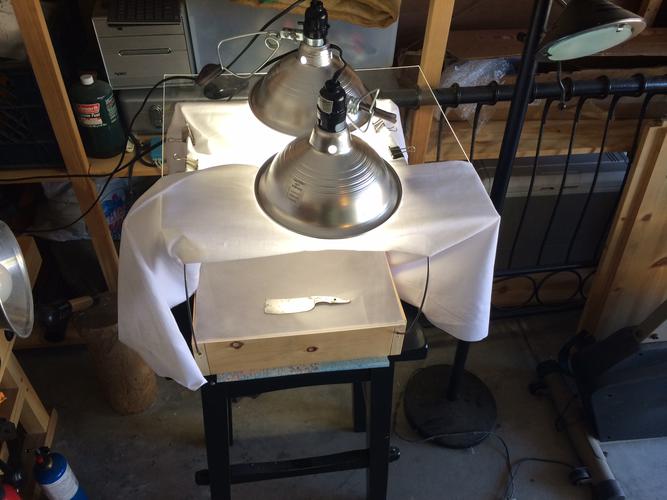
And here's a couple of razors inside there, photographed with my cellphone (an Iphone 5, but any modern smartphone should be in this general ballpark).
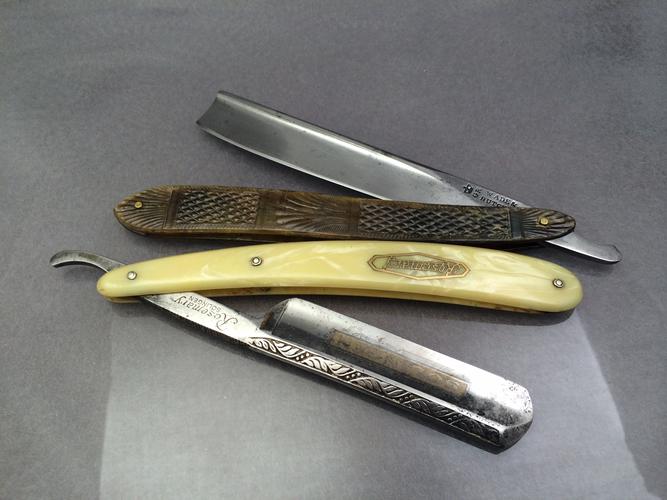
(Note, I actually had the lamps more side-by-side than lined up when I took that picture).
The idea behind all this is to control two main things:
- The lights! When I take pictures, I turn off all the other lights in the garage so that all light is coming from the setup.
- What's reflected. The 'stage' is what you directly see, but the draped fabric (a $9 yard of linen I grabbed at Joanne Fabric, but anything white'll do) is what is reflected.
Having a contrast between what's behind the subject and what is reflected on the subject is what makes the picture interesting, and it's primarily the lights that do that.
There are zillions of setups for lighting products. Many of the razors I've photographed, I've photographed purely by pulling the blinds in my office and letting the east-facing SoCal afternoon be my light source. As a general rule though, diffused lighting is better.
When I get a chance I'll try and go over some of the theory on all this and why what works, works.-Zak Jarvis. Writer. Artist. Bon vivant.
-
The Following 13 Users Say Thank You to Voidmonster For This Useful Post:
Baxxer (08-28-2014), carrolljc (08-30-2014), ErieSurfer (12-05-2016), Geezer (01-10-2015), HARRYWALLY (08-29-2014), JimmyHAD (08-29-2014), jmercer (01-10-2015), Neil Miller (08-29-2014), nipper (08-29-2014), RezDog (08-28-2014), sharptonn (08-29-2014), spazola (08-28-2014), Wolfpack34 (08-29-2014)


 LinkBack URL
 About LinkBacks


 Reply With Quote