I haven't tried it and don't have a scope like that; just thinking out loud. It very well might not actually work.
I haven't tried it and don't have a scope like that; just thinking out loud. It very well might not actually work.
I stumbled upon these videos and it makes sense. I know that winter's not over and thought that for those who are still getting a lot of snow that it might be worthwhile to give it a go. :shrug:
https://www.youtube.com/watch?v=EMAgb3QNEE8
https://www.youtube.com/watch?v=-XLO...ion_2345200321
Geezer posted about using a vintage 'Sad Iron' as a pinning station.
http://straightrazorpalace.com/works...ml#post1595792
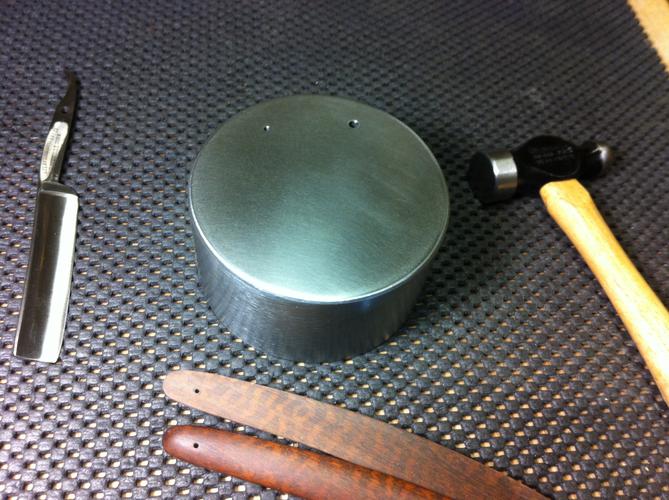
Well I happened to have one so I decided to have a go with it.
I apologize for no Before Pics but here's where I came to my senses. I'd used a 80 grit belt on my bench top sander then a 120 grit. In hindsight I'd have just started with the 120 as the 80 grit scratches were a bitch to remove; :banghead: I did use only the 120 grit on the face of the iron. :tu
Attachment 227165
I drilled a 5/64th" hole through one hole;
Attachment 227166
I then used one of my dad's old centering pieces for his lathe in my drill press to counter sink the drilled hole;
Attachment 227167
Attachment 227168
I also used that tool to create a couple of 'depressions' in the face.
I did all of the tool work Before I started to polish up the work surface! I figured that once I started using sandpaper on a hand held sander then going to my buffer that All of the holes would be 'Smoothed Over' and I was correct;
Attachment 227175
I'm looking forward to seeing how well it will work. Cast Iron will never take the polished finish that steel will (at least in my experience).
Now for a Disclaimer:
WARNING! CAST IRON IS A DIRTY METAL!!!
Please be aware that working/sanding/grinding cast iron will make Black Dust/Lots of Black Dust! Even with hand sanding! Wear proper respiration protection.
Also be ready to toss everything that you were wearing in the washer as that dust gets EVERYWHERE!!!!!!
I hope that this has been helpful. :shrug:
EDIT:
Damn it! I forgot to show how I'd ground, rounded and polished the edges to blend the sides into the flat so that a razor wouldn't be damaged. I also forgot to include the link to were Geezer Originally Posted his Idea!
Please Forgive Me!
Attachment 227179
A job done to perfection!! Step by step and a nice final product! Thank you!Quote:
Originally Posted by cudarunner
~Richard
PS. I have done some Googling and found that the hardness of these and other items like "all cast" anvils was probably made by casting against a chill. That is a piece of material much colder than the melt in which case the quick cooling causes the internal grain to be closer and harder.
I'd never come across the expression sad iron - but now I know that it's another name for a flat iron - I understand. I remember my mother using one when I was young - it was heated on a gas burner and we had a couple of sole plates (made of tin I assume) to slip over the iron plate and avoid burn marks.
Those that know me and know me well realize that I live in an apartment/well actually a duplex with a garage but the garage is filled with all of my 'stuff' there's barely enough room for my 'little' buffing station.
I do my honing at the counter top next to the sink in the kitchenette and I do all of the pinning at my multi-usage dinning room table.
I hope all get the point that space is precious Since I don't have a lot of room I have been using this to hold my pinning supplies. The steel and now cast iron pinning blocks are just kept on the floor out of the way.
Anyway here's the 'Kit';
Attachment 227775
Attachment 227780
Attachment 227778
Attachment 227779
I just used a couple of old inexpensive fishing boxes and made my little kit. Holds enough supplies for me and it's small enough for here at the Boars Nest.
Attachment 227782
Okay. here's one of mine. My home was built in 1885. A first floor bathroom, Cast iron clawfoot had lead in the porcelain enamel that was leeching out and that wasn't going to do for baths for my son- so I ripped it all out. I have hydronic heating, and wanted to save space by deleting the radiator in this bathroom, and yet- the floor is 6 inches of concrete and the hardest tiles you've never seen laid directly into the cement bed. (They make porcelain look like pergo) So to trench through them (the concrete beneath is easy by comparison- especially as it's not Portland but rather the much better and softer Lime cement) and lay pex al pex in a radiant loop for in floor heat I had to get crafty. So I took a cheap dewalt 15 amp 7" grinder and tig welded a stainless steel blade shroud and foot, and fabricated a volume control valve and jet ways inside the shroud to deliver water to the blade and made a water cooled concrete/ tile grinder. No dust in the house and got the trenches. Attachment 227943
Nice wet saw mate!
Good thinking and creativity
:tu
Thank you, sir.
Yesterday I spent my kids inheritance on my combination Retirement/Birthday to Myself which is a motorcycle. Don't worry they can sell it after I'm dead to pay for the funeral and hopefully there will be a little left over for them. :w
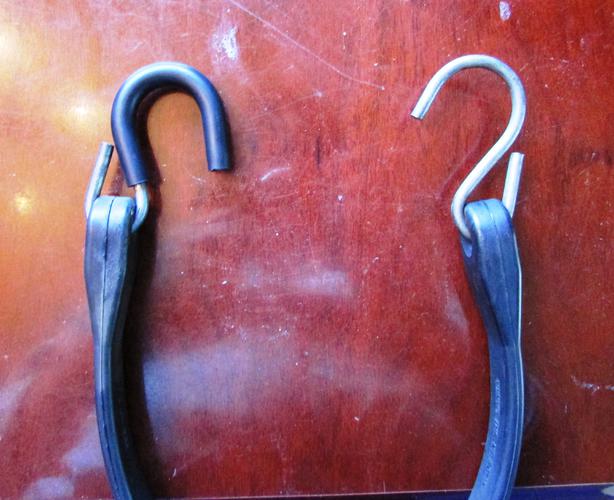
Anyway it has lots of chrome including a rack at the back and since on occasion I might what to ride to the store and pick up some barley pops or if I took a trip it would be nice to have some elastic hold down straps. However I didn't want to take a chance and scratch the chrome. But the only ones I've seen have the metal just painted with a little rubber 'thingy' to cover the end so I made my own with common heavy duty rubber hold down straps.
I used common automotive vacuum hose then put plenty of liquid dish soap in very hot water then placed the hose and allowed the rubber to become pliable. I then put a light coat of the liquid dish soap on the metal 'hook'.
While I wouldn't say it was 'easy' it wasn't 'hard' however as the hose progressed to where I felt it should be to protect the chrome I found that I need to use more than just 'finger tools' so I applied some electrical tape to the jaws of a pair of pliers.
Here's how I modified the hold downs:
One with a rubber cushion and the stock metal:
Attachment 236410
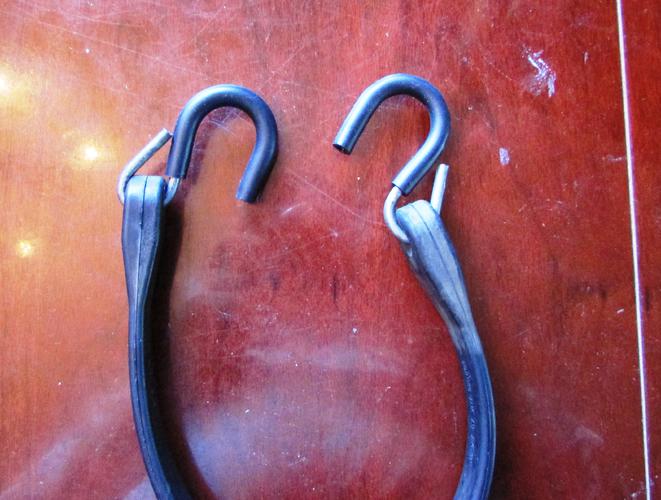
The completed modification:
Attachment 236411
I left about a 1/4" 'extension' at the end to try to make sure that the metal end didn't 'bite' anything.
Thanks for looking! :tu
I know this is kind of the opposite of the purpose of this thread, but it will probably be helpful.
My father and I used to ride our motorcycles constantly. Well, as frequently as weather in WI would allow. We had a system down pat for mounting stuff to our bikes. Which is important, because you don't want to hold your luggage onto your bike with one hand at 80 mph... Not that I'm talking from experience.... ANYWAYS, we would always have a bunch of bungee cords on hand, at all times. Enough so that you could give out a dozen and still pack your gear tightly. These are similar to what we used, rubber coated hooks and never scratched a thing.
http://www.amazon.com/gp/product/B00...pf_rd_i=511390
Well I actually didn't 'Modify' much I just trimmed the original packaging so that it would fit into a vintage handheld 'file cabinet'.
Anyway I didn't have a decent way of storing my sandpapers so I came up with this:
Attachment 236695
Attachment 236696
Gasoline works very well to slip rubber over metal and has the added advantage of once it dries, (a few minutes) the rubber is glued on. Just squirt a bit inside and slip it on, they become very slippery, and you have a few seconds to adjust the fit, if needed.Quote:
Originally Posted by cudarunner
Years ago, when I worked in a Motorcycle shop, this is how we replaced rubber hand grips. You have to cut them off, once dry.
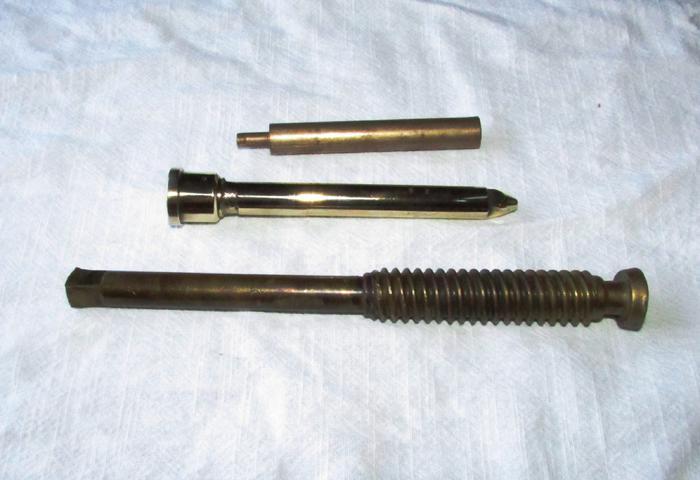
Well I'll be replacing the rear tire on my motorcycle here in a few days and I thought that I might need a little brute force and ignorance to get the shaft free. I don't own a dead blow hammer only a couple of rubber mallets but I had some brass 'punches' (brass shafts from large valves) that were my dad's so I ground the small end of one so that it will fit nicely into the counter sunk hold from when the shaft was manufactured so as not to damage the threads and make sure the punch didn't wander from the center.
The modified 'tool' is in the middle/you can see from the bottom 'punch' that dad had used it.
Attachment 241213
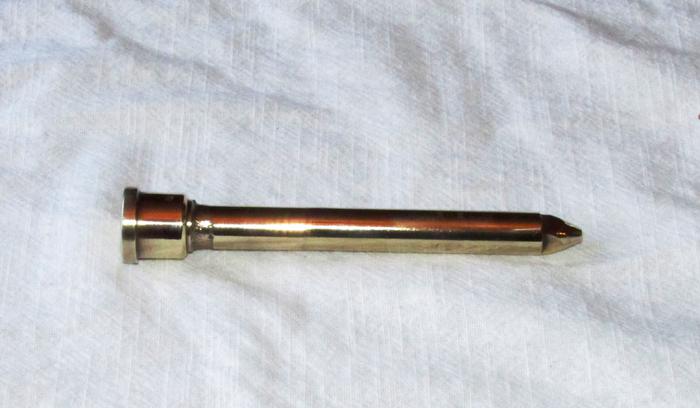
Here's a better look at the one I modified. I'll probably only use it for similar tasks.
Attachment 241214
Yes I polished it up a bit/it'll only be 'NEW' once.
Here are a few tools I had to modify for doing wire inlays. Old shaving brush handle with cut down x-acto handle inserted and an x-acto blade ground down and sharpened to cut the slot for the wire and a brass rod filed to a taper to use as a push rod to adjust the wire. Eventually I am going to spend a little more time to make some better tools, but since these work new ones can wait.
Attachment 241216
Custom Dremel Bit holder
I had been using a few of the 2X4 inch plastic boxes, (with holes drilled on the top) as Dremel bit holder, for bits I use frequently. Problem was they caught anything that got near them and went tumbling bits across the bench.
One day I was at a garage sale and saw a solid walnut board drilled with a boat load of 1/8 inch holes, a Cribbage board and the light bulb went on.
It fits perfectly on the side of my wooden tool box, that holds most of my razor hand tools. The holes are 1/8 inch and drilled deep enough to hold the bits securely.
I still keep extra, duplicate bits in plastic compartmented boxes. This board keeps the most used bits readily visible and at hand and I am not even using, half of the holes.
Best of all it was 2 bucks. Now, I see them all the time, at garage sales and thrift stores.
Attachment 241903Attachment 241904Attachment 241906Attachment 241907
I use a length of sisal rope tight between two vises with metal polish rubbed on there to polish inside the barber notch. Just put the notch on the rope and rub back and forth. Low tech but it works, especially if the notch is too small for a dremel wheel.
Attachment 242615
A custom stanley 307B. was a 6 oz. Ebay buy $12 shipped new old stock.
Attachment 242741
I ground/polished the head, 4.5 oz now and smooth, then shortened the handle to 10".
Also have a hunk of D2 on the way for a pinning anvil I will add to this post later. A small round I will drill for pin stock and polish up, heat treat ect. I saw one similar in a video somewhere.
Last week a new OS&Y valve showed up on a pallet at work.Quote:
Originally Posted by cudarunner
Guess who called Dibbs on the old one.....
Hey Roy was I the first one to use that brass drift? It was the perfect tool in my opinion, I,,m going to have to have one of them myself!!!! Tc
I have a set of different sizes. One of my bigger ones I use for knocking the axle out of a Harley (or anything else) to keep from damaging the threads. I also have a big brass headed hammer.Quote:
Originally Posted by tcrideshd
Well.... new guy has reinvented the wheel hahaa
Saw a pinning anvil in a video a while back and thought, man thats pretty clever. holes drilled for pins and all. I didn't realize they were sold at SRparts.com for $20 lol live and learn. Im into mine for $18 with the shipping.
3 1/2 x7/8" D2 drilled for 1/16" and 1/8" pin stock, awaiting heat treat. Attachment 242965
Quote:
Originally Posted by AKmik
I use a 9" piece of 1" X 1" key stock I drilled 1/16" holes in different depths, a hole for a 3/32" pin (rarely used) plus a hole to catch pins I knock out of old razors.
Sorry about the late post but yes indeed you were the first to use that brass drift.Quote:
Originally Posted by tcrideshd
Hmm... never tried the gasoline trick. In our shop, we just used a compressed air nozzle and put it against the hole in the end of most grips, thumb over the other end of the handlebar, a bit of air and that grip would balloon up and slide right on.Quote:
Originally Posted by Euclid440
The other way I'm familiar with is grip tape and grip fluid used for rubber handles on golf clubs... Those grips will NEVER let go!
Regards
Kaptain "The things you learn... after your retired" Zero
Nice job there!!Quote:
Originally Posted by AKmik
If you drill, with a larger bit, up through the holes from the bottom to about a ¼" from the top, the pins can drop free instead of wedging after the first couple pins.
~Richard
It figures that some corporation took a backyard solution and turned it into a product sold for profit.Quote:
Originally Posted by AKmik
As I've said, this wasn't my idea (Got it from Geezer) here:
http://straightrazorpalace.com/works...ml#post1595792
Here's my way of doing it/see post #83:
http://straightrazorpalace.com/works...ors-etc-9.html
Where do they sell it? I like the looks of that block! Tc
Yep, good idea for our niche market. I tell you what I would have had a dozen for sale if they weren't being made. But , with them available for $20 I can't even think about it.
Great idea Geezer , I think I will drill a larger hole for disassembly. I have not heat treated it yet. I have a small 20lb bench anvil I have been using , this one will go on a new assembly bench I am building so can still drill and mod this one. I did coat it with anti scale and get it read to heat but its in stand by for now.
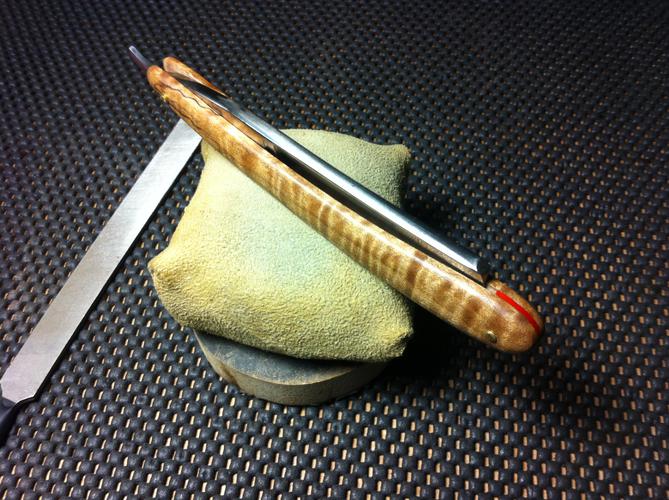
Here's another useful scrap made hootenanny . Just a little wrapped sand bag glued down to a piece of scrap hard board. I have a few of these in the shop. Very handy when you want to work on something small and odd shaped, not in a vice and without scratching. gets your work up off the bench a little. This one is my dirty one, I post these up because I found myself filing the tops of my clipped pins on mine yesterday. This one is a Crown Royal bag, fake suede.
Attachment 244698Attachment 244699
And my clean pad is a piece of soft leather and plywood, no filing here. This one for scrimshaw and other clean work. The soft sand bag holds irregular shapes nicely for up close detail type work.
Attachment 244700
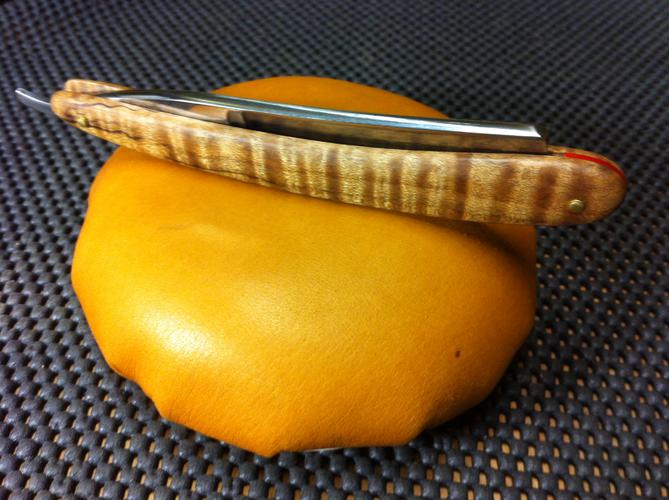
Razor is a Northfield Cutlery I rescaled.
The sandbags are a great idea, yes there are absolutely times when I need that. I like the look of that razor too!
A 9X12 in piece of 6mm (1/4 inch) Craft Foam from Wallmart, or any craftstore, about 2 bucks.
Protects the razor and keeps it from moving. Plus you can bury the blade in the foam and sand or polish right to the edge, with no danger of cutting yourself.
I don't know if this is a modification, let's call it repurposing. An old knife sheath is now a DE cover. I can even wear it on my belt!
Attachment 244789
I guess that I am getting old as I let my good friend Ski talk me into installing an electric garage door opener so I didn't have to get off my bike to open the damn door.
Now the portable controls to open the garage door are designed to be mounted on the sun visors so they are completely out of the elements. That really doesn't work on a motorcycle. However since I have saddle bags I figured I could attach a control in there and have it fairly safe from the elements. I could just reach back and slid my hand under the leather cover and hit the button.
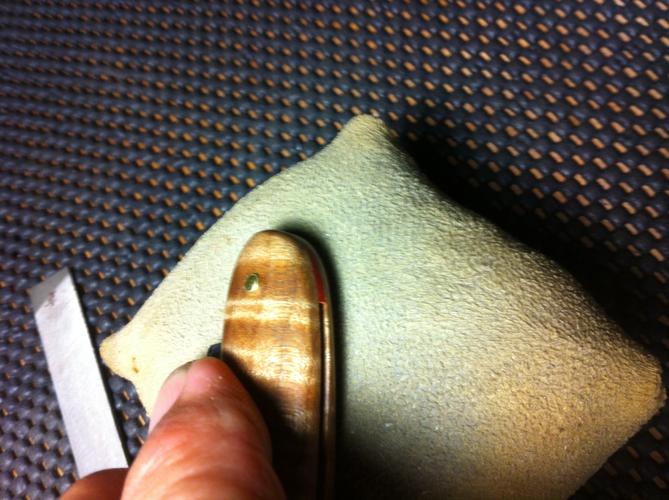
However I thought that a little insurance would be nice so I made the control 'Water Resistant'.
I used my vacuum sealer to form a bag just big enough for the control then I cut a slice on One Side of the top of the bag. I used acetone to clean all the plastic bag contact area and the metal from the control. I then used some silicone to seal all around the slice.
I let it set for about 24 hours and then used the vacuum sealer to close it up. NOTE: There wasn't enough plastic bag at the bottom to see if the machine would suck the air out so I just sealed it up.
While I wouldn't want to drop it in water to test, I think it should hold up.
If it wasn't for needing to use the metal hook I would have just made a bag and vacuum sealed it in/well maybe not completely but most of the air would have been evacuated. :shrug:
Before sealing the metal hook with silicone and sealing the bottom of the bag:
Attachment 246462
Before sealing with silicon:
Attachment 246463
Silicone sealed and cured and the bottom of the bag sealed:
Attachment 246464
I rode to Ski's today to get my ass kicked shooting pool and upon returning home the remote worked perfectly! :y
You could seal the bag and stick some Velcro on the back of the bag and where you want to stick it, so the integrity of the plastic bag is intact.
I have had a remote for the gate and the garage door, Velcroed to the side of my counsel on my Explorer, for a few years now, down below my leg and in front of the seat, where it can’t be seen, but is easy to get to.
I've thought about doing just that! :bow: However I figured that with the metal hook the remote would probably stay in place better IF I were to 'Be Less Than Careful' when adding things to the saddle bag.Quote:
Originally Posted by Euclid440
With my luck I'd knock the remote off and have to get off and then have to dig down to find it. :banghead:
I dislike remotes especially the one for my truck on the key. I have unintentionally unlocked my truck many times from inside the house by just bumping it in my pocket. I would use my key without the remote but then I would have to start the truck within 12 seconds of unlocking the door or the alarm goes off. I keep waiting for the batteries to go lower so it only unlocks from 10 feet or less!
:tuQuote:
Originally Posted by 32t
I had to unplug the motor for the mechanism as when I was working on making the bag for the remote the damn door would start to open or close!:rofl2::roflmao :w
:D,,,,,,,,,,,,,,,,,,,,,,,,
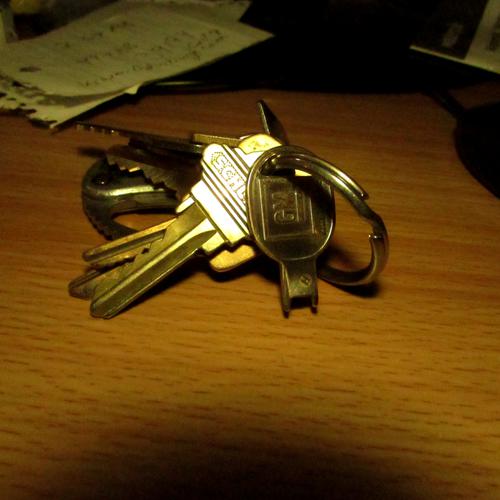
My first lighted loupe was a plastic one in an aluminum frame with the two hole cover for the batteries. Well it only took a couple of battery changes before I lost the thin aluminum tool to remove the cover so I'd use two 1/16" pin punches to remove and install the cover.
I found a heavier duty loupe made out of metal so I retired my original. I needed to change the batteries so after I was done I figured I'd better find a way to keep from losing the two pronged tool.
I decided it would be best if I just made a different one. I 'think' I saw something similar somewhere here at SRP to unscrew the plug in the handle of a DE so this isn't an original idea.
Here's my solution:
Attachment 247635
Attachment 247636
Attachment 247637
I've still got the original in the storage case, maybe I'll find another old key and make another one just in case. :shrug:
Thanks for looking.
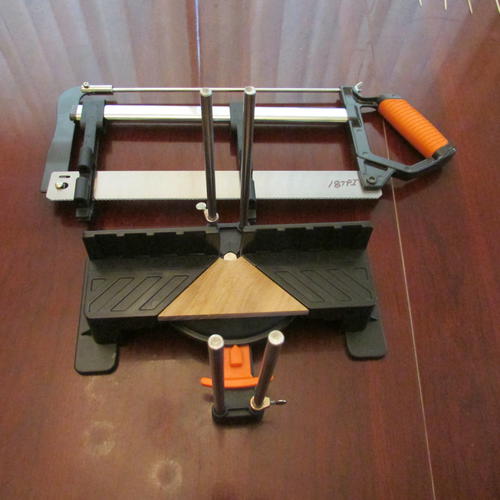
While I have an old style wooden miter box, I didn't like trying to cut acrylics and such for making wedges for scales. The teeth on the crosscut saw were pretty coarse and hard to work with. I tried using a hacksaw but it wobbled in the slots meant for the crosscut saw so I went looking.
I found this:
https://www.amazon.com/gp/product/B0...?ie=UTF8&psc=1
The base is plastic but it's not going to see any 'Heavy Duty' usage. While the teeth were a higher tooth per inch I ordered the 18 TPI. It cuts really nice!
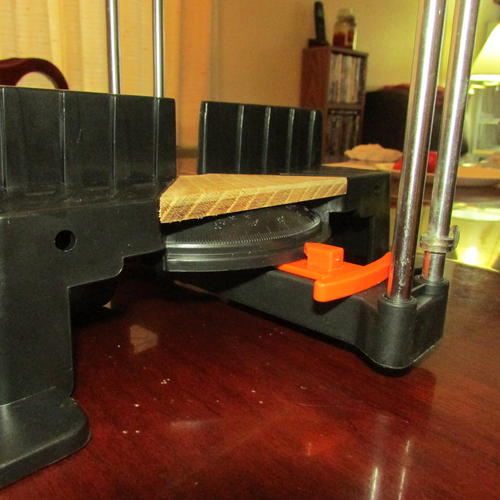
HOWEVER even with gently sawing when I cut a 3/4"X3/4" piece of Inlace Acrylic at the last stroke it chipped out at the bottom. That's because there isn't any support under the blade. So down to my buddy Ski's I went. Here's what we came up with. A piece of white oak cut at a 45deg angle then cut to fit.
Attachment 248908
I also sanded it down to just shy of flush. I can put a 5 thousands feeler gauge under a straight edge on one end and barely under the other but a 6 thousands won't go so I sanded it pretty close. There are many, many cross braces underneath and our initial idea of bolting the pieces in place wasn't practical so I used Barge Glue and I'm pretty confident that the pieces aren't going anywhere.
Attachment 248909
Thanks for looking.