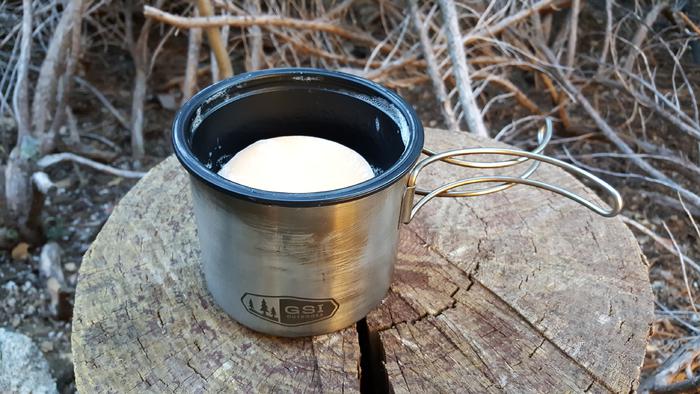
This is luxury camping, hot lather in the wild. My camping cup also serves as a scuttle. The plastic
insert is a microwave mac and cheese container I saved to make this gizmo. It works great!
Attachment 248937
This is luxury camping, hot lather in the wild. My camping cup also serves as a scuttle. The plastic
insert is a microwave mac and cheese container I saved to make this gizmo. It works great!
Attachment 248937
Just so you don't drink from your scuttle!
As I've posted my newly acquired table top band saw is adjusted (Thanks to my Buddy Ski) and works nice. However the Made By the C. H. Ina Company didn't provide a storage place to keep the small Allen wrench that's required to make adjustments for the blade.
SO--a small bit of vacuum hose, some Barge, some painters tape to contain where the Barge would be applied, a little time for the two surfaced to dry, apply the hose to the machine, Press for a minute and Viola! Handy storage. Why the designers didn't include something like this is beyond me/maybe it would have cost a 10th of a cent more so there would be less profit :shrug:
Attachment 249461
Attachment 249462
I posted about my self given Christmas Present for this year here;
http://straightrazorpalace.com/works...ml#post1687757
I'm waiting for the stablizing solution to arrive (two more days) so in the meantime I decided to not actually place the wood or whatever directly in the chamber well at least if I can't help it. Here's my solution, I took a 7" wide by 3" deep aluminum cake pan, drilled two holes and used some 1/8" brass rod to make a handle. I"d tried to use some acid core solder to make a 'bump' that wouldn't clear the holes I drilled but I wasn't happy with the results so I heated the ends of the rod till they were red and then plunged them in cold water and then inserted the rod into the holes and used vise grips to bend them.
I'm fairly happy with the results:
Attachment 251724
Attachment 251728
I really shouldn't post this but I will.
First and Foremost! Always Use Proper Eye Protection when using Any Air or Electric Powered Tool or Any Other Device Which Could Cause Injury!
I keep my Safety Glasses just inside the door to my garage:
Attachment 266552
It all started out innocent enough; I decided to clean up the Boars Nest :dropjaw: and in the process I took the top off of my toaster and removed the crumb tray from the bottom so I could run them through the dishwasher and shook it out over the kitchen sink. However I could see that there was lots of debris left inside so I took it outside and then grabbed my Harbor Freight Blow Gun with the 2' extension to remove the crud.
While I was blowing the crud out the extension pivoted and when I tightened it it went past center. Well being anal as I am I decided to fix it.
So I took the extension out and cleaned the threads up, but then I noticed that the extension threaded into what looked like some kind of connector. So I removed the connector.
I'm sorry for the lack of pictures as this post is an afterthought. With that said, take a look at these pics.
Here's the website picture of the blow gun:
Attachment 266550
Now here's where the connector is:
Attachment 266551
That isn't really a 'Connector' what it is in reality is a 'restrictor valve' to probably please OSHA. While the extension is a little less then 1/4" ID there is a hole in that 'connector' that's about 3/32" + or - a bit.
SO! I removed the restrictor valve and placed it in my drill vice and used a 1/4" drill bit to improve the 'air flow'. The valve is hollow at the male threaded end but the restrictor hole is in the flush end.
I reassembled using Medium Blue Loctite to hold the new and improved restrictor in place and JB Weld to hole the extension in the position I wanted.
To say that the Air Flow at the tip of the nozzle was increased would be an understatement. Before it was like firing a 22 long rifle pistol and then firing the same pistol in 357 MAG.
I hope this will be of some help to some of you.
Work Safe My Friends!
What you had was a pressure limiter. It's job is to prevent blowing bubbles in your blood stream,should you bump the nozzle against your skin to shut off the flow. Your skin would not see the 150psi, but a fraction of it.
JMTOTP. ~Richard
Yup, I have heard of guys getting killed, playing grab a$$ with un-restricted blow guns.
You really don’t need that much pressure to blow most crud off.
Do be careful with it, especially if you have kids or grand kids. Everybody likes to play with an air nozzle.
While in my 64 years I've never heard of anyone being harmed by a air nozzle I suppose that stupidity will always conquer. To me it's like the warnings on Hair Dryers--Do not use in Bathtubs. Common sense seems to be a diminishing thing these days.Quote:
Originally Posted by Euclid440
Anyway it will fit right in with the other blow guns that I've had since the 70's as they don't have the 'Restrictors'/'Pressure Limiter' or such (All came from the factory that way).
We had this issue at work, well OSHA had an issue...
One simple remedy is to cross drill the tube. This way, if you cover the end of the tube with you palm, air can escape. If there isn't one, the theory is you can puncture your skin with air pressure.
Although, you don't have to worry about OSHA. If we didn't have to avoid getting fined (again), we probably wouldn't do anything about it.
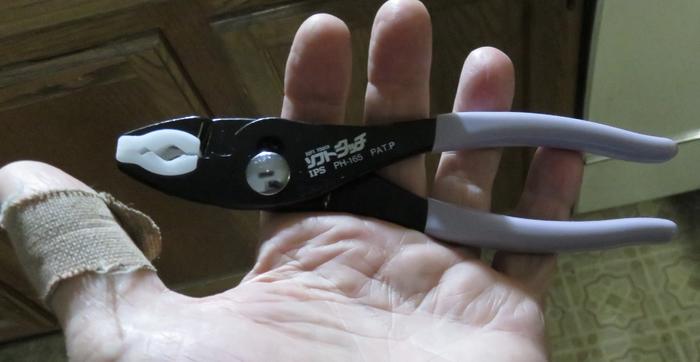
Ever have a time when you needed a pair of pliers or Channel Locks that needed protection on the jaws so you didn't put marks or scratches on a chrome bolt or such?
I have always had a 10" pair of Channel Locks with about 3 layers of shrink tubing on them to do such a job, especially my last occupation. I would use the same size shrink tubing by shrinking one, then another the same size over it & a third piece. I get emails from Stew-Mac, the guitar people & they are always coming out with something really cool. I got an email the other day about some pliers they now sell with some replaceable nylon jaws, so I got me a pair. They cost $14.95 & are well worth it. I was going to get a set of the replaceable jaws also but they weren't available yet. I have already had to use them on a vintage Bang Olufsen stereo receiver in which a 1/8" billet aluminum part which holds the speaker jacks & pivots up for ease of connecting the speakers, was slightly bent. These arrived Saturday & I tried them & they worked great, not scratching the black paint.
Here's my Channel Locks I modified years ago at my last job.
Attachment 270385
The new Stew Mac pliers with replaceable nylon jaws.
Attachment 270386 Attachment 270387
I needed to R&R my front tire on my Harley so the brake caliper needed to be removed. In the past I'd just loosened the master cylinder's cover and used my fingers to press the piston back a bit but this time I needed to do more that that. I have the chrome and gold Ride to Live Live to Ride trim and I didn't want to bugger it up when I used a C-clamp so I made a modification to one of my C-clamps and it's now a specialty tool.
I cleaned the surface of the piece that's on the end of the threads up with acetone and then sanded and buffed the surface. I used a socket that was just slightly larger in diameter and traced the pattern on a scrap piece of 1/8" leather. Then a thin coat of Barge contact cement which was allowed to dry and a second coat was applied and when dried the leather was clamped well and allowed to setup for an hour.
Attachment 272987
Attachment 272988
I will confess to not planning far enough ahead as after the leather piece was secure I went ahead and cleaned up the threads really well, I also straightened the rod used to tighten and use some Kroil Oil to de-rust where the ball turns along with the female threads in the C-clamp and once well de-oiled (except for a light coat of Ballistol in the ball area) all work great!
So it's now stored away from the other C-clamps ready for it's next use on the brakes of my Harley. :tu
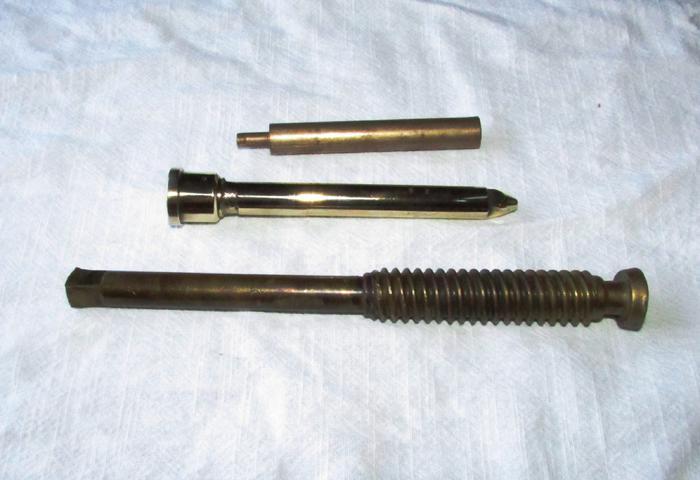
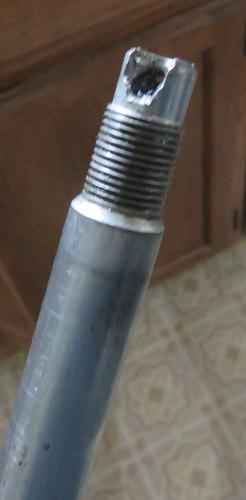
This post has stuck with me and I got a couple of brass stems from some valves that got replaced at work. Just got them home today. Didn't have a ruler handy so the spoon and flashlight are for reference.Quote:
Originally Posted by cudarunner
The one is a little on the large size.:D
Attachment 299585
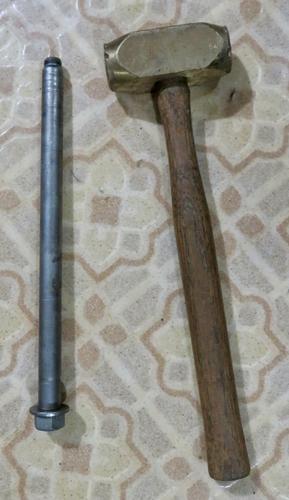
Tim, I got out one of my service manuals because I know it says it in there somewhere's but I can't find it right now. They say to always put anti-seize on an axle before putting one back in. I've had them where the axle wouldn't come out because water gets in there from washing a bike, rain or moisture & so on. That way the next time you have to take the wheel off, the axle will come out easily. I have an old axle I use that was damaged on the end & another one to show what happens when one won't come out easily.
Attachment 299586 Attachment 299587 Attachment 299588
I also have a set of brass punches but the brass hammer & ground down axle in the 1st pic is what I usually use. The other 2 pics are of a damaged axle. Then if one is much more difficult, I use the same hammer or another large hammer & a brass punch. Put some anti-seize on it when you go back together & it will be much easier next time. BTW, you can see Harley makes the axle smaller at the end just for that reason. I. have always put the nut on flush with the end of the axle & tap it to get it moving, then remove the nut.
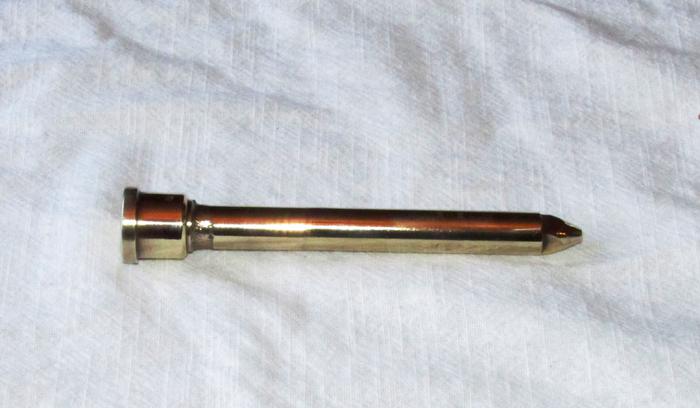
I don't have an axle to remove at the moment but I have always liked brass punches and the idea of using valve stems to make them appealed to me.
Here ya go. Read #3.
Attachment 299589
Of course any brand will work.
Don't know if I will ever own a bike with a drive belt. Except to drive the generator.
Those swingarm bolts can be a pain too. I have a tool that goes in my air-hammer that works for axle and swingarm bolts.
Some PB Blaster penetrating oil.
Usually come right out unless it has been out in the weather. Changing bits and hammering back and forth! :banghead:
I can see you on a service cycle, Tim! :DQuote:
Originally Posted by 32t
My '03 fXDWG is the newest bike & the only rear belt drive I'll ever own. I got it because it was the fastest way for me to ride at the time. My shovel was all in pieces, & I mean all the way down to the crank. Now i have a 2nd shovel I need to finish. First shovel still in pieces.
Those swingarm bolts................same thing, anti-seize.
:OT
Attachment 299597
:D...........
Yup. A little back and forth with that one! :cool:
Yeah Tom, those air hammers are great for different things. I'm glad I have mine. I have the chisels for it but I believe I have one that is flat on the end like a hammer head.Quote:
Originally Posted by sharptonn
My bed side lamp bit the dust, I used the stand to make a solder station. It works great.
Attachment 300732
Quote,MisterClean: My bed side lamp bit the dust, I used the stand to make a solder station. It works great.
:tu
Such type attachment, if I didn't use it right away like Mr.Clean did I'd also save 'em for some type of use needed for later.
Nice repurposing Mr Clean.
Ingenious..
Looks like something we could all use.
Great job Freddie!
Pete <:-}
I like it.!!
So...you sleep in in the shop, Freddie.!? That's die hard..!:rofl2:
I know a few people myself included that you might say it the other way around and their shop is in their bedroom.Quote:
Originally Posted by outback
I'll have you know that I resemble that statement!Quote:
Originally Posted by 32t
Geezer
And a nice little shop you have!Quote:
Originally Posted by Geezer
Not for razors, but maybe I’ll use it on brush turnings.
Been waiting for a local supplier to restock captive ring turning tools for a few weeks now and am running out of time with respect to a project I’m doing.
So, make my own is the option now.
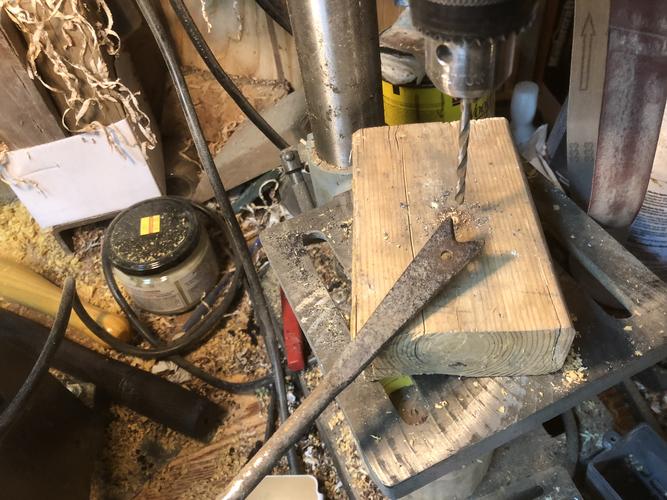
Started with an old school dandelion pulling tool and drilled a small pilot hole, slightly off centre.
Attachment 301713
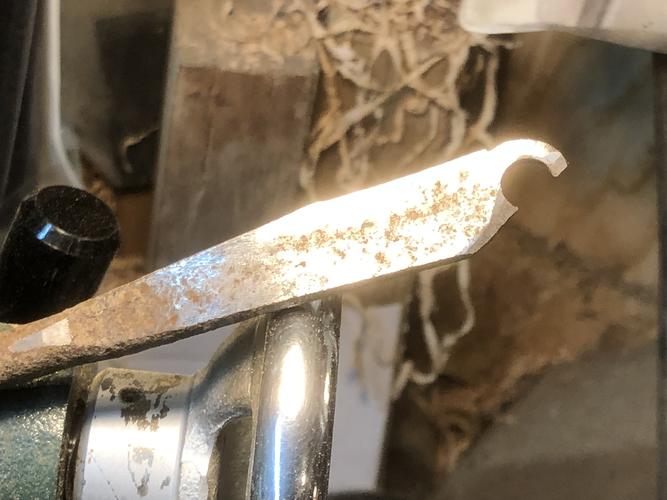
Stepped it up to a 5/16 hole and removed half the outer material and shaped/sharpened the required profile.
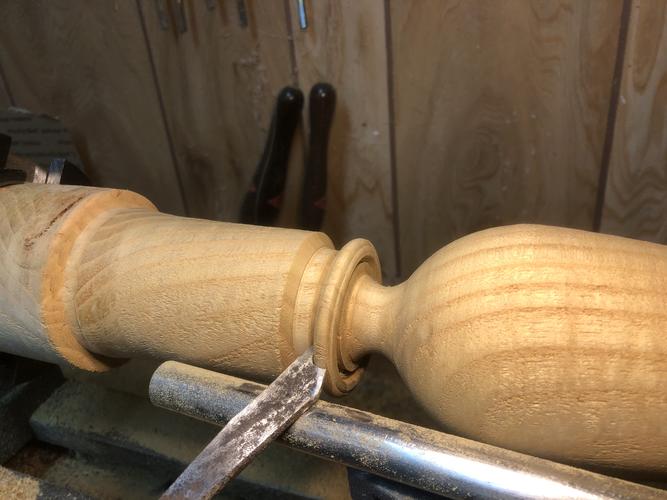
The idea is make a bead of the desired rad with your spindle gouge, then come in from the sides, bit at a time on either side with this and chase your circle around till you undercut and meet in the middle.
Attachment 301714
And it works quite well.
Attachment 301715
Attachment 301716
Attachment 301717
In my haste to test, I failed to sand and finish the outer ring prior to full separation as is recommended. Luckily there is enough stem on this goblet still for me to remove the first and make two more, but stop short of off to get them perfectly round and smooth.
Just sharing an idea that worked gents.
:chapeau
Interesting tool Mike
I don't think that I would like a ring like that on a shaving brush.
Fair enough Tim, maybe just goblets and baby rattles,,,
:tu
I am super intrigued. I’m tuned in for the rest of the story.
Bounced it over here for the finish Shaun..
https://sharprazorpalace.com/convers...ml#post1860494
Cheers.