
Results 1 to 10 of 18
 25Likes
Thread: Drilling and Pinning New Scales
 LinkBack URL
 About LinkBacks
-
02-26-2015, 04:33 PM #1Junior Member

- Join Date
- Sep 2014
- Location
- Houma, La.
- Posts
- 15
Thanked: 3 Drilling and Pinning New Scales
Hi;
I bought some really nice scales on the "bay". I am going to put them on blades that have some rather warped scales. My question is: I do not have a vice or a drill press. I do however have a Dremel with all the bits, a small jewelers ball pein hammer, and a cordless drill, with all the bits (sounds like the box on "Chopped") .
Would love to hear all advice and links to drilling and pinning as I don't want to screw up the scales or crush them. They are not to fragile, like MOP, or old and brittle like Bakelite. I thank you
-
02-26-2015, 04:53 PM #2Senior Member

- Join Date
- Feb 2012
- Location
- West Midlands, UK
- Posts
- 1,263
Thanked: 360
It's very important to ensure you drill straight in both planes - and that both scales are matched. I always drill both scales at the same time when they are taped together. If you don't have a drill press you will just have to do it by eye - maybe you can get a small clamp so that at least you are using both hands on the drill.
Geezer likes this.My service is good, fast and cheap. Select any two and discount the third.
-
02-26-2015, 05:21 PM #3Senior Member

- Join Date
- Jan 2015
- Location
- Kentucky
- Posts
- 343
Thanked: 64
Drilling the hole straight in both planes is critical as UKRob advises. I would think that you should be able to tape the scales together; attach them to a board, plank, 2x4 via C-clamp or tape them if you must (horizontal plane); carefully measure and mark your hole location; center punch the hole location; and carefully drill the hole making sure that the drill is vertical (vertical plane). The old carpenter's rule applies here: Measure twice and cut once. IE for you it will be: Measure twice and "Drill" once. Good Luck!
Regards;
Lex
-
02-26-2015, 05:54 PM #4Junior Member
- Join Date
- Sep 2014
- Location
- Houma, La.
- Posts
- 15
Thanked: 3
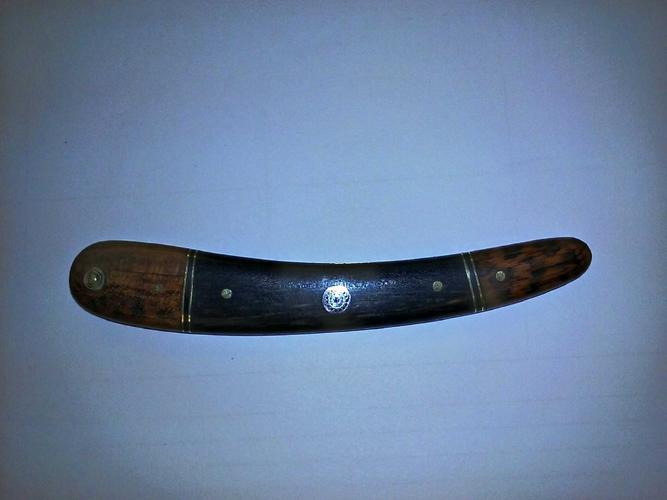
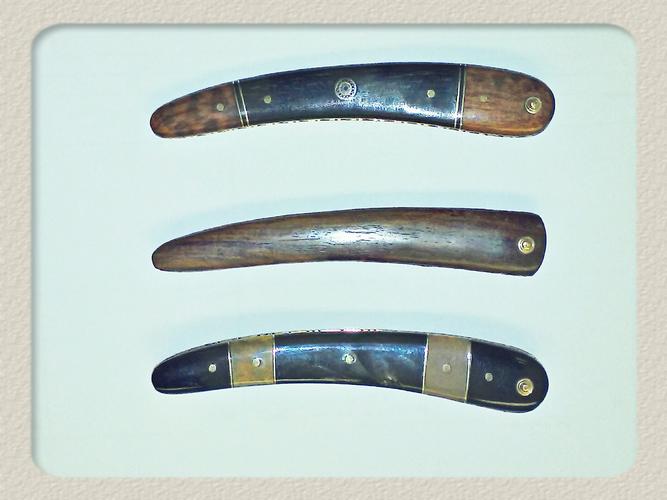
Wow, both great ideas. Never thought of taping yo a 2x4, that makes all the sense in the world. What are the chances of the scales splintering . Btw here are the scales.
-
02-26-2015, 06:01 PM #5Junior Member
- Join Date
- Sep 2014
- Location
- Houma, La.
- Posts
- 15
Thanked: 3
Sorry, here is a better picture of the scales
-
02-26-2015, 06:09 PM #6Senior Member


- Join Date
- Feb 2013
- Location
- Haida Gwaii, British Columbia, Canada
- Posts
- 14,455
Thanked: 4830
A pin vise with a split point drill bit is the bomb for hand drilling and marking drill points. If you don't have one you should get one. Since the acquisition of mine I would not ever want to be without it for scale and pin work. It is hands down the best money I have spent on razor restoration tools and they are extremely affordable.
It's not what you know, it's who you take fishing!
-
02-26-2015, 06:38 PM #7Member

- Join Date
- Jul 2014
- Location
- East Coast US
- Posts
- 97
Thanked: 75
In addition to taping scales you can use a carpenters square to ensure you are holding your rotary tool or drill 100% perpendicular to ensure your holes are perfectly straight.
I am working in a limited space scenario and I bought a rotary tool workstation (milescraft) that is a drill press for my rotary tool. Havent looked back. It was like $35 with shipping from amazon. Its great for drilling out pins and drilling pin holes in scales.Geezer likes this.
-
02-26-2015, 07:12 PM #8
IIRC, mine was less than $6.00usd
 Originally Posted by RezDog
 Geezer likes this.If you don't care where you are, you are not lost.
-
02-26-2015, 09:05 PM #9Senior Member

- Join Date
- Apr 2008
- Location
- Essex, UK
- Posts
- 3,816
Thanked: 3164
Just a word of warning, but drilling straight depends on everything, including the scales, being at 90 degree angles to each other. For instance, if you make your own scales you have the benefit of drilling them before you shape the upper surface of each - this practically ensures straight drilling, drill them on a bit of wood with a split tip drill like previously mentioned and you stop the under scale from having a ragged appearance.
However, when the scales are already shaped, particularly those that are rounded in cross section, then they tend to 'rock and roll' a bit and you have to take particulary care with waht type of supporting measures you use.
Another problem with pre-shaped scales is that they tend to be wider in the centre for, say, half of the scales length, and then taper to tip and wedge at the ends - sloping, if you prefer. Press the pivot pin end flat to your drill bed and drill it and you will see that the wedge end has lifted and you have an inclined hole for the pivot pin (closer to the scale tip on one side, further away on the other).
This type of error usually applies to drill presses, hand drilling has a whole set of other issues.
Regards,
Neil
-
02-27-2015, 12:20 AM #10
Just a habit of mine: When making the wedge, open out the hole top and bottom so it can tilt in the direction it needs to and does not trap one scale and make it impossible to get all lined up properly. Think of an "X" or )( for the shape of the hole looking from the end of the wedge. Also, leave your wedge a bit oversize till you have fitted every thing and then finish it carefully after pinning.
Have fun!
~RichardBe yourself; everyone else is already taken.
- Oscar Wilde


 Reply With Quote


