
Results 1 to 6 of 6
 20Likes

Thread: Sandpaper Notepad
 LinkBack URL
 About LinkBacks
-
06-22-2015, 02:14 PM #1Senior Member


- Join Date
- Apr 2012
- Location
- Diamond Bar, CA
- Posts
- 6,553
Thanked: 3215 Sandpaper Notepad
Tired of looking for a piece of sand paper and not knowing what the grit is or trying to find the next grit in the progression? Or just wasting paper, cause, you know you have some more of ‘that sheet”… some place…
Recently I was on the Cactus Juice web site, turntex.com, searching the site for more info on stabilizing wood, and I found this piece of Genius.
“Sand Paper Notepads” by Curtis Seebeck. You just glue the sheets into a pad, like a note pad and tear off a new sheet when needed, make them in the grits you use and store, in a neat, little packages.
The tutorial is pretty easy to follow, but here are a few tips I discovered when I did it. You can make the pads any size you want, Turners cut sheets into strips and stack in a progression, so you just tears off the next piece in the progression, in order, no confusion.
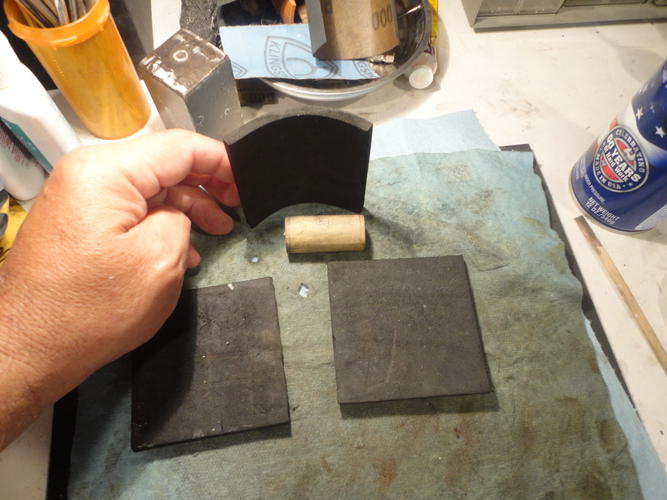
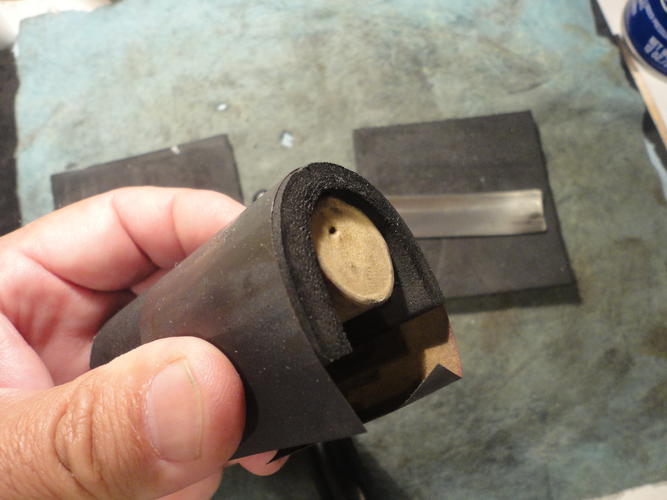
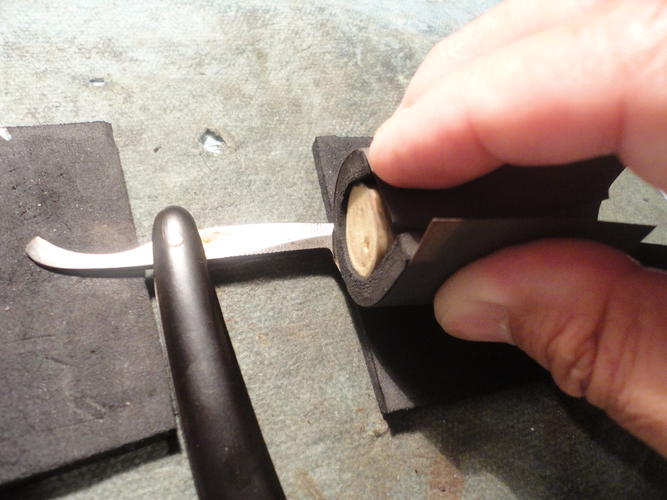
I use a 3x3in, 6mm foam pad over a wine cork, to hand sand, the synthetic corks are better because the end are cut flat, not beveled and you can get into tight corners like stabilizers.
Photo 1-4
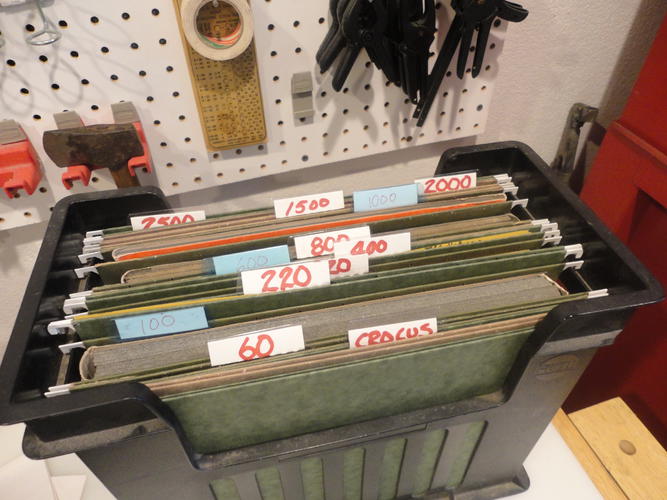
I keep my Wet & Dry in a portable file box in hanging file folders.
Photo 5
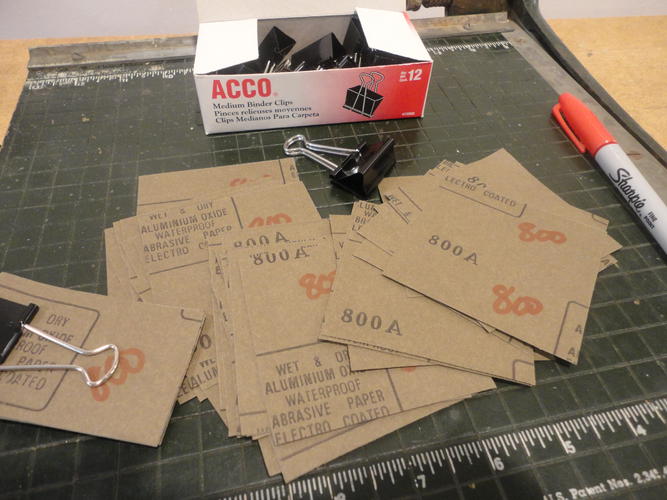
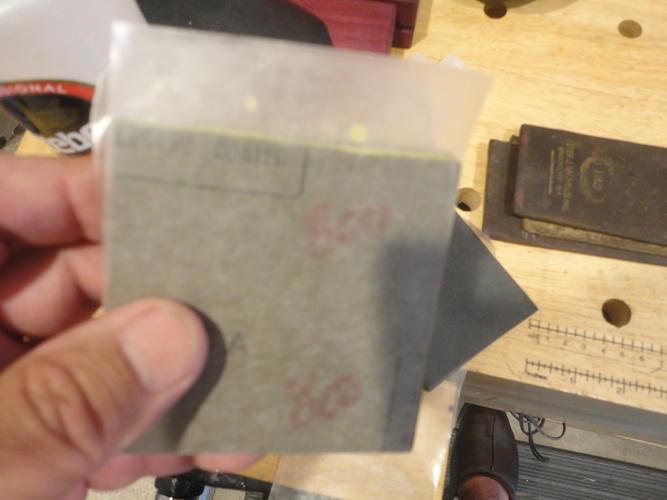
I cut the sandpaper into 3x3 squares with a $2 garage sale paper cutter, that I only use for cutting sand paper. Stack them evenly and clip with a binder clip, you can just staple them together if you want. As soon as you cut the sheets flip the squares over and mark the grit in a couple of places. Do it now, if you wait, your screwed, 3 sheets will make a stack about ¼ in thick.
Photo 6
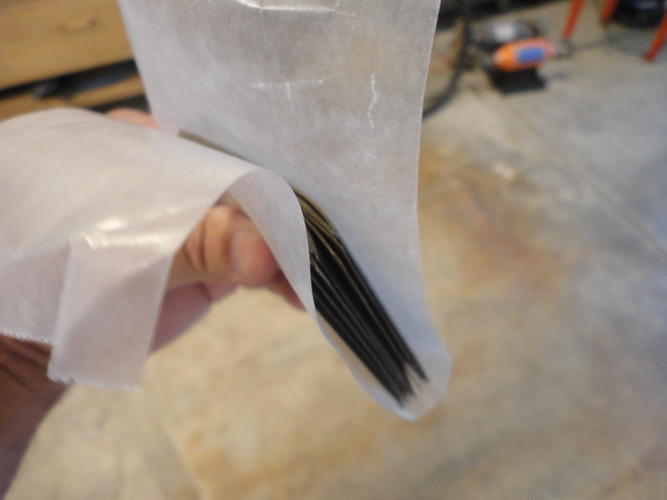
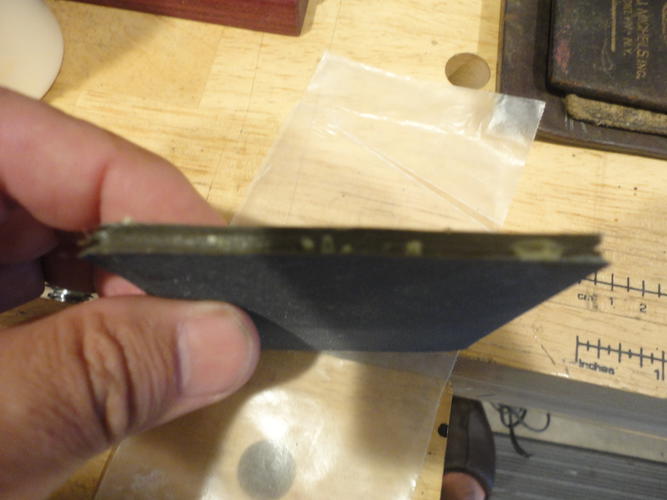
I cut a couple pieces of wax paper 3.5 X9 in to protect the vice and keep from gluing the paper to the vice. Place the stack, even end up in a vice, a wood clamp would also work, if you don’t have a vice.
Photo 7
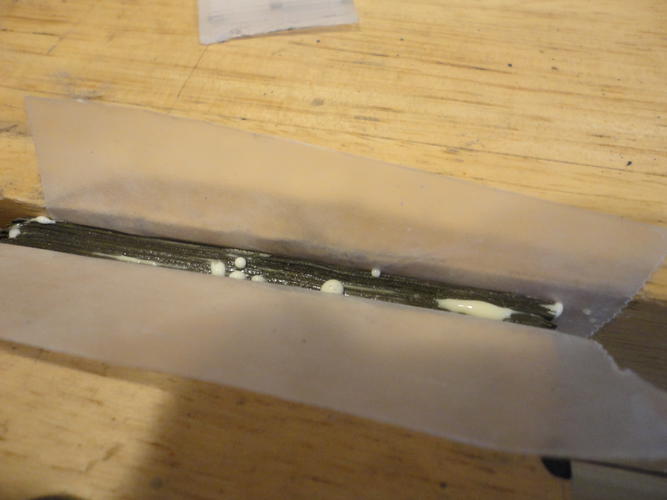
Make sure the stack is a 1/8 to ¼ in below the top of the vice so the top of the stack is tight and there is a small channel for the glue to pool.
Photo 8
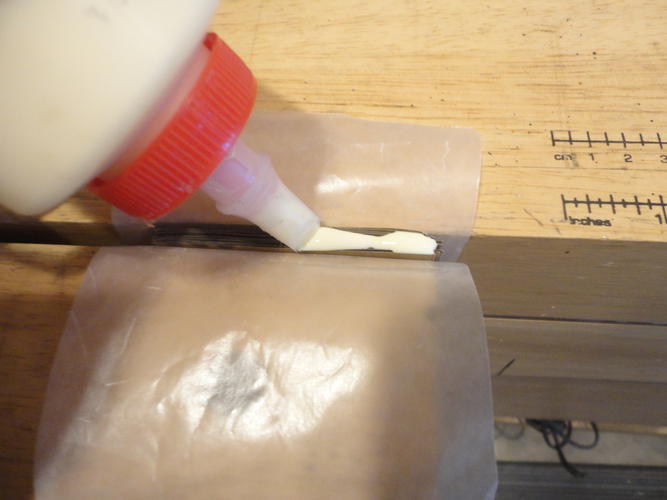
Using yellow wood glue,
Photo 9
Apply a thick bead and let dry. Now peal off the wax paper and do the next grit.
Photo 10
This is so simple, it’s genius. Check out the link and his website, Thanks, Curtis. Enjoy.Last edited by Euclid440; 06-22-2015 at 05:13 PM.
-
The Following 16 Users Say Thank You to Euclid440 For This Useful Post:
bongo (06-26-2015), criswilson10 (06-23-2015), eddy79 (06-24-2015), engine46 (08-05-2016), Geezer (06-22-2015), Hirlau (06-22-2015), JeffR (06-26-2015), markbignosekelly (07-03-2015), MattCB (06-25-2015), MikeT (07-03-2015), Phrank (06-22-2015), ScoutHikerDad (06-22-2015), Steel (06-22-2015), Substance (06-23-2015), Toroblanco (06-01-2019), xiaotuzi (08-05-2016)
-
06-22-2015, 05:15 PM #2Senior Member
- Join Date
- Apr 2012
- Location
- Diamond Bar, CA
- Posts
- 6,553
Thanked: 3215
Added the link to turntex.com Sandpaper, NOTEPADS.
Sorry, forgot.Geezer likes this.
-
06-22-2015, 05:46 PM #3Senior Member


- Join Date
- Nov 2013
- Posts
- 2,321
Thanked: 498
Great tip. Thanks.
What a curse be a dull razor; what a prideful comfort a sharp one
-
06-25-2015, 10:03 PM #4Senior Member

- Join Date
- Dec 2013
- Location
- Texas
- Posts
- 1,568
Thanked: 269
Good advice, thanks! I learned the hard way to label sandpaper after cutting it up... So now I carefully cut up paper, label it and put each grit in its own ziplock bag.
Euclid440 likes this.
-
06-26-2015, 02:00 AM #5Silky Smooth
- Join Date
- Sep 2008
- Location
- Southern California
- Posts
- 802
Thanked: 154
Euclid440,
Thank you for the great tip!
(Almost as clever as squaring the circle.)
Cheers,
JeffEuclid440 likes this.de gustibus non est disputandum
-
07-03-2015, 07:07 AM #6Senior Member

- Join Date
- Jun 2015
- Location
- South Carolina
- Posts
- 1,838
Thanked: 516
Dude. You rock! Originally Posted by Euclid440

I really need to get more organized. Been getting better, but still need work. Was just looking at the big plastic bin I have full of various grits... it's organization time!Euclid440 likes this.
-
The Following User Says Thank You to MikeT For This Useful Post:
Euclid440 (08-05-2016)


 Reply With Quote