
Results 11 to 19 of 19
 30Likes
 LinkBack URL
 About LinkBacks
-
08-04-2015, 08:49 PM #11Senior Member


- Join Date
- May 2014
- Location
- Easley, SC, USA
- Posts
- 1,861
Thanked: 480
It is supposed to be darker in the background to give a shadow relief look. And that darker color is several layers deep.
Geezer likes this.Some people never go crazy. What truly horrible lives they must lead - Charles Bukowski
-
08-04-2015, 09:45 PM #12Senior Member


- Join Date
- Mar 2012
- Location
- Thunder Bay, Ontario, Canada
- Posts
- 17,324
Thanked: 3228
Yes, it could be that the darker background areas were made that way. Oth if the background areas were textured/stippled that would provide contrast to the smooth areas of the scale but also trap dirt/crud and darken it. That is why a mild cleaner should likely be used with a soft brush to see if it is dirty or coloured. The use of a mild cleaner should not remove paint/colouring if there is any.
BobLife is a terminal illness in the end
-
08-04-2015, 09:57 PM #13
 Originally Posted by sharptonn

 If you don't care where you are, you are not lost.
-
08-05-2015, 05:40 AM #14Member
- Join Date
- Mar 2009
- Posts
- 46
Thanked: 3
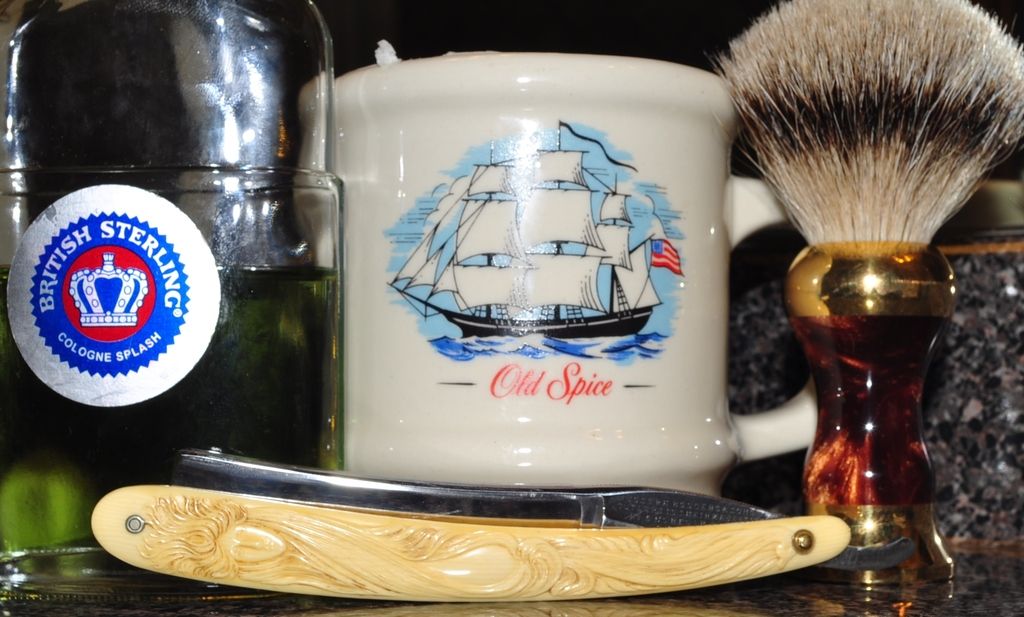
While I can't be certain, the browning does appear to be like cigarette smoke stains. I don't believe there was a color on there. That said though, the staining is indeed very similar to the photo, which is not the razor I have. I suppose it would be curious for them to both stain pretty much the same. But then again, the crevices/nooks collect dirt well. It really does not appear to have any color added.
I typically am not one to remove patina on many/most items, and the razor above is a wonderful example where it works well. But, this one really feels like it would benefit. The plastic (celluloid likely) is a nice white and I would be happy if it were clean. But, I'm not sure it can be thoroughly cleaned because the relief is so deep.
I will try a cpl of the suggestions. Scrubbing Bubbles is a good thought. It does wonders on Gillette's. But for anything else it would require a good scrubbing tool which is what I was hoping might come up here. Maas didn't touch it with a toothbrush. Maybe a finer toothbrush.
-
08-05-2015, 09:07 AM #15
I used Soft Scrub on the one above. A good stiff toothbrush and maybe 10 minutes of work got it looking good. It was pretty much black when I started.
Keep us posted.RocketMan likes this.If you don't care where you are, you are not lost.
-
08-05-2015, 03:39 PM #16
I'll add for the heck of it..
First I use plain vinegar and water to remove soap scum...scrubbing bubbles and some others work well also. I use a 1" paintbrush with the bristles cut to about 5/8ths of an inch to work the solution with little or no pressure. Then I rinse the whole thing well. A rinse in baking soda and water can neutralize any acids present. then water rinse. ( Soda in honing water is a good way to prevent rust also.
I often use a tiny bit of toothpaste on my thumb pad to sorta buff and shine the tops of the fancy work and leave the low spots looking darker. Rinse after.
Lots of ways to do the job!
~RichardBe yourself; everyone else is already taken.
- Oscar Wilde
-
The Following User Says Thank You to Geezer For This Useful Post:
Hirlau (08-05-2015)
-
08-11-2015, 01:05 PM #17Senior Member


- Join Date
- Jan 2013
- Location
- Communist State of California
- Posts
- 1,461
Thanked: 463
Maas+firearms cleaning brush+elbow grease+time
It's worked for me on several similar celluloid scales.
-
08-15-2015, 07:04 PM #18Member
- Join Date
- Mar 2009
- Posts
- 46
Thanked: 3
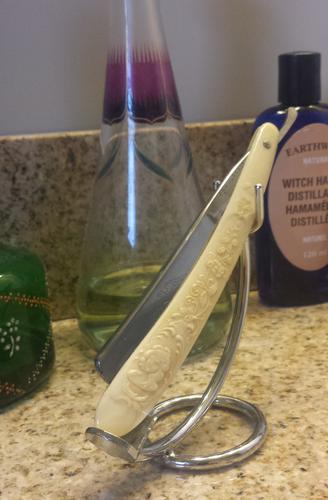
Thank you for all the input! I kind of amalgamated everything and cleaned up some, but not over the edge - trying to keep the contrast.
I went with a cut off paint brush - great idea! There were some excellent artist brushes in a shop up here, so I bought a decent one and trimmed it down. A great fine detail buffer! I will also check out brushes for cleaning firearms. That is a great idea of somewhere I never would have thought about looking at.
Thnx everybody! This was also my first shave with a Swedish steel like this Hellberg, and I have to say it has a wonderfully soft feel to the edge. I had a terrific shave with it today.
Last edited by RocketMan; 08-15-2015 at 07:35 PM.
-
-
08-16-2015, 03:47 AM #19Senior Member
- Join Date
- Jan 2013
- Location
- Communist State of California
- Posts
- 1,461
Thanked: 463
Looks great.


 Reply With Quote


