Results 1 to 8 of 8
 10Likes
Thread: How to Fix Chipped Toe
-
10-05-2015, 06:01 PM #1Junior Member

- Join Date
- Sep 2015
- Location
- Michigan
- Posts
- 6
Thanked: 1 How to Fix Chipped Toe
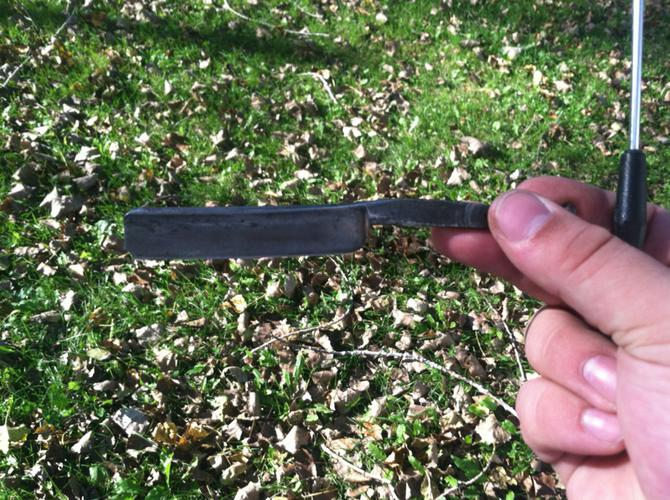
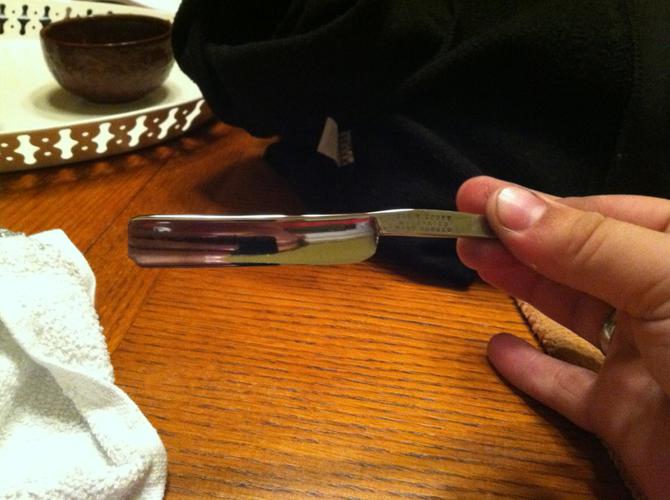
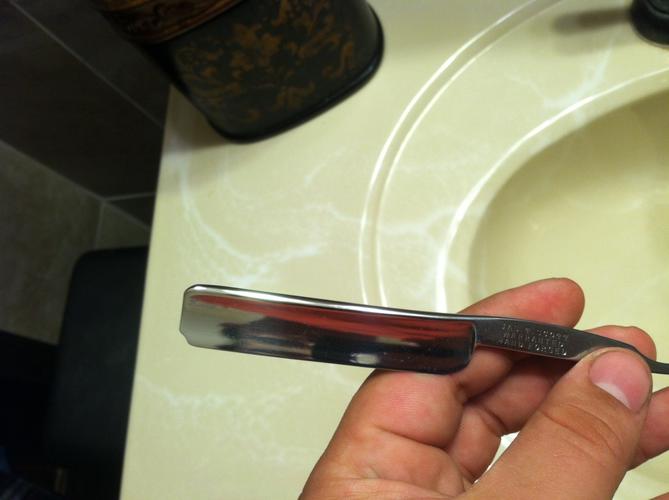
So I'm kind of working through my first blade restoration and am wondering how I should go about taking this out. I'm thinking about slowly and carefully grinding it out on my belt sander. Of course I'd be careful to preserve the temper of the steel. Any help is appreciated.
Thanks.


-
10-05-2015, 08:10 PM #2Senior Member


- Join Date
- Apr 2012
- Location
- Diamond Bar, CA
- Posts
- 6,553
Thanked: 3215
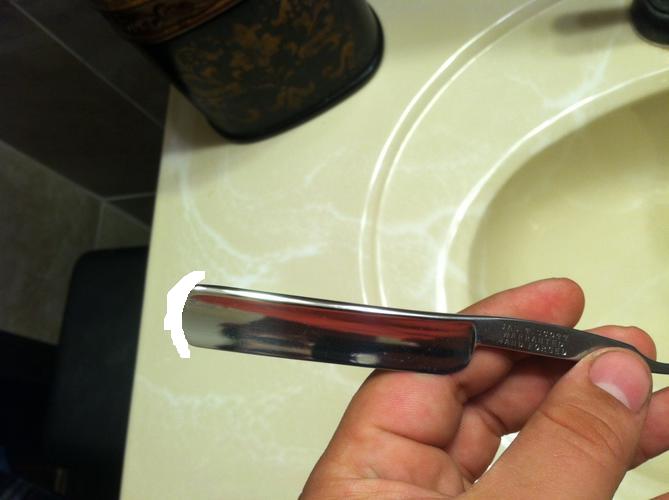
The easiest, would be to grind it round, similar to the heel. Draw the profile with a colored sharpie for contrast and a coin, washer or copy of the heel profile. Then, file with a Diamond plate/ diamond file or low speed with a Dremel and a medium sanding drum, quench frequently in a glass of water.
Go slow, clamping the blade, edge up, in a vice padded with wooden jaws and or leather. Overheating will ruin the temper of the blade and it will never hold an edge.
-
10-05-2015, 09:00 PM #3Senior Member


- Join Date
- Jun 2013
- Location
- Pompano Beach, FL
- Posts
- 4,048
Thanked: 636
I agree with Euclid440. Round it off.
-
10-05-2015, 09:41 PM #4

Well said by Euclid, you can make a nice round point out of that one!
-
10-05-2015, 11:43 PM #5Junior Member

- Join Date
- Sep 2015
- Location
- Michigan
- Posts
- 6
Thanked: 1
Thanks gentlemen. This is kind of what I was gonna try, but it's always good to hear from those with experience.
-
10-06-2015, 02:55 PM #6
-
The Following User Says Thank You to Gipson For This Useful Post:
Cmgrier1172 (10-12-2015)
-
10-07-2015, 01:13 PM #7

I would probably do similar to the picture above working from the centre of the blade to the edge and spine to keep the full length.
My wife calls me......... Can you just use Ed
-
10-07-2015, 01:42 PM #8illegitimum non carborundum


- Join Date
- Jan 2008
- Location
- Rochester, MN
- Posts
- 11,552
- Blog Entries
- 1
Thanked: 3795
Though of course the second approach is going to be more work as you will be removing a lot more steel from the spine.


 LinkBack URL
 About LinkBacks


 Reply With Quote
