Page 1 of 3 123 LastLast
Results 1 to 10 of 21
Like Tree68Likes

Thread: Make me smile

  1. #1
    Senior Member blabbermouth
    Join Date
    Apr 2012
    Location
    Diamond Bar, CA
    Posts
    6,553
    Thanked: 3215

    Default Make me smile

    How I made a frowning razor, smile.

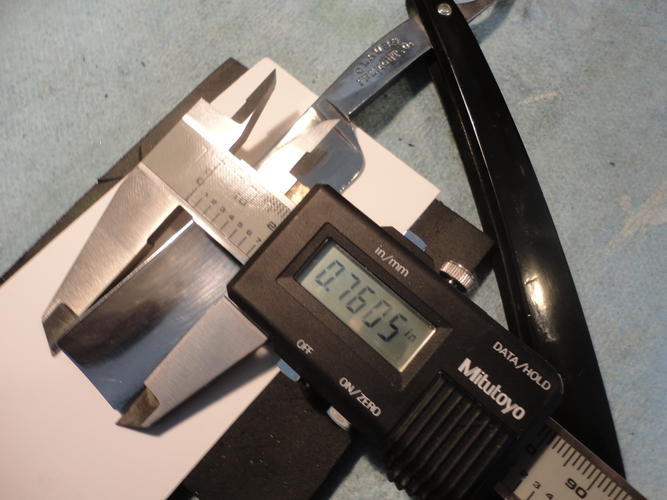
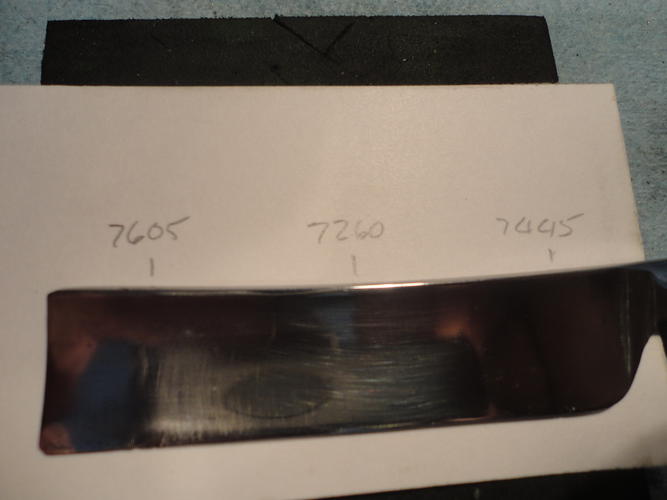
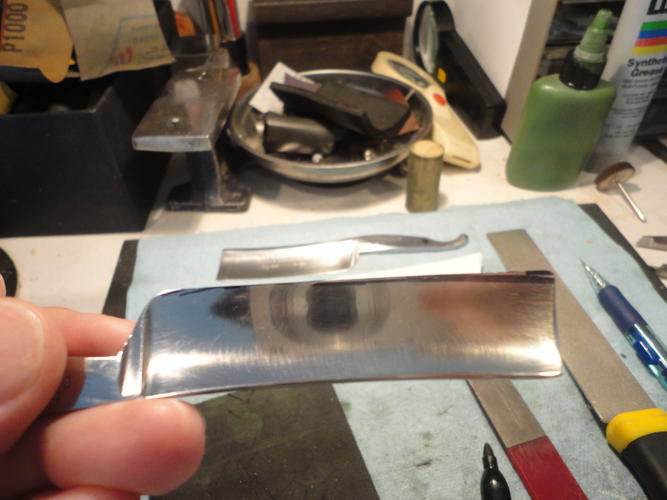
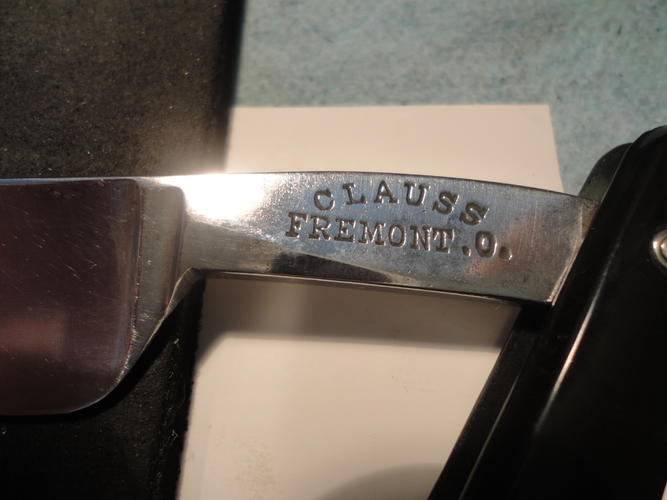
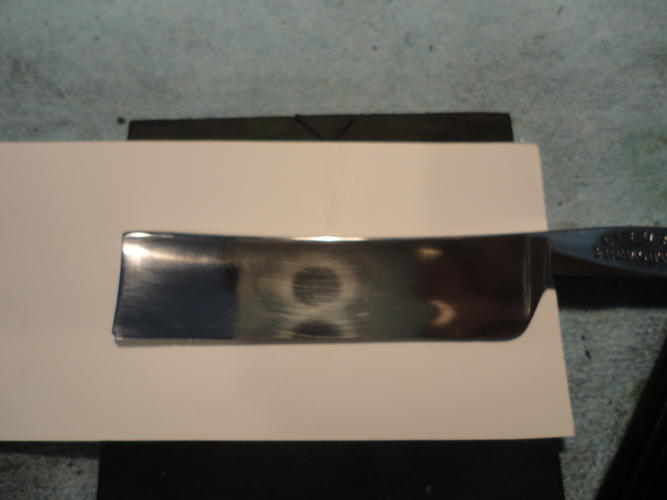
    Recently on a couple of other threads the subject of how to hone a razor into a smile. Recently I picked up a Clauss razor in the wild for $15, yes they are out there, and it looked a little lob sided. Measuring it, I discovered it had a bit of a frown and wider toe (.7580), than heel (.7445), a swayback spine, and a muted tip, a good candidate for a smiling razor.

    So I thought I would post a photo tutorial of the process. It is pic heavy and will take 3 postings. Sorry about the shaky pics, trying to hold the razor, tools and camera, needed a third hand.

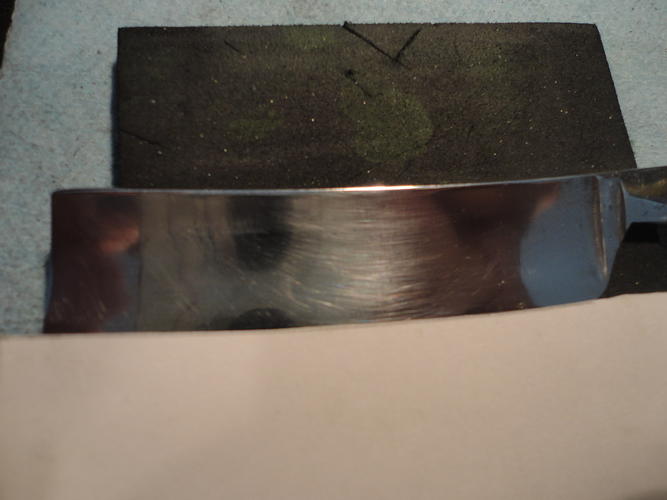
    My plan was to make the edge match the spine. I traced the spine on a piece of cardboard, and cut it out, to create a pattern, trace the spine arc with a sharpie on to the blade edge, using the lowest part of the blade (.7260). as the middle. The Sharpie mark is just a guide, the true shape and width is formed by measuring and shaping a little at a time.

    Name:  1.jpg
Views: 961
Size:  45.1 KB

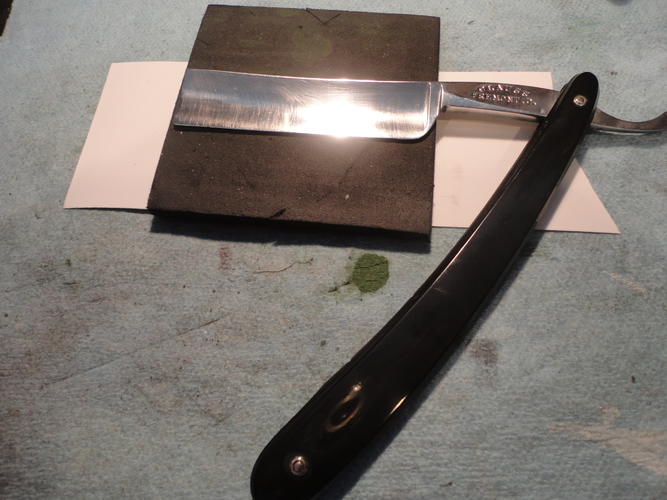
    Here's the razor as purchased with a little bit of clean up, just polish and some Chrome Ox on the buffer.
    Name:  2.jpg
Views: 947
Size:  31.3 KB


    Name:  3.jpg
Views: 943
Size:  20.3 KB

    Notice the wonky blade and the slight frown.
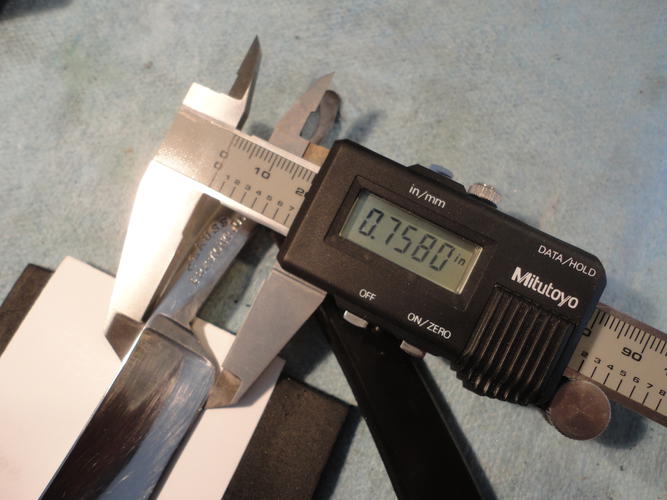
    Name:  4.jpg
Views: 933
Size:  43.1 KB

    Some good Measurements confirm my suspicions.
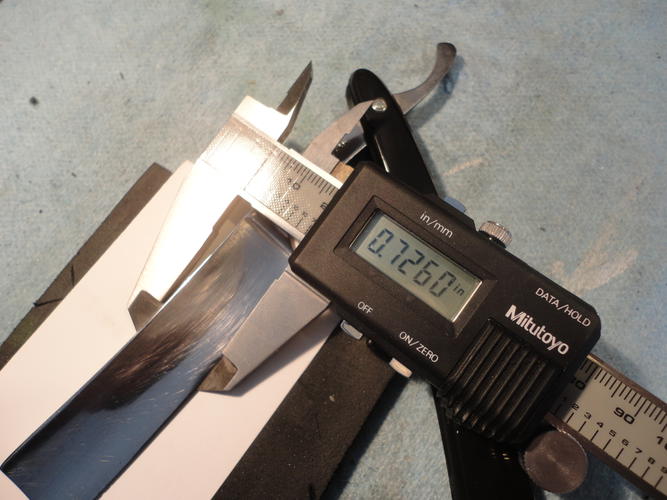
    Name:  5.jpg
Views: 940
Size:  47.1 KB


    Name:  6.jpg
Views: 938
Size:  45.3 KB


    Name:  7.jpg
Views: 913
Size:  22.1 KB


    Name:  8.jpg
Views: 923
Size:  39.8 KB

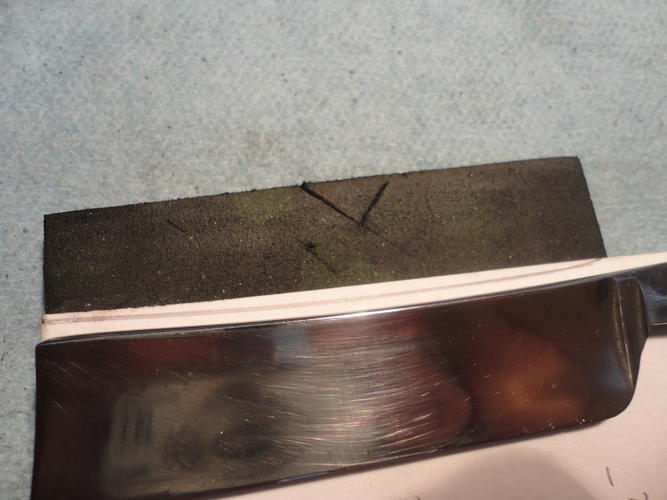
    Trace the spine shape

    Name:  9.jpg
Views: 926
Size:  26.5 KB

    Copy onto the edge

    Name:  10.jpg
Views: 925
Size:  42.0 KB

    Continued Make Me Smile 2
    Last edited by Euclid440; 11-07-2015 at 03:54 PM.

  2. The Following 16 Users Say Thank You to Euclid440 For This Useful Post:

    10Pups (02-03-2016), ejmolitor37 (02-12-2016), engine46 (12-23-2015), Geezer (11-10-2015), Hirlau (11-07-2015), JazzDoc (01-04-2018), jmercer (08-20-2016), joelkerr (03-10-2020), markbignosekelly (02-11-2016), MikeB52 (11-10-2015), MisterClean (12-24-2016), MisterMoo (02-11-2016), nipper (02-11-2016), Substance (05-10-2016), tinkersd (03-30-2017), WW243 (01-07-2016)

  3. #2
    Senior Member blabbermouth
    Join Date
    Apr 2012
    Location
    Diamond Bar, CA
    Posts
    6,553
    Thanked: 3215

    Default MAKE ME SMILE 2

    The Sharpie mark is just a guide, the true shape and width is formed by measuring and shaping a little at a time.

    I hand filed with a combination diamond file, 400 on one side, 1K on the other. I ground the toe to .7280 and then the heel, by laying the spine on a foam pad, edge straight up and filed the edge.

    The razor is hollow ground and the material thin, was removed easily and quickly with 400 grit. I stopped short just a bit at .7280 and reduce to the full height (.7260) by smoothing/blending the profile with the 1k file and honing. I lowered the corners first, toe & heel to .7280, then using the full width of the 1in file width to smoothed the arc with a rolling cut from the outsides towards the middle, measuring after every few strokes.


    Name:  A1.jpg
Views: 929
Size:  40.7 KB

    Double check your measurements, .7260 is the width of the middle, I don’t want to remove any more width than necessary so ,7260 is what I am shooting for all the way across the width. If you have to remark, WD40 will remove the Sharpie ink.

    Name:  A2.jpg
Views: 920
Size:  44.1 KB


    Name:  A3.jpg
Views: 920
Size:  37.5 KB


    Name:  A4.jpg
Views: 921
Size:  50.8 KB

    The tools, the red file is an EZ Lap 1200 diamond file, the yellow black file is a 400/1k Diamond file, pencil, sharpie and a set of calipers.


    Name:  A5.jpg
Views: 919
Size:  42.0 KB

    So here’s what we will be removing up to the line, remember the line is just a guide, measure twice, cut once. Actually measure a bunch.

    Name:  A6.jpg
Views: 924
Size:  40.3 KB

    Filing the edge, start at the corners, toe & heel then blend, measure often.

    Name:  A7.jpg
Views: 919
Size:  38.2 KB

    Take off a little, take a measurement, go slow the metal is thin, using 400 grit.

    Name:  A8.jpg
Views: 927
Size:  35.9 KB


    Name:  A9.jpg
Views: 906
Size:  43.3 KB

    Getting there

    Name:  A10.jpg
Views: 914
Size:  41.3 KB

    Close enough for now

    Continued, Make Me Smile 3
    Last edited by Euclid440; 11-07-2015 at 03:50 PM.

  4. The Following 10 Users Say Thank You to Euclid440 For This Useful Post:

    ejmolitor37 (02-12-2016), Geezer (11-10-2015), Hirlau (11-07-2015), jmercer (08-20-2016), joelkerr (03-10-2020), markbignosekelly (02-11-2016), MisterMoo (02-11-2016), shikano53 (02-04-2016), tinkersd (03-30-2017), WW243 (01-07-2016)

  5. #3
    Senior Member blabbermouth
    Join Date
    Apr 2012
    Location
    Diamond Bar, CA
    Posts
    6,553
    Thanked: 3215

    Default MAKE ME SMILE 3

    The whole process took but a few minutes, probably spent more time measuring than anything and it honed easily and quickly.

    I set the bevel on a 7x2 in, 1k King, that I have been playing with, it easily set the bevel in about 60 or 80 laps, with a muddy slurry, (didn’t really count the laps) and finished on a GS20 after a 12k super stone and stropped on .125um CBN.

    It took a nice edge, shaves very well and looks pretty good.

    Name:  B1.jpg
Views: 932
Size:  25.5 KB

    Finished, just needs honing and the heel reshaped

    Name:  B2.jpg
Views: 910
Size:  25.6 KB

    Lowering the heel, required reshaping the heel, look at the first photo and the last one to see the reground heel. The 400 diamond made quick work of it.

    Name:  B3.jpg
Views: 921
Size:  33.1 KB

    Check out the heel... and the point is back... yea...

    Name:  B4.jpg
Views: 903
Size:  22.7 KB


    Name:  B5.jpg
Views: 909
Size:  29.6 KB

    Here the final edge shape is compared to the pattern of the spine

    Name:  B3.jpg
Views: 921
Size:  33.1 KB

    Finished shape, just needs honing, finish is a little rough, but I plan to rescale and spend some quality sanding and buffer time... later.

  6. The Following 23 Users Say Thank You to Euclid440 For This Useful Post:

    beluga (05-20-2017), DoughBoy68 (11-07-2015), ejmolitor37 (02-12-2016), engine46 (12-23-2015), Geezer (11-10-2015), Hirlau (11-07-2015), JazzDoc (01-04-2018), jfk742 (11-07-2015), jmercer (08-20-2016), joelkerr (03-10-2020), kaptain_zero (11-10-2015), markbignosekelly (02-11-2016), MikeB52 (11-10-2015), MisterMoo (02-11-2016), moutonrouge (03-28-2016), MW76 (02-11-2016), nipper (02-11-2016), rolodave (02-11-2016), Slawman (02-25-2016), Substance (05-10-2016), Thug (11-10-2015), tinkersd (03-30-2017), WW243 (01-07-2016)

  7. #4
    At this point in time... gssixgun's Avatar
    Join Date
    Jun 2007
    Location
    North Idaho Redoubt
    Posts
    27,031
    Thanked: 13245
    Blog Entries
    1

    Default

    All stacked and racked for ya Marty

    Good thread

  8. The Following User Says Thank You to gssixgun For This Useful Post:

    Euclid440 (11-07-2015)

  9. #5
    FAL
    FAL is offline
    < Banned User >
    Join Date
    Jul 2015
    Location
    Central Oregon
    Posts
    789
    Thanked: 98

    Default

    Nice job, it even made me smile, the first time today.

  10. #6
    Senior Member Willisf's Avatar
    Join Date
    Sep 2014
    Location
    Yorkton, Saskatchewan, Canada
    Posts
    1,171
    Thanked: 230

    Default

    Wow!
    Was so cool to see the method you used to do this. Very precise! That blade sure looks great too!
    You saved another one!

    Geezer likes this.
    Is it over there or over yonder?

  11. The Following User Says Thank You to Willisf For This Useful Post:

    Euclid440 (11-10-2015)

  12. #7
    Senior Member blabbermouth Geezer's Avatar
    Join Date
    Jul 2010
    Location
    EauClaire,WI
    Posts
    7,685
    Thanked: 3825
    Blog Entries
    1

    Default

    As an old machinist... and restorer, I like the effort you put in to do it right and thank you from my experiences for the great and useful write up of how to! Beats the mark one eyeball! and slows a restorer down enough to think while doing the work! I like it!
    Best of all it was used on a great razor that will now be seeing another few generations of use.
    Thank you again!
    ~Richard
    Be yourself; everyone else is already taken.
    - Oscar Wilde

  13. The Following User Says Thank You to Geezer For This Useful Post:

    Euclid440 (11-10-2015)

  14. #8
    Senior Member Willisf's Avatar
    Join Date
    Sep 2014
    Location
    Yorkton, Saskatchewan, Canada
    Posts
    1,171
    Thanked: 230

    Default

    Quote Originally Posted by Geezer View Post
    As an old machinist... and restorer, I like the effort you put in to do it right and thank you from my experiences for the great and useful write up of how to! Beats the mark one eyeball! and slows a restorer down enough to think while doing the work! I like it!
    Best of all it was used on a great razor that will now be seeing another few generations of use.
    Thank you again!
    ~Richard
    Great eye for detail. I learned something new tonight. I think I'm going to have to break down and travel south sometime when on holidays after winter. Learn first hand from a mentor. Nobody in Saskatchewan.....
    Is it over there or over yonder?

  15. The Following User Says Thank You to Willisf For This Useful Post:

    Euclid440 (11-10-2015)

  16. #9
    Str8Faced Gent. MikeB52's Avatar
    Join Date
    Aug 2013
    Location
    Orangeville, Ontario
    Posts
    8,449
    Thanked: 4206
    Blog Entries
    1

    Default

    Terrific walk through of the process. Nice results as well.
    "Depression is just anger,, without the enthusiasm."
    Steven Wright
    https://mobro.co/michaelbolton65?mc=5

  17. The Following User Says Thank You to MikeB52 For This Useful Post:

    Euclid440 (11-10-2015)

  18. #10
    Senior Member blabbermouth
    Join Date
    Apr 2012
    Location
    Diamond Bar, CA
    Posts
    6,553
    Thanked: 3215

    Default

    Thanks guys, the actual work only took a few minutes, I do like smilers and the Clauss’s, they are nice shaver.
    Substance and Slawman like this.

Page 1 of 3 123 LastLast

Posting Permissions

  • You may not post new threads
  • You may not post replies
  • You may not post attachments
  • You may not edit your posts
  •