
Results 1 to 10 of 17
 20Likes
 LinkBack URL
 About LinkBacks
Threaded View
-
11-12-2015, 12:36 AM #1Junior Tinkerer


- Join Date
- Apr 2014
- Location
- Canberra
- Posts
- 799
Thanked: 242 Razor scales - Let's get creative!
As Movember is long underway and I have not been shaving much, figured I'd post this bit of work I've done for fun a while ago. Several people found these scales interesting and have wondered what they are and how they were made. Some people have seen them temp-mounted on blades and asked: "Why aren't these permanent???".
I will give as much explanation of the process, as I can. Sadly I don't have many pictures anymore, but the ones below should do just fine.
Well anyway, for now they remain my test scales, I have no desire to peen any razor in them. Who knows, maybe when I run out of wood, horn, bone, G10...
I hope you find this at least a little inspiring and of course, feel free to share your own ideas and creations. Rock on!
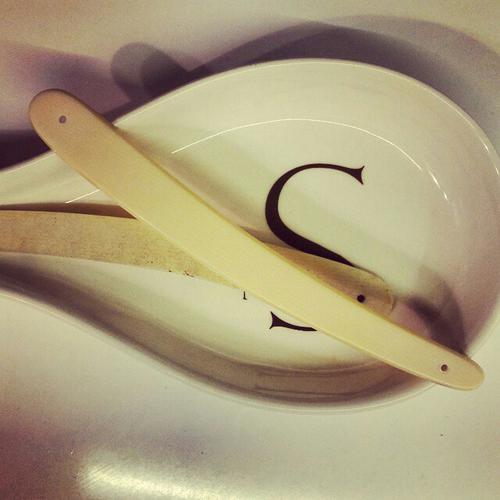
Fig 1. - Just ordinary celluloid scales
In this step you will need..... A decent pair of celluloid scales duh!
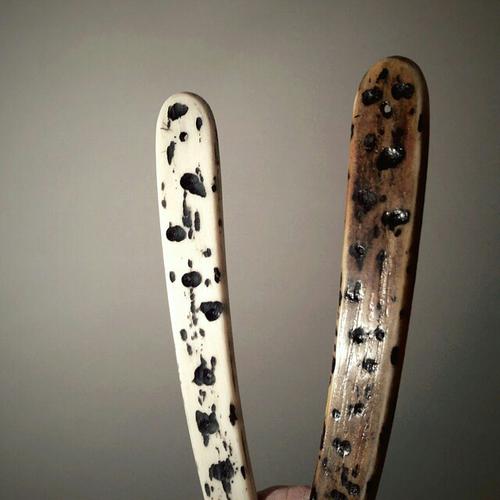
Fig 2.a. - Left: The easy part (the beginning).
Fig 2.b. - Right: Mid-process checkpoint
2.a. Steps to get here apply to both sides, of course. This was done using an accu drill (hand held), a few bigger drill bits and a burr bit, a can of matte spray paint and some sand paper. Let's assume the drill bits were 10mm and 5mm, or approx 3/8" and 3/16". The burr bit was one of those 5-10mm ones and sandpaper used was probably 400-800 grit.
I took the drill and created shallow dents with drill bits at first. Then I went on to deform those dents with a burr bit. Also created random lines, flecks, bites on the sides, etc. I then proceeded to paint the surface with my matte spray. Glossy spray may work, but I figured at this stage I wanted the entire surface to have the same look - so matte. I was going to let the CA alone give it the final, finished look. After they had dried at this stage, I took the sandpaper and lightly sanded off the surface. This removed everything but the paint in the dents, of course. After I was happy with the finish, I moved on to the fun part.
2.b. To get here I needed: thin, or medium CA, ebony and cocobolo dust, two separate mixing containers, something thin to mix with, protective latex gloves and some kitchen towels (paper, like the toilet paper kind). The wood dust was created with 800 grit paper. I then proceeded to mix it with CA and apply it in thin layers to the scales. I realized I shouldn't try to apply both red and black dust in the same layer/same mix. They would combine into one mushy color and I wasn't after that. I wanted clear red and black areas, with a bit of yellow peaking out. This probably took as many as 12 layers, lightly (or aggressively) sanding each one after application. On 2, or 3 occasions, I'd remove the last layer completely, because I didn't like the blend. This is how I would coat:
1. CA and ebony
2. Clear CA
3. Clear CA
4. CA and cocobolo
5. Clear CA
6. CA and ebony
7. Clear CA
8. Clear CA
9. CA and cocobolo
10. Clear CA
11. CA and ebony
....
.... and so on, you get the picture. Clear CA coats are important to keep the dust mixes well separated, as I found.
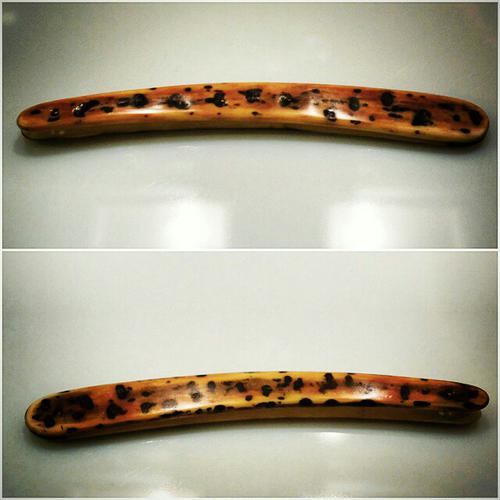
Fig 3. - Completed
3. The finished product probably has one, or two clear coats of CA applied at the end. Rough spots and excess CA was sanded down with 320 grit, moving to 400, 600, 800, 1000, 2000. After this I did a bit of polishing with a clean microfiber cloth and this gave them a nice shine.
Cheers!
S.
-


 Reply With Quote