
Results 1 to 9 of 9
 14Likes

Thread: Morley Clover Stamp restoration
 LinkBack URL
 About LinkBacks
-
12-10-2015, 06:00 AM #1Senior Member


- Join Date
- Dec 2014
- Location
- Virginia, USA
- Posts
- 2,224
Thanked: 481 Morley Clover Stamp restoration
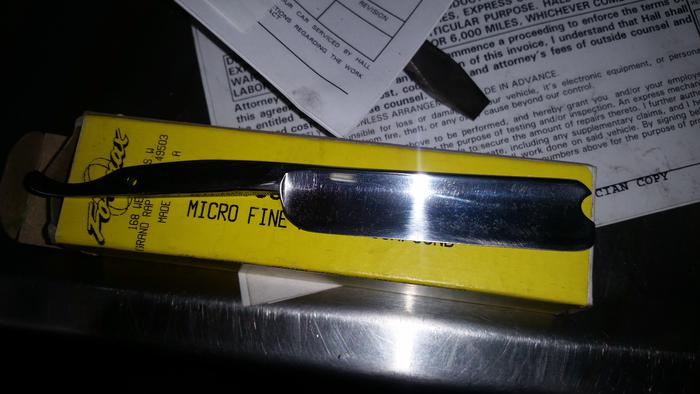
Well, the Morley came in the mail today so I started to clean it up. First thing I did was dull the edge on my 1k hone. Something about that process seemed so very wrong and backwards...lol. Good thing I had already made the decision to replace the scales, I discovered the ones it already had were cracked right beneath the pin for the blade. Anyway, this is what I started with:


And after a little sanding, we're starting to see shiny metal! Still have a lot of finer sanding and polish work to go, but not off to a bad start in my opinion:


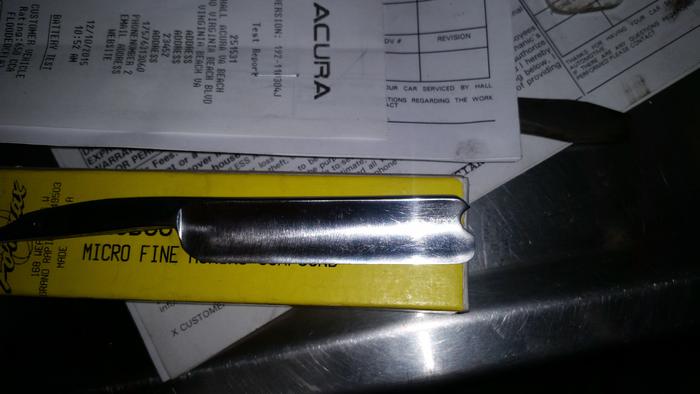
Not sure I want to dig any deeper than I already have, since razors are thin to start with. The pits might just have to stay in there, but at least it's cleaned up. Might go over it with some finer sand paper, then hit it with the cloth buffing wheel I picked up for my dremel. I'm thinking a fine polishing compound (CrOx maybe?) should clean it up nicely.
-
12-10-2015, 06:08 PM #2Senior Member
- Join Date
- Dec 2014
- Location
- Virginia, USA
- Posts
- 2,224
Thanked: 481
Finished polishing the blade during down time at work this morning. Also ground it so there's no more than .005" variance in width from spine to edge. Yes, I measured it lol.
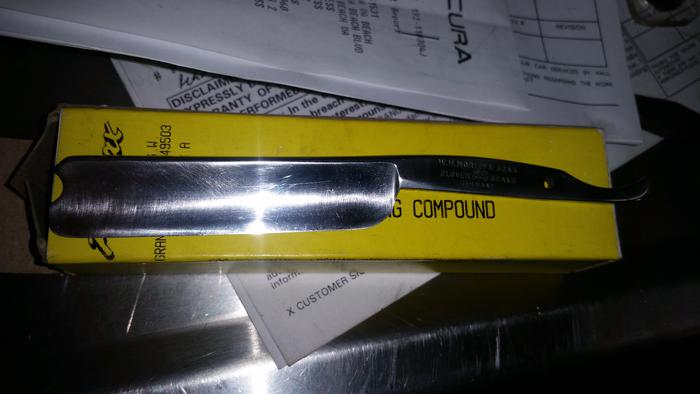
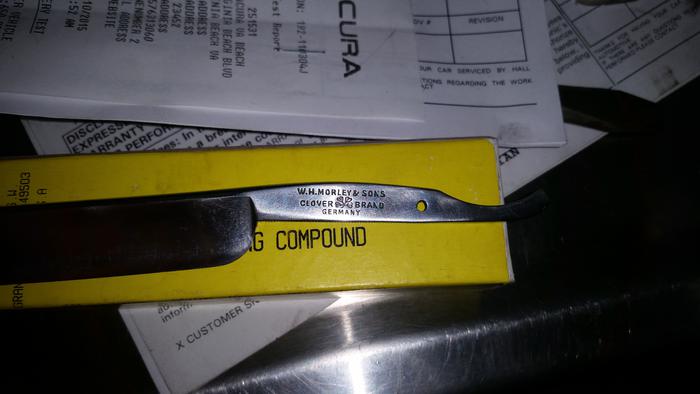
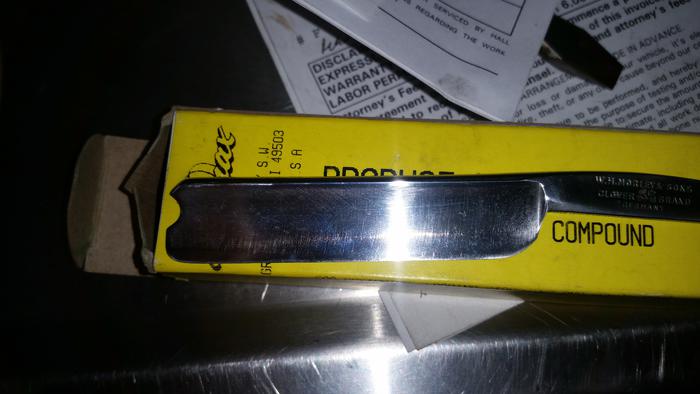
Now I just need to fabricate the scales I'll be pinning to it and we'll be good to go.Last edited by Marshal; 12-10-2015 at 06:13 PM.
Willisf likes this.
-
12-13-2015, 03:20 PM #3Senior Member
- Join Date
- Dec 2014
- Location
- Virginia, USA
- Posts
- 2,224
Thanked: 481
Whew, this is going to be a picture heavy thread. So, to start with I traced the scales of my Gold Dollar. Those are thicker than the scales of all my other razors, and I kind of wanted these to be a little meatier. Then I changed the backside with a little flare to give it a more unique look. It's a small change, but I'm liking the way it looks:

I put the blade on paper and played with it. Kind of helps me get an idea what I want the final end product to look like. How much I want to taper the edges and where I want the lines to be, all that fun stuff.

Got the pinholes laid out where I want them on the drawing. You can see a few measurements taken up in the corner there. The width of the Morley VS the width of the Gold Dollar at the back where the pin is, how thick the Gold Dollar scales are, how thick the spacing material at the tail of the razor is, and how thick the razor is at both pins. Then I used that information as a rough guide for what I want the final measurements of my scales to be. Since my hand writing is illegible to most:
Morley measures precisely .125" near the pin hole.
Gold Dollar blade is .180" thick as a similar spot.
The GD is .480" at the pinhole near the blade, .380" at the tail, with a spacer of .081"
The redwood slat material I'm using is 1/4" thick, or .250"
I want to eventually shave that down to .160" at the pivot pin, and .145" at the tail pins.
The overall thickness of my razor should be in the ballpark of .445 at the pivot pin, .415 at the tail pins, using .080 of spacing material. I say ballpark because this isn't an exact science, and I'll be making adjustments as needed.
I'm thinking about using a brass sheet to make the spacing material at the tail end of the razor. The form for that is already 'built in' to the pattern. Anyway, with that out of the way I used a razor knife to cut the pattern out, traced it onto the wood stock, and cut it out with a jigsaw. I didn't think to take pictures of that process, but it's pretty straight forward and boring anyway. The next step is to true the 2 pieces up to one another and make their shape as close to identical as possible. I don't have the advantage of a belt sander, so I used a pair of C clamps to hold the wood together and used a 4 sided wood rasp to get the same result. Jumping ahead a little bit, the 2 slats paired up next to the tool used to shape them:

Now jumping back to about halfway through the shaping process. This is the 2 slats held together by C Clamps. You can see how uneven they are to start with. Basically I took the rough side of the file and used it to cut the high spots down where you see the edge of one scale sticking up over the other. Then using that same rough side of the file brought the overall shape closer to the pencil line on the board to give it the proper shape.

A few different angles so you can see the high spots:


At the tail end of that last pic you can see the diagonal kerf made by the rasp on a spot I had already worked. When you're using a rasp like this and you want to remove a maximum amount of material you'll use a diagonal motion and it will leave a pattern like that. When you have it about where you want it, you can use same side in a back and forth motion to get rid of that kerf mark.
On the next picture you can see some kerf marks on the front where I've already filed, and a really good angle on what I'm trying to knock down on the backside to true up the scales. The file pictured has a flat side and a round side, and each has a fine and rough rasping surface. For the concave side of the scales I'm using the flat part of the rasp. For the rest, the flat side is the go-to.
 Willisf likes this.
-
12-13-2015, 03:20 PM #4Senior Member
- Join Date
- Dec 2014
- Location
- Virginia, USA
- Posts
- 2,224
Thanked: 481
Here we see the scales more or less rough shaped the way I want them:

And that same view from earlier, with the edges trued up:

For anybody wondering, I used 2 C clamps so that the scales would always be held together by pressure if one or both needed to be moved, that way I wouldn't have to fight to realign the edge. It'll also let me hold them together while I move the clamps around for drilling the pinholes. And of course the little bits of scrap between the clamps and the scales is there so the clamps don't bite into the work piece and scratch it up.
Now that the edges are true to one another, little bit of work with the fine side of the rasp to do some minute shaping and smooth out the marks from the rough side of the rasp is all we need. The end result:


And last I marked the inside so I know which side to leave alone from here out. Maybe some light finish sanding later, but otherwise I want to leave that alone so the scales stay true to one another.

Last edited by Marshal; 12-13-2015 at 05:08 PM.
Willisf likes this.
-
12-13-2015, 04:08 PM #5Senior Member

- Join Date
- Apr 2012
- Location
- Diamond Bar, CA
- Posts
- 6,553
Thanked: 3215
Just glue them together with double stick tape, Scotch tape for wrapping presents works just fine.
And thin those puppies down in thickness and at the pin side or they will be way too clunky to strop and shave with.
A good start is always with the original scales. You can, make a quick & dirty prototype scales, from tongue depressors,(craft store) or paint stir sticks. Bolt them on and try stropping to see how they feel, before you cut your scale material.
-
12-13-2015, 04:30 PM #6Senior Member
- Join Date
- Dec 2014
- Location
- Virginia, USA
- Posts
- 2,224
Thanked: 481
They'll be thinned down. I started with 1/4" stock to be sure I had enough material to work with. I'll probably work on thinning them up a little later today, and do the final shaping. Still debating if I want to have a go at them with the wood carving and burning tools, or give it a stain and polish and call it good. Red oak is a little bland. We'll see how it shapes up.
I'm not too overly concerned with them being a bit thicker than the originals. For what I have in mind style wise, thicker is better. And I have big ol' bear paws rather than normal human hands, so it would likely be beneficial. But there's enough material there that I can make changes as needed before the final pinning.
I like that double stick tape suggestion. Didn't think of that, I was just working with what I have on hand from when I made my longbow. Not pretty, but effective. I spent more time taking pictures and constructing those posts than I did working the material with the rasp.Last edited by Marshal; 12-13-2015 at 04:35 PM.
-
12-13-2015, 11:46 PM #7Senior Member
- Join Date
- Dec 2014
- Location
- Virginia, USA
- Posts
- 2,224
Thanked: 481
Another pic dump/update. Today the scales were thinned up to about .16x at the toe, and about 14x at the heel. The x representing anything between .160 and .170 for example. The tool used to do the thinning was a hand plane, so not the most exact instrument known to man. Again, not pretty, but effective. Once I had a system down it may have taken me 15 minutes to plane them to around what I wanted. The tools:

And an above view of how I rigged up the work piece:

The clamp on the right was used as a stop to keep the work piece from rotating. This keeps hands and fingers out of the way of the rasp. Much better than trying to hold the piece and carefully move it across the upturned rasp like I tried initially.
One I had them around the thickness I was shooting for, I got to work with the rasp again. First stage was to work out all the gouge marks from the plane with the rough side of the rasp. The second step was to level out the scales so the transition was smooth without any high or low spots. This was mostly eyeball work, because it would've taken all day if I stopped to make a measurement with calipers every 30 seconds. Once I was satisfied there, the finer side of the rasp was used to knock off the gouges made by the rough side of the tool. From here on out most of the work was done with the 2 fine edges.
Again the concave side of the scales were worked with the rounded part of the file, and the convex side of the scales and toe were done with the flat part. I think the rounding is rather self explanatory, work the file at the usual 45 degree angle while rotating your 'plane of attack' until you get the rounded edge you're looking for. The last part formed was the flare at the heel. Once the edges were rounded all the way down the length of both sides of the scales, a flat slope was cut with the rough side of the file then smoothed out with the fine edge. I left a (slightly) sharp line at the top of the scales, and rolled the edge at the bottom for a smooth transition into the rolled edge along the convex side of the scales.

**Side note about red oak - this wood is actually pretty hard but it throws a rather interesting curve at you. The dark porous spots are rather soft, and something to be aware of if you ever try to use this stuff for your own projects. It's cheap, readily available, and takes a fairly nice stain, but you do have to be mindful of the dark spots between the rings. If you look at the pic above, just right of the center of the top scale you'll see one of the dark spots I'm referring to - I very nearly made a mistake that would've resulted in scrapping that scale and having to cut another, but I was fortunate enough to be able to work around it and 'cover' the mistake.

Now that the planing and rasp work is done, and they're moving toward a final shape, all that's left is some finish sanding and a final decision whether I want to carve anything into them and/or scorch them a little with the ol' wood burning kit. I've actually never carved wood or used the wood burning kit before, but I figure there's no time like the present to learn. Worst case scenario I do some practice on the scrap pieces and decide I'd rather not destroy what could be a very handsome set of scales with a tiny bit of sanding, some stain, and a nice clear finish.Last edited by Marshal; 12-13-2015 at 11:49 PM.
-
12-26-2015, 06:11 PM #8Senior Member
- Join Date
- Dec 2014
- Location
- Virginia, USA
- Posts
- 2,224
Thanked: 481
Update - the restoration has actually been finished since Monday, I just haven't had a chance to update. Hopefully nobody thought I quit or failed lol.
Anyway, the ultimate decision, since I've neither carved wood nor burned it, was to simply color the scales with one application of red oak stain and finish up with a few coats of a polyurethane gloss clear finish. I think I went with 5 total coats because I wanted it to be thick. This is around the second or third coat:


As you can see, I used push-pins to keep them elevated while drying. The only downside to this is it left a ring where the scales sat on the plastic rim of the push pin that needed to be scuffed down with 320 grit paper.
For what they are, I think the scales came out rather nicely.Willisf likes this.
-
12-26-2015, 06:58 PM #9Senior Member
- Join Date
- Dec 2014
- Location
- Virginia, USA
- Posts
- 2,224
Thanked: 481
And since you can only put 7 photographs in a single post, here is the finished project from several different angles:


As stated earlier, the pattern for the brass spacer at the heel of the scales was built into the pattern for the scales. I kept the pattern, and cut out the back part, then used a sharpie to trace the shape I wanted onto a brass plate. I tried to make 2 of them, but the holes didn't quite line up right on the second plate. So I kept the good one and just used a single plate instead of 2. I feel like there isn't quite enough space between the scales at the hind end because of this, but the scales function as intended so it is what it is.
Once I had the pattern traced onto the brass sheet, I cut the spacers out with a Dremel tool, making sure to stay close to the marker line, but preferably outside of it. As with everything else, I would rather err on the side of caution because the brass can always be filed down further but if I cut too short could never add more onto it. I used the holes I had already pre-drilled in the scales as a guide for drilling the holes in the spacer plates. I placed one scale on the rough cut brass, held it where I wanted it by hand, placed it on a scrap piece of oak and drilled it with a hand drill. No fancy clamp action here, just a lot of luck lol.
Once I had the holes adequately placed in one sheet, I was able to sandwich the brass plate between the scales and use the point of my pocket knife to score the brass as close to the finished scales as possible. The final shaping was done with a hand file bought from Home Depot many moons ago. The brass spacer was clamped into a vice, and rotated as I worked each of the 3 edges that would be visible. As with the rasp, push the file in one direction (away from yourself) at approxiamately a 45 degree angle for maximum material removal. Keeping the file perpendicular to the work was the hardest part, particularly so when working the round corners.
Since brass is a soft metal it does form a sort of sheet that hangs off the edge that you're pushing the file towards. This is easily knocked off by pulling the piece out of the vice, and filing it away by holding your file about 45 degrees to the edge and lightly filing the burrs away. Usually best done pushing the file inward toward the center of the work piece as opposed to center out. Once the edges were filed down to where the knife scratches were I started taking 10-20 swipes of the file, then sandwiching it between the scales to see where I was at. Once the edges got to where some parts were lying where I wanted them and others were too high, the edges I wanted to file down were marked with a sharpie. 5-10 swiped, then check. It gets tedious, but the end result is worth it I think.
Once the filing was done, I sanded away the file marks with 320 grit, worked my way up to 2k, and finished off with a little chrome oxide on a cloth buffing wheel.
I won't detail pinning because there's a few very good guides for that on here already. The honing progression was, well...strange to say the least. I started out messing with a soft and hard Arkansas pair I have at work for my pocket knives. The stones are far too small to be effective for a straight razor, but I did get an OK bevel set out of them. Ultimately I went back to the typical Norton progression - 1k, 4k, 8k, and finished on an American Hone Co. barber hone. The barber hone was again, just messing around. Playing with a new thing to see what it can do. Still getting it dialed in, but the shave was fairly good.
But there you have it - the entire project start to finish.


 Reply With Quote


