
Results 1 to 10 of 19
 56Likes
Thread: Wedges easy, quick, accurate
 LinkBack URL
 About LinkBacks
Hybrid View
-
12-18-2015, 07:37 PM #1Senior Member


- Join Date
- Sep 2013
- Location
- Tucson, AZ
- Posts
- 1,031
Thanked: 176 Wedges easy, quick, accurate
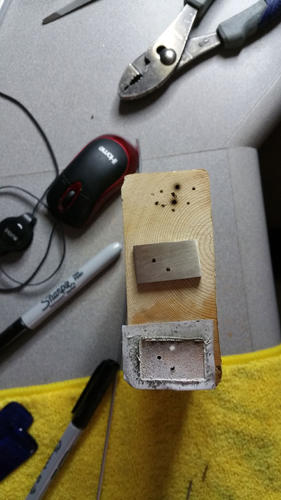
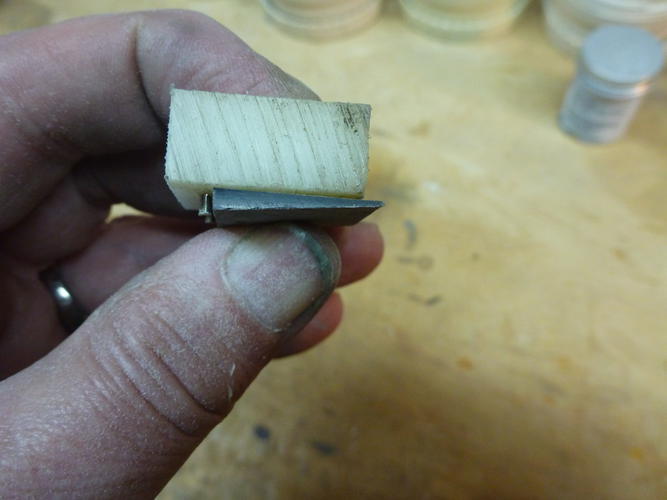
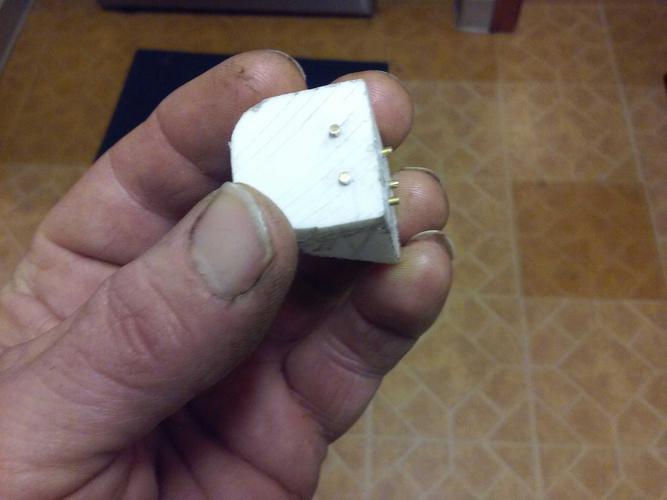
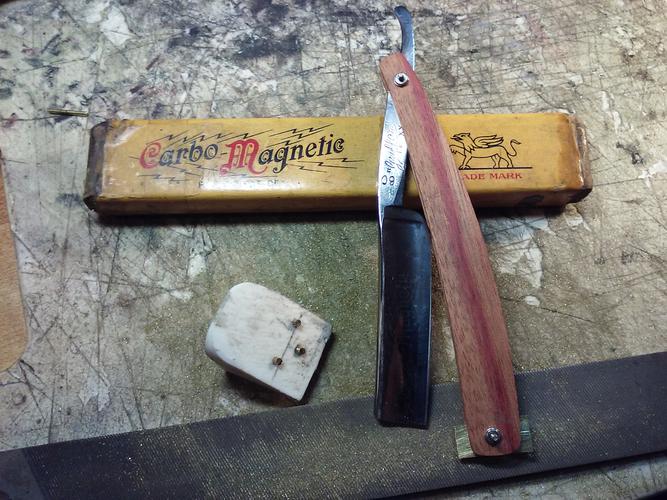
I use a disk sander for much of the shaping work that I do on razors. I came up with a simple tool to facilitate my wedge making, a scrap of 2x4. It saves my fingers and allows speedy and accurate shaping of a wedge. It is especially helpful with harder materials like this chunk of Nickel Silver. Having already trial assembled the razor to determine the wedge thickness I desire, I am ready to get started.
First, mark the top of the block and sand it to clean up using the platform on the disk sander. Now it will be parallel with the sanding face to ensure your wedges only have one taper in them!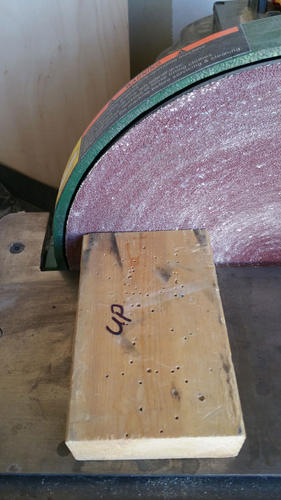
Cut your wedge blank and drill the pin hole through it. Here the wedge blank down to allow adequate internal clearance of the the blade. (I use the shanks off of broken 1/16 drill bits as trial assembly pins.)
With the internal clearance set. I put a piece of double stick tape on the block where the wedge will go. Carefully place the wedge blank on the wood so that it is positioned with the axis of taper perpendicular to the bottom of the block. Then drill through the wedge hole into the wood (not too deeply) and pin the wedge blank to the block with a scrap of pinning material. I usually start a hole with a drill and cut the end of the pin at an angle to fashion a crude nail. Then drill another hole through the wedge material as far from the assembly pin hole as is reasonable but will still be inside the scale. Using another piece of pinning material nail it to the block using this hole as well. This will keep the wedge from rotating as it is ground down to dimension.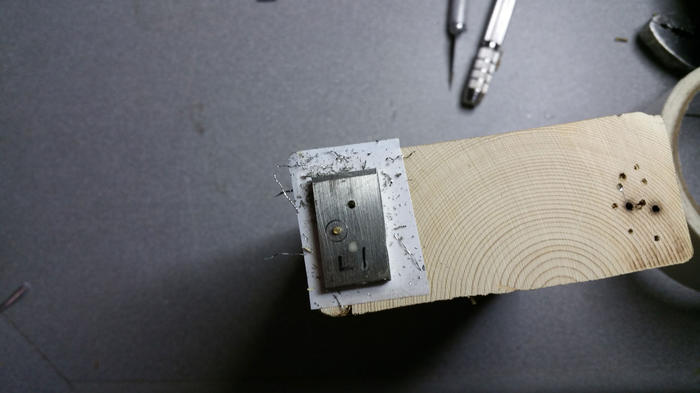
Back at the disk sander I can be very aggressive on taking the material off. I stop to check the maximum thickness with a depth gauge as I get close to size. I keep a spray bottle of water to cool off the material frequently, if not it will get hot enough to burn the wood.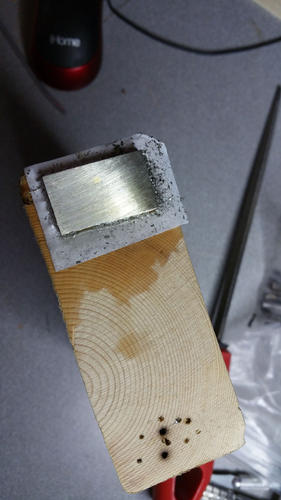
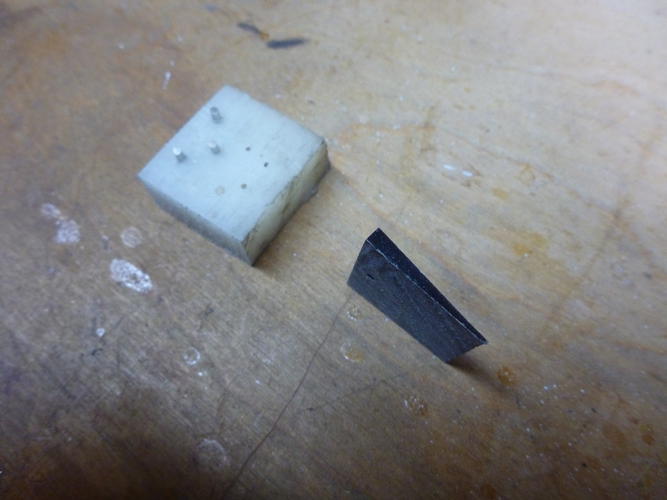
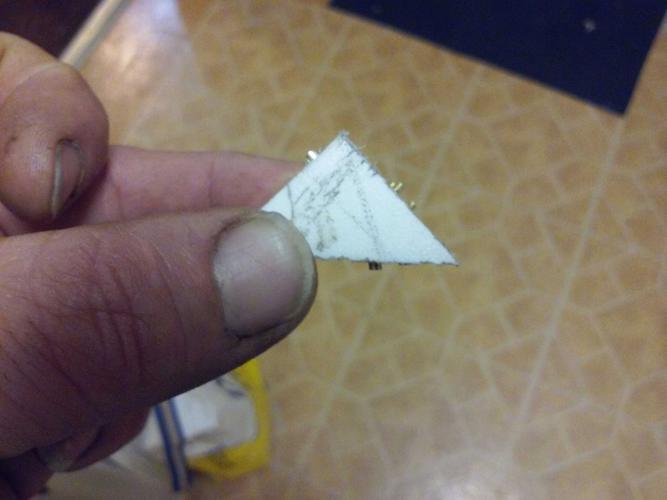
With the wedge down to size, carefully pry it off the wood and knock out the pins. Save them for the next wedge. Again trial fit the wedge and mark around the scale for rough shaping of the perimeter. Back to the disk sander and its ready to pin up and hand finish.
I find this is a quick way to get a wedge to the hand finish point. It works well with any material except transparent wedges or scales...that second hole will show up.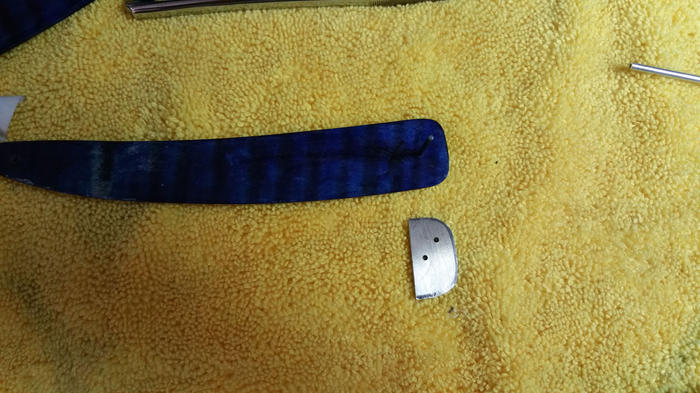 The easy road is rarely rewarding.
-
The Following 9 Users Say Thank You to Splashone For This Useful Post:
cudarunner (12-18-2015), Deeter (08-22-2016), Euclid440 (12-19-2015), gromowski45 (02-23-2016), Hirlau (12-18-2015), jmercer (12-19-2015), MW76 (03-19-2016), Ullmencott (12-19-2015), xiaotuzi (08-20-2016)
-
12-18-2015, 08:07 PM #2Senior Member


- Join Date
- Dec 2010
- Location
- South Florida
- Posts
- 13,530
Thanked: 3530
Thank you for taking the time to show your technique,,, I have struggled with wedges all my straight shaving life.
-
The Following User Says Thank You to Hirlau For This Useful Post:
Splashone (12-18-2015)
-
12-18-2015, 08:38 PM #3At this point in time...


- Join Date
- Jun 2007
- Location
- North Idaho Redoubt
- Posts
- 27,068
- Blog Entries
- 1
Thanked: 13249
How are you creating the "wedge angle" or did I miss that ???
Hmmmmm you gave me an idea either way heheheLast edited by gssixgun; 12-18-2015 at 08:48 PM.
ScoutHikerDad and Geezer like this.
-
The Following User Says Thank You to gssixgun For This Useful Post:
Splashone (12-18-2015)
-
12-18-2015, 09:04 PM #4Senior Member
- Join Date
- Sep 2013
- Location
- Tucson, AZ
- Posts
- 1,031
Thanked: 176
The wedge angle is how you hold it to the disk. I am usually not trying to hit a specific angle but often times have a min and max dimension in mind. Its just how you angle the block.
ScoutHikerDad likes this.The easy road is rarely rewarding.
-
12-18-2015, 11:41 PM #5Senior Member

- Join Date
- Oct 2011
- Location
- Standish, Maine
- Posts
- 816
Thanked: 953
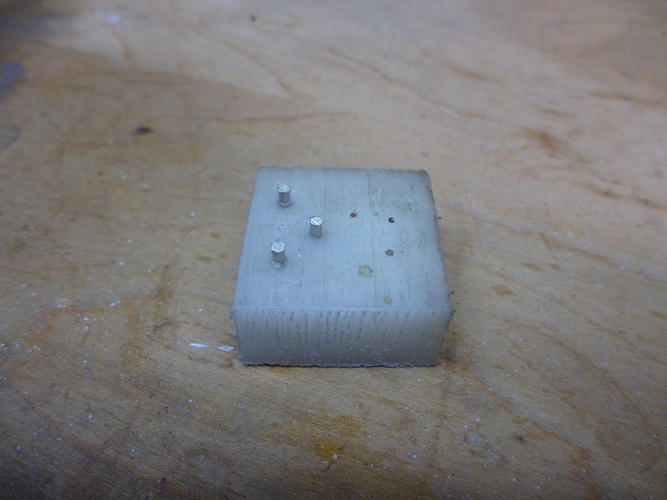
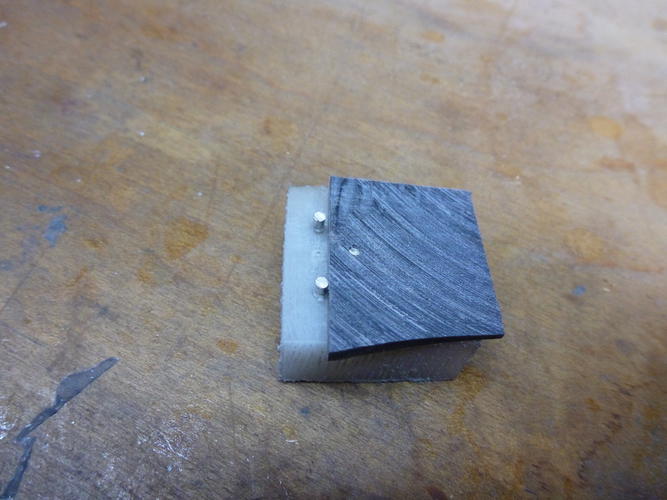
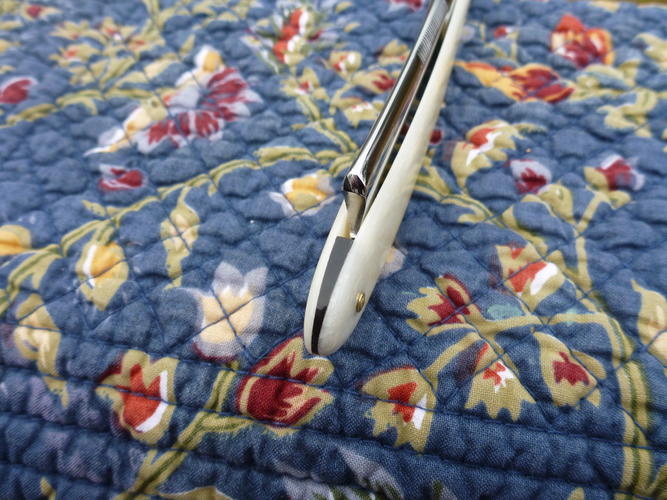
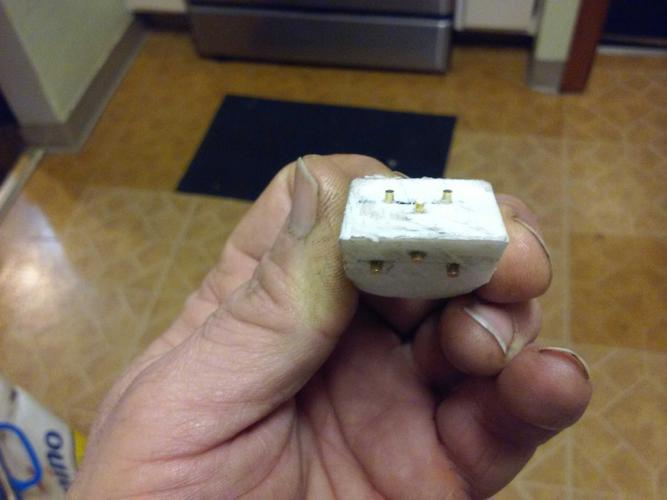
Here is the wedge gizzy I use. I saw something similar on another thread. Great minds think alike. Quick and easy to make. I used a scarp piece of nylon and some 1/16" dia. nickel silver pins. Drill the holes a few thousands undersize and hammer the pins in place. Once they are in place hold the gizzy against the disk sander to reduce the length. The pins in my wedges are always 1/8" back from the edge so that is the distance between the pins. Take your wedge material measure back 1/8" inch and drill a hole. Drop it on the gizzy and hold it against the sanding disk. It's easy to sand on an angle to get the wedge shape. Do one side flip it over and do the other. Take a few cuts and sort of sneak up on it. It doesn't get much simpler. The last photo is a completed and installed horn wedge.
Last edited by karlej; 12-18-2015 at 11:52 PM.
-
-
12-19-2015, 01:02 AM #6Senior Member
- Join Date
- Sep 2013
- Location
- Tucson, AZ
- Posts
- 1,031
Thanked: 176
I don't bother flipping it over. When it is done and off the block, I briefly touch the "interior" edge to "normalize" that edge to the tapered sides.
The easy road is rarely rewarding.
-
12-19-2015, 04:18 AM #7Senior Member


- Join Date
- Mar 2015
- Location
- Akron, Ohio
- Posts
- 12,110
Thanked: 4314
Your welcome... Originally Posted by karlej

I posted it in butchered blade some time back, for those that dont have a belt sander.
Mine was made to make large and small single pin wedges and double pin wedges.
 Mike
Mike
-
-
12-19-2015, 04:37 AM #8Senior Member
- Join Date
- Mar 2015
- Location
- Akron, Ohio
- Posts
- 12,110
Thanked: 4314
Thats just the difference between making wedges without a jig to hold them with and without a jig. [emoji38]
-
12-19-2015, 08:07 PM #9Senior Member
- Join Date
- Mar 2015
- Location
- Akron, Ohio
- Posts
- 12,110
Thanked: 4314
I've also made brass wedges with the jig, by c-clamping a file to my work table, being I dont use power tools.
I like the smell, when walking around the barn.[emoji6]Mike
-
The Following 5 Users Say Thank You to outback For This Useful Post:
ajkenne (12-19-2015), engine46 (12-23-2015), gromowski45 (02-23-2016), sharptonn (12-20-2015), xiaotuzi (08-20-2016)


 Reply With Quote