
Results 1 to 10 of 19
 56Likes
Thread: Wedges easy, quick, accurate
 LinkBack URL
 About LinkBacks
Hybrid View
-
12-18-2015, 08:38 PM #1At this point in time...


- Join Date
- Jun 2007
- Location
- North Idaho Redoubt
- Posts
- 27,069
- Blog Entries
- 1
Thanked: 13249
How are you creating the "wedge angle" or did I miss that ???
Hmmmmm you gave me an idea either way heheheLast edited by gssixgun; 12-18-2015 at 08:48 PM.
ScoutHikerDad and Geezer like this.
-
The Following User Says Thank You to gssixgun For This Useful Post:
Splashone (12-18-2015)
-
12-18-2015, 09:04 PM #2Senior Member


- Join Date
- Sep 2013
- Location
- Tucson, AZ
- Posts
- 1,031
Thanked: 176
The wedge angle is how you hold it to the disk. I am usually not trying to hit a specific angle but often times have a min and max dimension in mind. Its just how you angle the block.
ScoutHikerDad likes this.The easy road is rarely rewarding.
-
12-18-2015, 11:41 PM #3Senior Member

- Join Date
- Oct 2011
- Location
- Standish, Maine
- Posts
- 816
Thanked: 953
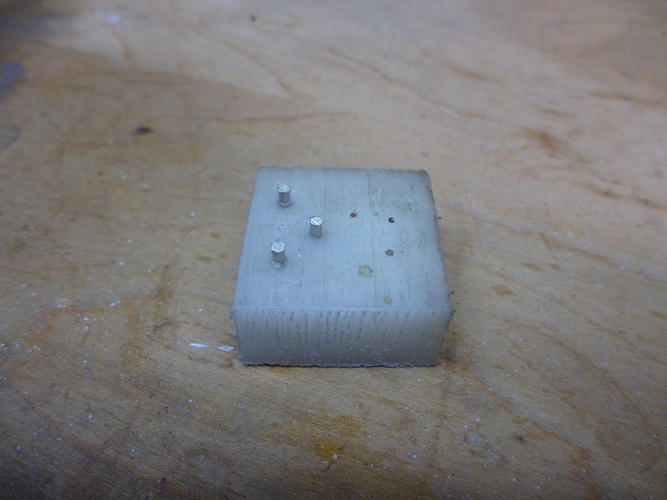
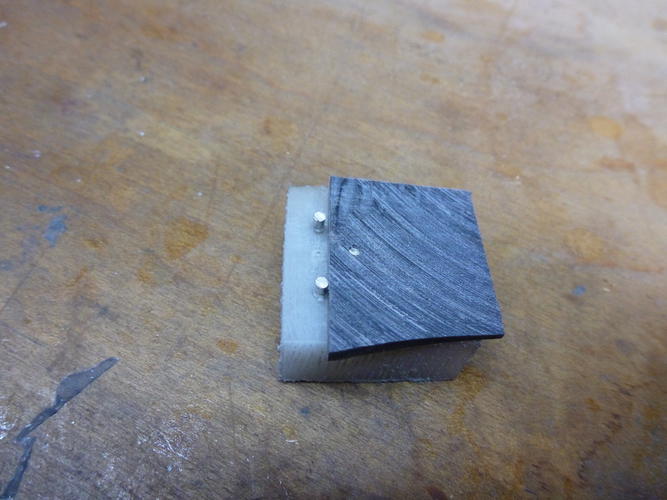
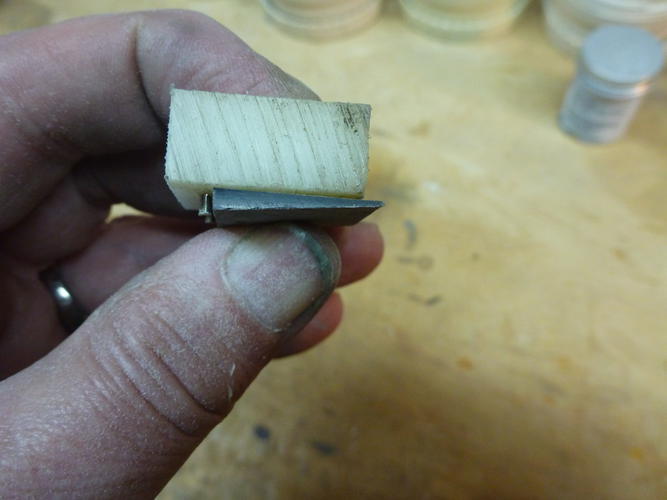
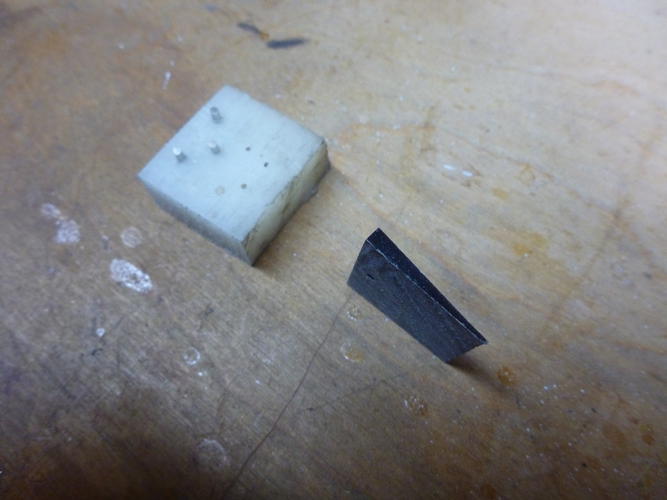
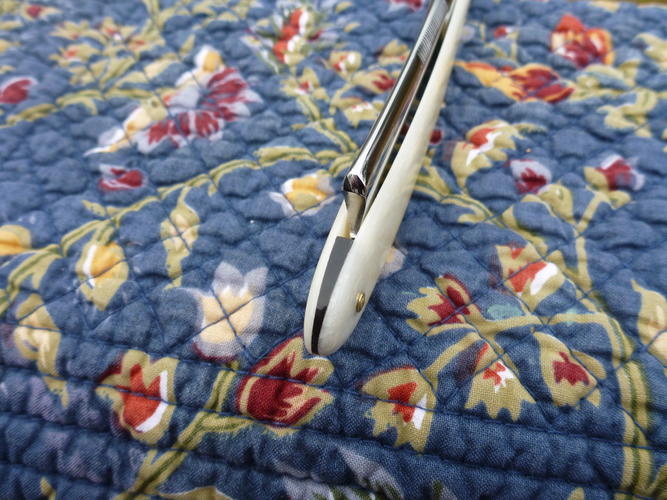
Here is the wedge gizzy I use. I saw something similar on another thread. Great minds think alike. Quick and easy to make. I used a scarp piece of nylon and some 1/16" dia. nickel silver pins. Drill the holes a few thousands undersize and hammer the pins in place. Once they are in place hold the gizzy against the disk sander to reduce the length. The pins in my wedges are always 1/8" back from the edge so that is the distance between the pins. Take your wedge material measure back 1/8" inch and drill a hole. Drop it on the gizzy and hold it against the sanding disk. It's easy to sand on an angle to get the wedge shape. Do one side flip it over and do the other. Take a few cuts and sort of sneak up on it. It doesn't get much simpler. The last photo is a completed and installed horn wedge.
Last edited by karlej; 12-18-2015 at 11:52 PM.
-
-
12-19-2015, 01:02 AM #4Senior Member
- Join Date
- Sep 2013
- Location
- Tucson, AZ
- Posts
- 1,031
Thanked: 176
I don't bother flipping it over. When it is done and off the block, I briefly touch the "interior" edge to "normalize" that edge to the tapered sides.
The easy road is rarely rewarding.
-
12-19-2015, 01:41 AM #5At this point in time...
- Join Date
- Jun 2007
- Location
- North Idaho Redoubt
- Posts
- 27,069
- Blog Entries
- 1
Thanked: 13249
Good idea guys I added it to the Sticky I think it wiil maybe help some of the new guys to make correctly built and functioning scales with real wedges instead of spacers..
I have always just freehanded them using a piece of Doublesided Tape but your ways are easier to teach new guys
Many Thanks for sharing
-
-
12-19-2015, 01:46 AM #6Razor Vulture


- Join Date
- Oct 2010
- Location
- Lone Star State
- Posts
- 26,168
Thanked: 8617
Outback showed a jig about like that a while back. He was using sandpaper on a flat surface. Good idea for those without many power tools or those who like doing it by hand.
"Don't be stubborn. You are missing out."
I rest my case.
-
12-19-2015, 01:48 AM #7I used Nakayamas for my house


- Join Date
- Aug 2009
- Location
- Des Moines
- Posts
- 8,664
- Blog Entries
- 1
Thanked: 2591
Very neat ideas shared here, thanks
Stefan
-
The Following User Says Thank You to mainaman For This Useful Post:
Splashone (12-19-2015)
-
12-19-2015, 02:49 AM #8< Banned User >
- Join Date
- Jul 2015
- Location
- Central Oregon
- Posts
- 789
Thanked: 98
I use Dop wax instead of pins, it is wax that hardens fast to different materials, then heat a bit and the pattern pops off to do the other side, it can be used for hand engraving tiny parts and stone setting, when ya wanna get real fancy...
Great Jig Ideas Gent's.
-
-
12-19-2015, 01:18 PM #9Senior Member
- Join Date
- Oct 2011
- Location
- Standish, Maine
- Posts
- 816
Thanked: 953
The wedge material is rarely flat on both sides and it's too hard to hang on to without the gizzy. For those without power tools I suppose you could use this on a flat piece of sandpaper but it's the long way around the barn. Originally Posted by Splashone

-
12-19-2015, 03:37 PM #10Senior Member

- Join Date
- Apr 2012
- Location
- Diamond Bar, CA
- Posts
- 6,553
Thanked: 3215
I double sided foam tape them to the end of paint stir stick and rub them on a file lying flat on the bench, applying more pressure to one side and just taper one side, finish on sand paper. Enlarge the hole a bit to allow for the taper.
Eyeball, measure with calipers and test fit. Keep old wedges for patterns and thickness templates.
I do like the jigs, will have to make one for the belt sander, Thanks.outback likes this.
-
The Following User Says Thank You to Euclid440 For This Useful Post:
outback (12-19-2015)


 Reply With Quote