
Results 1 to 10 of 28
 85Likes
 LinkBack URL
 About LinkBacks
-
12-22-2015, 01:17 AM #1Senior Member


- Join Date
- Oct 2011
- Location
- Standish, Maine
- Posts
- 816
Thanked: 954 How to make and fit a lead wedge... the way I do it.
I frequently see rescaled razors with poorly fit wedges or worse yet a spacer someone thinks is a wedge. This is my first attempt at putting together a how to and I hope it is useful. I've used this process now for 4 years. It takes me about 20 minutes to make and fit the wedge.
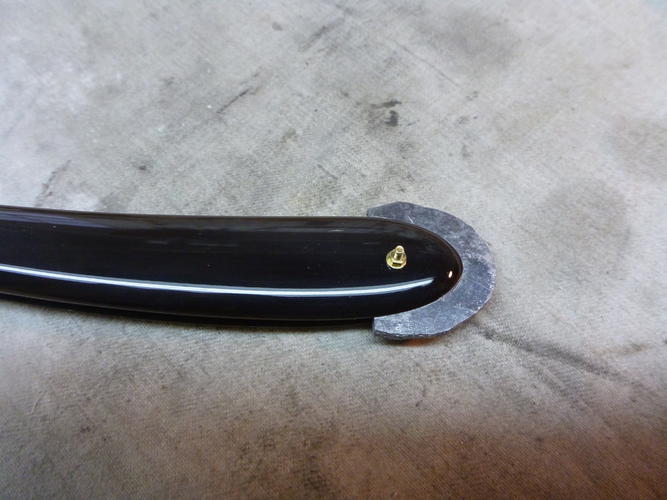
Wedges are tapered. Ideally they have the same taper as the tang. They also set the depth the blade sits in the scales. If I'm working with a blade with a barbers notch I like the blade to sit about in the middle of the notch. Maybe a little less. If you measure at that point on the blade you will have your approximate wedge width. Normally when I make scales the blade toe will be between 1/16" to 1/8" from the end of the wedge. Usually this makes the wedge a little thicker than most of the old ones. The old makers achieved sinking the blade deeper with a thinner wedge by increasing the distance between the wedge and blade toe. Because of the wedge shape the further away the blade is from the wedge the wider the scales. Today most folks like to see the blade tucked up close to the wedge.
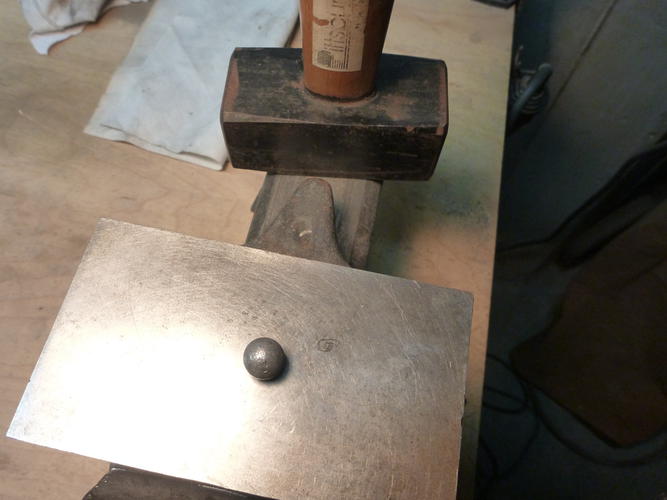
The process starts with a 50 ca. round lead ball. Don't cast your own... head to the local sporting good store and buy a box of premade. Speer is a common maker.
Next you'll need a flat faced hammer and a flat steel surface. You can use a regular ballpeen hammer but the face is crowned and it will make this more difficult than it needs to be.
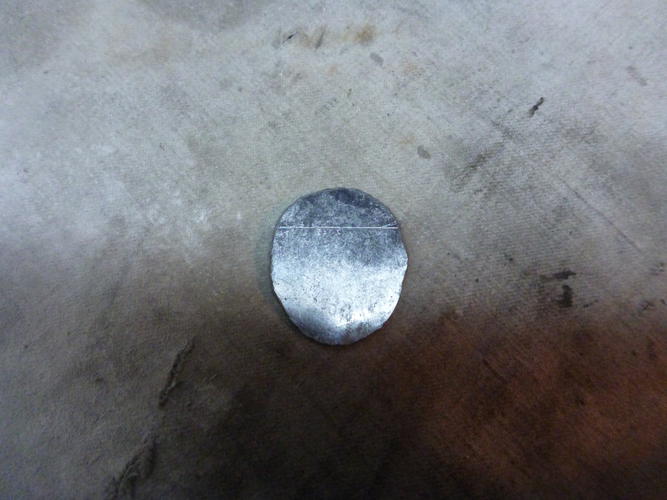
Strike the ball squarely on the steel plate until it is wider than the scales. It will probably be about .120 thick at this point.

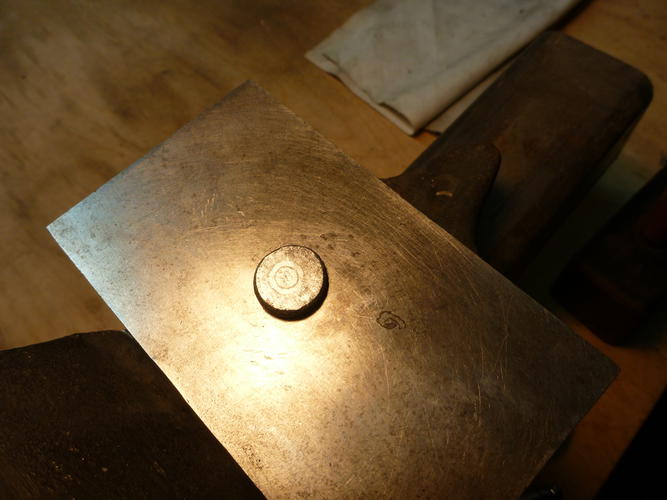
Next strike lead on the edge holding the hammer face at an angle working from one edge to the other. Flip it over a few times as you strike to keep things even and flat.
At this point the wedge shape has been achieved and is about .035 at the thin end and .120 at the thick end.
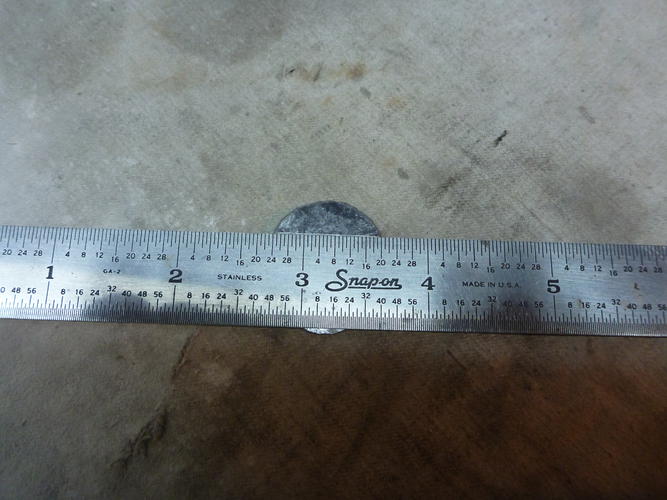
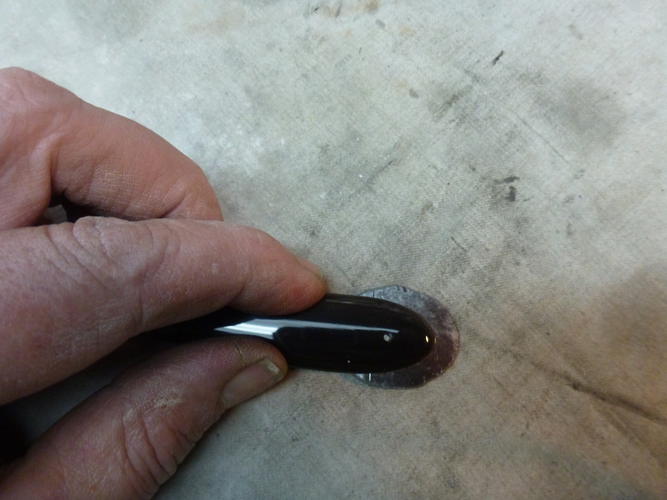
Lay a straight edge across the wedge at the point you have determined for the final wedge thickness. In this case it was .100.
Most wedges are in the neighborhood of 9/16" long. Make a small mark on the lead that distance from the line.
Now lay one scale half on the lead with the end of the scale at that mark. I use a sharp pencil to mark around the scale and get my hole location.
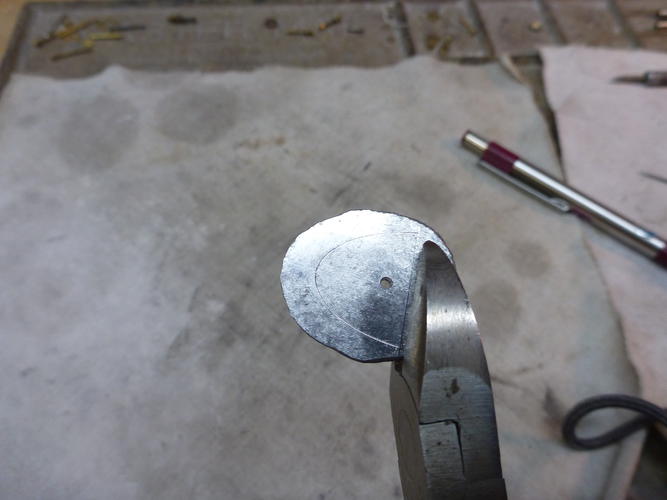
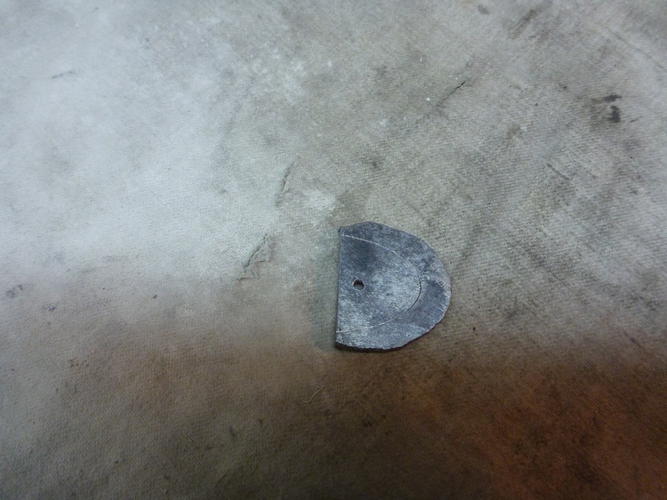
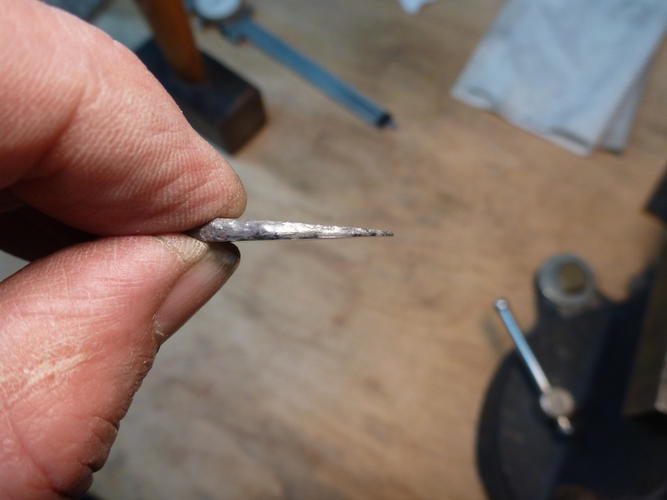
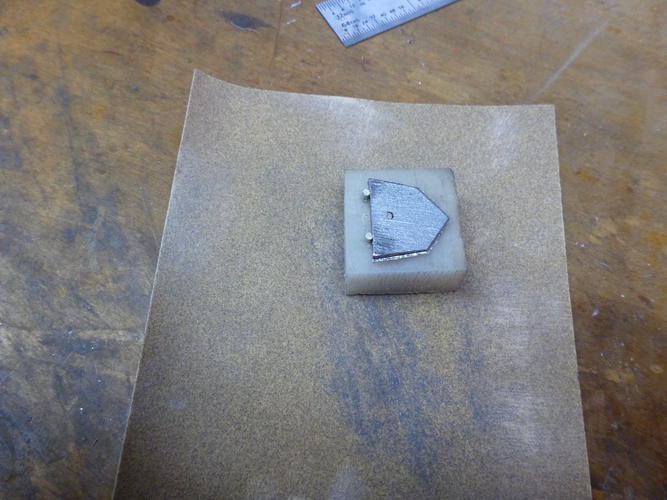
A pair of dikes is used to cut the wedge and it is trued up on a 1" x 42" belt sander to the thickness line.
The center of the hole in the wedge for the pin is 1/8" from the thick edge of the wedge. After it is drilled use a counter sink to chamfer the edges.
Assemble the scales to the wedge using micro fasteners and trim off the excess lead with dikes.
I hope you started with flat scales. If not you need to fix that now.
Hold the assembled scales up to a strong light and look for gaps around the edges were the scales meet the lead. NO gaps allowed. If there are any then something is not flat. If it's the lead and you are good with the hammer you can fix it with some well placed strikes. Another method is to use this wedge gizzzy to flatten the lead on some 100 grit paper.
So you put it all back together again, hold it up to the light and 'damn' you can just see the tiniest of gaps in a couple places on one scale side. Don't chase your tale at this point trying to make everything flatter.
Take a scraper and scrape out material in the center of the scales almost to the edge. Don't go to the edge or you will most likely have a bigger gap. This is an old carpenters trick for fitting molding and it works great here. Reassemble. Still a small gap...take it apart and scrap some more. No gaps allowed. Any gaps now will be glaring then you take the lead down to the surface of the scales. Now I know you can bump the lead to swell it up some and fill some gaps but it's not necessary if you do this correct in the first place and bumping the lead can create other problems.
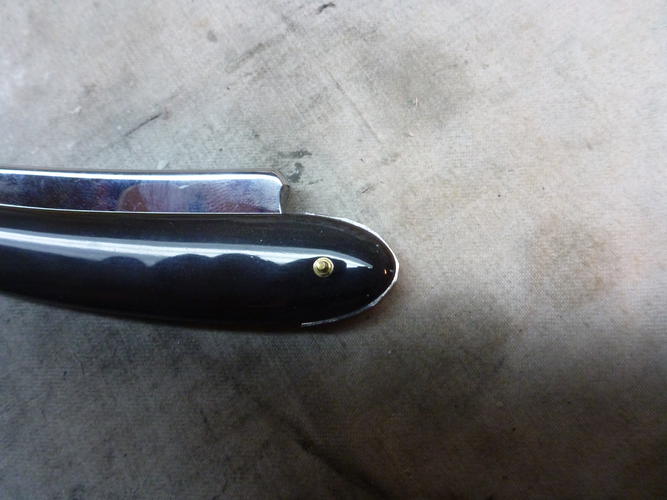
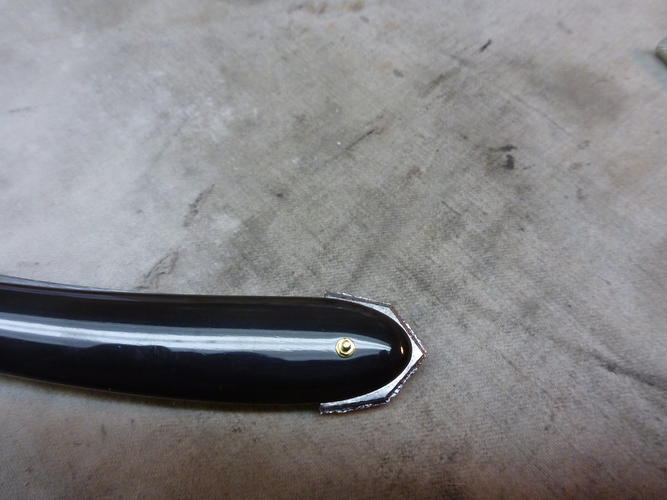
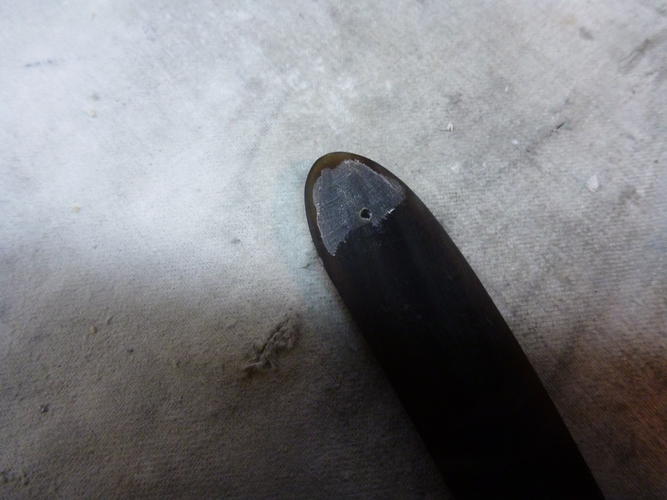
We're on the home stretch. Assemble the blade to the scales and if you are satisfied with how the blade sits start removing lead from the edge until you have about .010 proud lead.
Install your final collars and pins at this point. I left a little proud lead because I sometimes have to move things around a bit to get the blade closing on center.
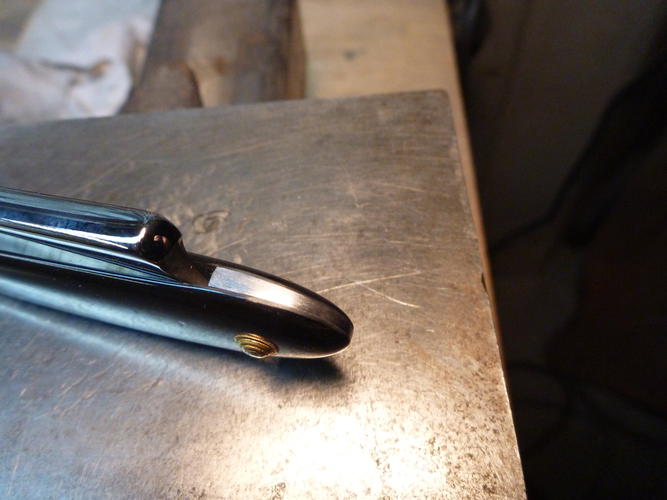
I remove the last of the lead with a single cut file being careful not to nick the scales to much. Follow with 400 grit paper and 600 grit paper and last to the buffer to re-polish the edges touched by the 600 grit paper.
Keep the buffer away from the lead. It's very soft and you will make a real mess of things.
This wedge's final dimensions were .045 at the thin end and .100 at the thick end. Perfect fit. NO gaps.Last edited by karlej; 12-22-2015 at 01:25 AM.
-
The Following 32 Users Say Thank You to karlej For This Useful Post:
32t (12-22-2015), Anthonyb (12-23-2015), BeJay (12-24-2015), Benjisco (12-22-2015), bongo (12-22-2015), Cangooner (12-22-2015), Chevhead (04-18-2016), dinnermint (03-09-2016), eddy79 (12-22-2015), Euclid440 (12-22-2015), Gasman (08-15-2019), Geezer (12-22-2015), Hirlau (12-22-2015), jmercer (12-24-2015), mainaman (12-22-2015), MattCB (12-22-2015), moutonrouge (03-28-2016), Quixoticshaver (12-22-2015), RezDog (12-22-2015), Sandycrack (04-18-2016), sharptonn (12-22-2015), Slawman (12-23-2015), Srdjan (12-22-2015), Steel (12-22-2015), Substance (12-27-2015), tonybee (12-31-2015), Utopian (12-22-2015), Willisf (12-22-2015), WillN (12-22-2015), Wirm (12-22-2015), Wolfpack34 (12-22-2015), WW243 (12-22-2015)
-
12-22-2015, 01:58 AM #2Senior Member

- Join Date
- Sep 2014
- Location
- Yorkton, Saskatchewan, Canada
- Posts
- 1,171
Thanked: 230
Great tutorial!
I like your technique.
Thank you for showing us this.
I'll be bookmarking it for a reference down the road.
 Is it over there or over yonder?
-
12-22-2015, 02:03 AM #3Member
- Join Date
- Mar 2013
- Location
- Hondo, Texas
- Posts
- 41
Thanked: 14
Very nice method and a great write-up!
- mikeo
-
12-22-2015, 02:36 AM #4Senior Member


- Join Date
- Apr 2012
- Location
- Diamond Bar, CA
- Posts
- 6,553
Thanked: 3215
Great post, well written and photo documented. Sticky material.
Thanks for your hard work, taking photos of a process can be a pain in the rear.
Nice work.
-
12-22-2015, 03:09 AM #5illegitimum non carborundum

- Join Date
- Jan 2008
- Location
- Rochester, MN
- Posts
- 11,552
- Blog Entries
- 1
Thanked: 3795
That's a very nice write-up. Thank you!
I've got a couple of boxes of .490 balls for trying this out. It turned out that my muzzleloader likes .495 better so the .490s have been sitting around waiting for some something to do and this definitely is worth trying.
-
12-22-2015, 03:35 AM #6~ Life is but a Dream ~

- Join Date
- Dec 2014
- Location
- Oakham, Ma.
- Posts
- 3,844
Thanked: 1218
Awesome write up and pictures.
A 50 cal.lead ball...whoda thunk??
Just so happens that my muzzle loader is a 50 cal. TC.
Lead wedges galore!!!
Thanks for the info.
Pete <:-}karlej likes this."Life is short, Break the Rules. Forgive quickly, Kiss Slowly,
Love truly, Laugh uncontrollably, And never regret ANYTHING
That makes you smile." - Mark Twain
-
12-22-2015, 05:11 AM #7Razor Vulture

- Join Date
- Oct 2010
- Location
- Lone Star State
- Posts
- 26,195
Thanked: 8624
Seems everyone is getting on board with the outback wedge fixture!

Awesome Job!
Great idea, Mike! I am putting mine together a bit at a time! "Don't be stubborn. You are missing out."
I rest my case.
-
The Following User Says Thank You to sharptonn For This Useful Post:
outback (12-22-2015)
-
12-22-2015, 03:22 PM #8Senior Member
- Join Date
- Oct 2011
- Location
- Standish, Maine
- Posts
- 816
Thanked: 954
I've been using this wedge gizzy for years. I think I have the patent for it around here somewhere. Originally Posted by sharptonn


-
-
12-22-2015, 03:35 PM #9I used Nakayamas for my house


- Join Date
- Aug 2009
- Location
- Des Moines
- Posts
- 8,664
- Blog Entries
- 1
Thanked: 2591
This is a very cool technique, thanks for sharing.
karlej likes this.Stefan
-
12-22-2015, 03:39 PM #10Senior Member

- Join Date
- Apr 2011
- Location
- California
- Posts
- 1,596
Thanked: 865
Nice write-up Karl. Very helpful hints which should save me some time making my wedges in the future. Thanks!
 Lupus Cohors - Appellant Mors !


 Reply With Quote