
Results 1 to 10 of 41
 119Likes
Thread: My Experimental Vacuum Chamber
 LinkBack URL
 About LinkBacks
Threaded View
-
01-15-2016, 03:51 AM #1'with that said'


- Join Date
- Aug 2010
- Location
- Walla Walla in WA State USA
- Posts
- 11,157
Thanked: 4230 My Experimental Vacuum Chamber
I've been interested in making a small vacuum chamber for quite sometime. I've looked at commercially built units and found them out of my budget. The many YouTube ones were interesting but not to my liking.
SO!
I built one that I 'think' will do for my small time needs. It's still in the experimental stage so Please Bear With Me!
One of the things from reading here awhile back was that the seals seem to deteriorate so I wanted something that could be easily and affordably replaced. I also wanted something that wouldn't cost me an arm and a leg so here's what I'm 'Playing with'.
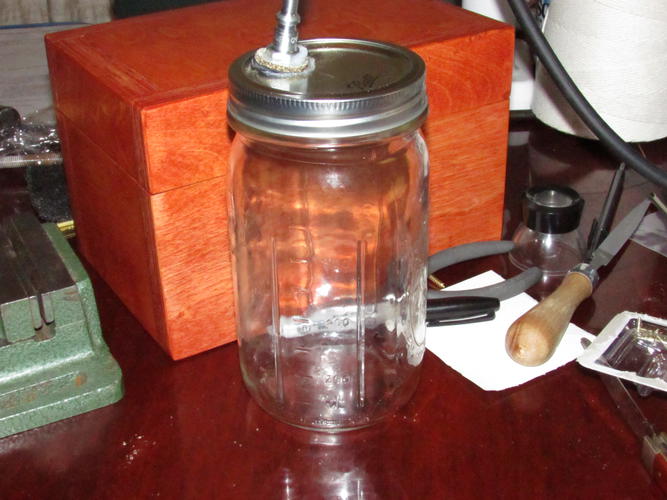
I chose a 1 Qt mason jar since the lids are inexpensive and readily available. I also think that it will be large enough to hold a pair of scales and the liquid of choice to have impregnated into the scales.
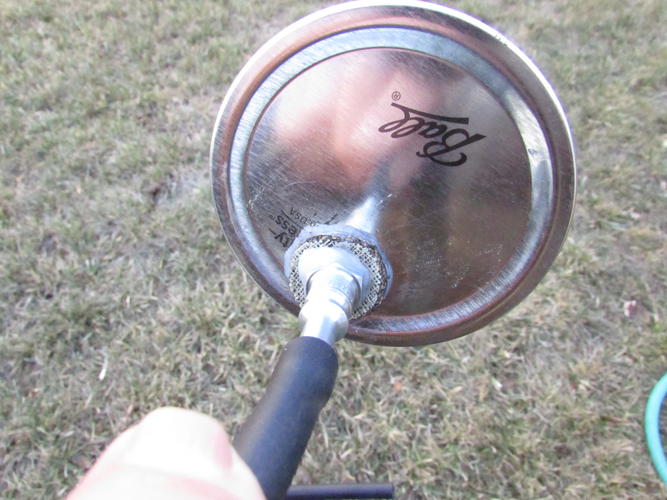
I used a Lincoln style air hose connector to connect to the vacuum hose and be attached to the lid of the jar. I used a 29/64 drill bit to create a hole near the edge of the lid. With just a little pressure the 1/4" pipe threads easily started and would screw fully in.
OK! That worked so I cut piece of some material that back in the day was used to hold automotive glass in the tracks of door windows then I drilled a hole using the same bit as for the lid. I used silicon sealer on the threads then threaded the material on and re-applied silicon and screwed the nipple into the lid.
It looks like this:
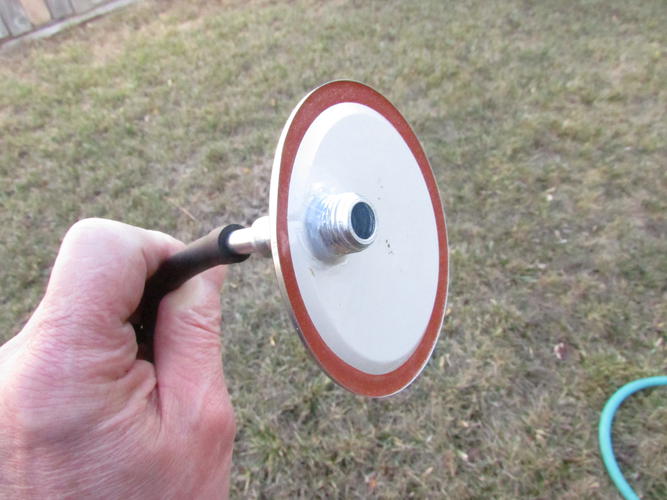
I then used additional silicon on the inside of the lid for added sealing.
Like this:
Here's a look at the basic setup:
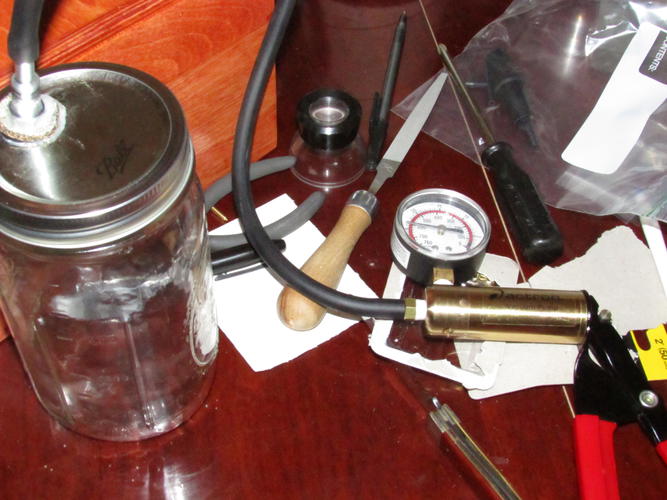
After allowing the silicon to cure I was ready for a 'Dry Run' so I applied a light coat of Vaseline to the rubber gasket, screwed the lid on hand tight and started to draw a vacuum.
After around 230 hand squeezed pumps I had drawn 24 inches of vacuum:
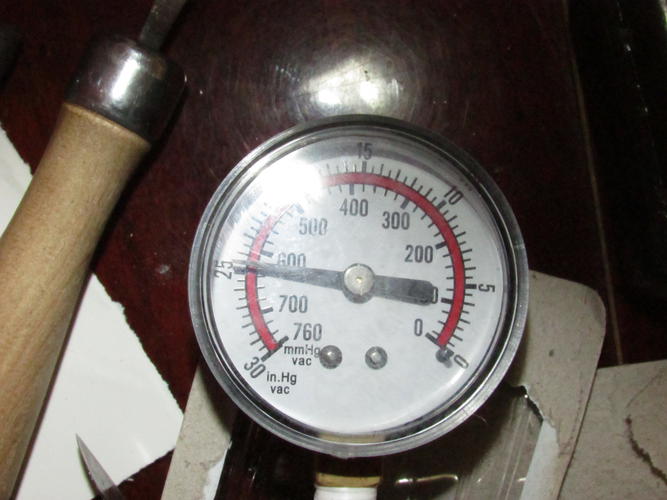
As I write this it's been almost 7 hours and the gauge hasn't changed so I'm confident that I've gotten a good seal.
I plan on a 'trial run' tomorrow. The jar will have some wood added to it then probably just some water then the lid attached and the jar laid on it's side with the hose at the 12:00/24:00 position and then draw a vacuum and see what happens.
So far I've got about $60 invested and that includes the pump and the air coupler.
If it's a failure at least I'll have a decent vacuum pump if I need it Our house is as Neil left it- an Aladdins cave of 'stuff'.
Kim X
-


 Reply With Quote