
Results 1 to 10 of 41
 119Likes
Thread: My Experimental Vacuum Chamber
 LinkBack URL
 About LinkBacks
-
01-15-2016, 04:51 AM #1'with that said'


- Join Date
- Aug 2010
- Location
- Walla Walla in WA State USA
- Posts
- 11,260
Thanked: 4238 My Experimental Vacuum Chamber
I've been interested in making a small vacuum chamber for quite sometime. I've looked at commercially built units and found them out of my budget. The many YouTube ones were interesting but not to my liking.
SO!
I built one that I 'think' will do for my small time needs. It's still in the experimental stage so Please Bear With Me!
One of the things from reading here awhile back was that the seals seem to deteriorate so I wanted something that could be easily and affordably replaced. I also wanted something that wouldn't cost me an arm and a leg so here's what I'm 'Playing with'.
I chose a 1 Qt mason jar since the lids are inexpensive and readily available. I also think that it will be large enough to hold a pair of scales and the liquid of choice to have impregnated into the scales.
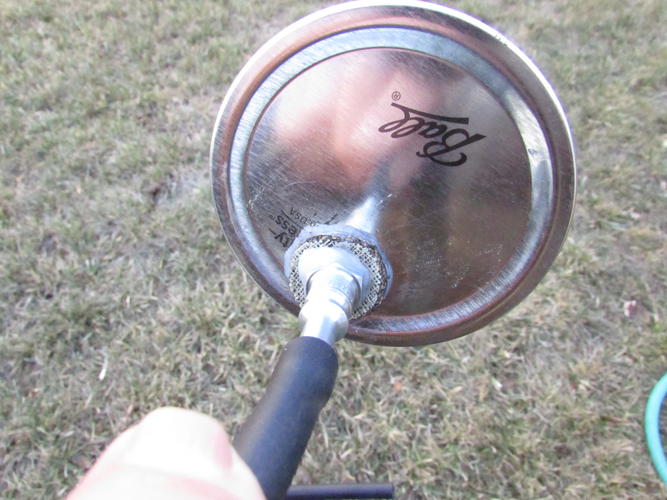
I used a Lincoln style air hose connector to connect to the vacuum hose and be attached to the lid of the jar. I used a 29/64 drill bit to create a hole near the edge of the lid. With just a little pressure the 1/4" pipe threads easily started and would screw fully in.
OK! That worked so I cut piece of some material that back in the day was used to hold automotive glass in the tracks of door windows then I drilled a hole using the same bit as for the lid. I used silicon sealer on the threads then threaded the material on and re-applied silicon and screwed the nipple into the lid.
It looks like this:
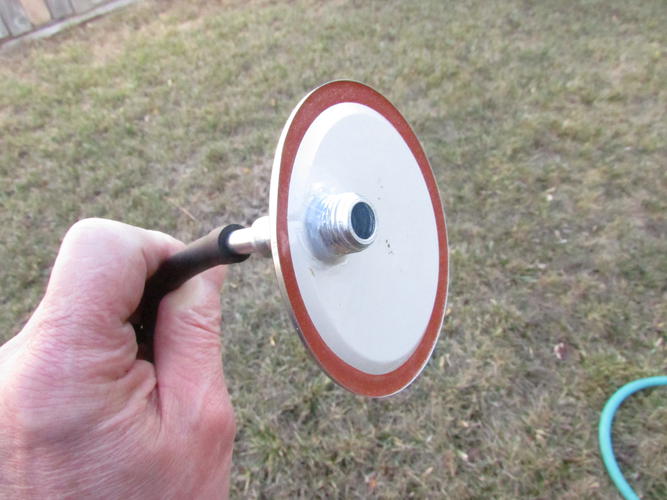
I then used additional silicon on the inside of the lid for added sealing.
Like this:
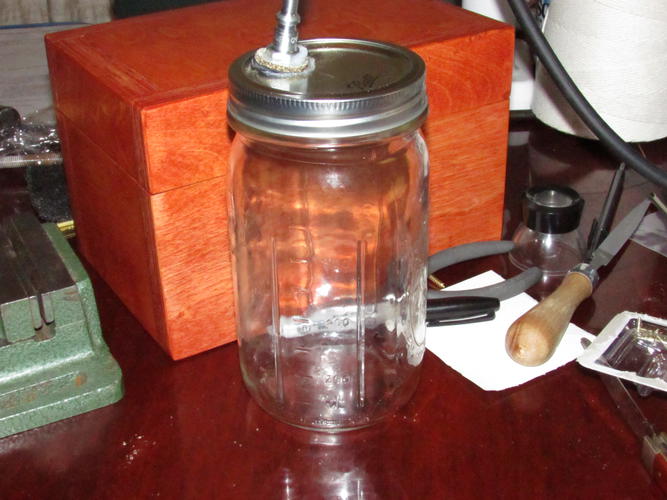
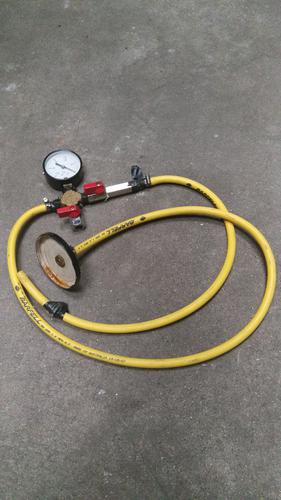
Here's a look at the basic setup:
After allowing the silicon to cure I was ready for a 'Dry Run' so I applied a light coat of Vaseline to the rubber gasket, screwed the lid on hand tight and started to draw a vacuum.
After around 230 hand squeezed pumps I had drawn 24 inches of vacuum:
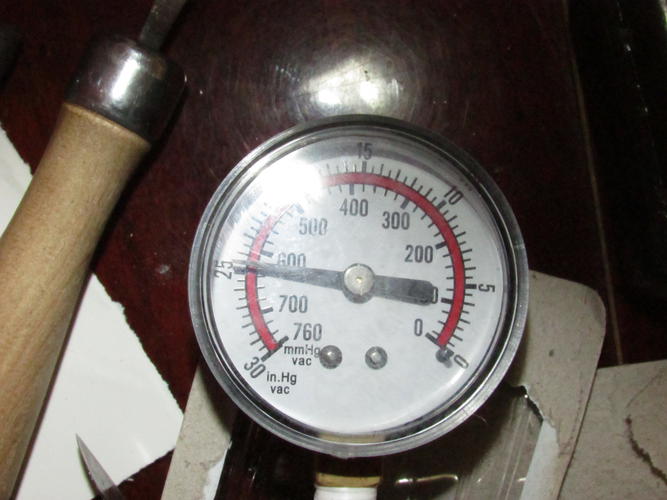
As I write this it's been almost 7 hours and the gauge hasn't changed so I'm confident that I've gotten a good seal.
I plan on a 'trial run' tomorrow. The jar will have some wood added to it then probably just some water then the lid attached and the jar laid on it's side with the hose at the 12:00/24:00 position and then draw a vacuum and see what happens.
So far I've got about $60 invested and that includes the pump and the air coupler.
If it's a failure at least I'll have a decent vacuum pump if I need it Our house is as Neil left it- an Aladdins cave of 'stuff'.
Kim X
-
-
01-15-2016, 05:09 AM #2Senior Member

- Join Date
- Apr 2012
- Location
- Diamond Bar, CA
- Posts
- 6,553
Thanked: 3215
I have thought about a similar system, using a heavy pasta jar about 12 in high. I am worried about foaming up.
I saw a system similar to yours, where a guy used a double jar in line system so the 2nd jar would collect any foam up and keep it, well away from the pump.
Which stabilizing fluid are you planning on using?
-
01-15-2016, 05:15 AM #3'with that said'
- Join Date
- Aug 2010
- Location
- Walla Walla in WA State USA
- Posts
- 11,260
Thanked: 4238
I have planned on a two stage set up with the second jar to catch anything that might be pulled up. Right now I just want to see how things work.
With how long and how many hand pumps it took to get 24 inches of vacuum I don't think that foaming will be much of a problem. If foaming starts to get out of control I would think that by stopping the pumping and waiting for the foaming to subside then start pumping again would work. But there again I don't know I'm new to this whole thing.
I haven't decided on what to use. I can envision being able to use the set up with a different jar to impregnate stains and such into woods and perhaps bone.
Like I said it's an experiment if it works GREAT! If not I'm not out much.
Our house is as Neil left it- an Aladdins cave of 'stuff'.
Kim X
-
01-15-2016, 05:36 AM #4At this point in time...


- Join Date
- Jun 2007
- Location
- North Idaho Redoubt
- Posts
- 27,204
- Blog Entries
- 1
Thanked: 13250
there is a catch container that goes in line with that Vacuum pump should be in the bag with all the attachments,, Little plastic screw jar with a double nipple top USE IT !!!!
That will be a safety that will catch vapor from the bubbles from getting to your pump..
The the 24 in/Hg will drop as the air is sucked outta the material, once it stops dropping for at least 12 hours then you are done but until then you have to keep pumping every few hours hehehe
I did a thread about making these a few years ago it should be around someplaceLast edited by gssixgun; 01-15-2016 at 05:39 AM.
-
The Following 2 Users Say Thank You to gssixgun For This Useful Post:
cudarunner (01-15-2016), Substance (01-15-2016)
-
01-15-2016, 10:30 AM #5< Banned User >
- Join Date
- Dec 2013
- Location
- Perth, Western Australia
- Posts
- 318
Thanked: 44
I made one similar, with a large pickle jar as the chamber. I pulled apart a $3 bicycle pump and reversed the valve to create a vacuum pump. Here's a picture of the set up, minus the jar and pump. It pulled about 80-85% of a perfect vacuum and did the job just fine. I put the scales and stabilising fluid into a smaller container that fits into the pickling jar, any frothing overflows and collects in the bottom of the jar.
Last edited by puketui41; 01-15-2016 at 10:33 AM.
-
-
01-15-2016, 01:38 PM #6Rock collector

- Join Date
- Jan 2012
- Location
- Illinois
- Posts
- 525
Thanked: 88
I picked up the same vacuum pump at a garage sale last year. My plan is to modify a small pressure cooker for the chamber, but I haven't found one for the right price.
-
01-15-2016, 02:01 PM #7I love Burls....... and Acrylic

- Join Date
- Mar 2012
- Location
- Baden, Ontario
- Posts
- 5,475
Thanked: 2284
That's really good Roy. I have a big one I made with an actual vacuum pump and it pulls 27/28 inHG. I'd say for a small setup, the 24/25 your pulling is really good. Should be good enough for thin wood scale material. What type of fluid do you plan on using? The Stick Fast resin or the cactus juice comes in 1 quart bottles. Although a tad on the expensive side, doing smaller pieces it should last quite some time. But then you would also need a thrift store toaster oven to cure the resin, but they can be had for quite cheap.
Burls, Girls, and all things that Swirl....
-
The Following User Says Thank You to HARRYWALLY For This Useful Post:
cudarunner (01-15-2016)
-
01-15-2016, 03:09 PM #8'with that said'
- Join Date
- Aug 2010
- Location
- Walla Walla in WA State USA
- Posts
- 11,260
Thanked: 4238
My little set up didn't come with a scavenger jar but as I said in my second post I am planning on a two stage unit. I'll use 2 additional male Lincoln Air fittings on top of a pint mason jar. They will be on opposite sides of the lid. Originally Posted by gssixgun

I needed to make sure that the initial jar was going to hold the vacuum. If I'd put it all together and the vacuum wouldn't hold then I'd have no idea where the problem was.
So now the original jar has held vacuum for about 20 hours see below:
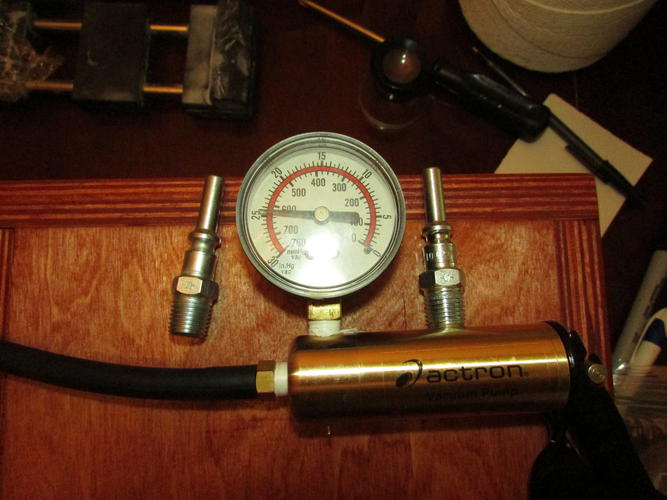
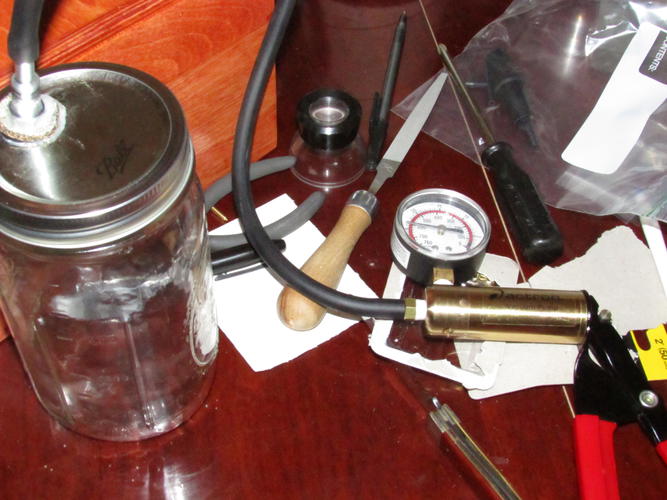
For those that don't know what a male Lincoln air fitting looks like the 2 that will be used on the scavenger jar or shown beside the pump's gauge.
OH! I'm well aware that once the air starts being drawn out of the wood or what ever I've got in the jar that the pumping will have to be continued.
But as I said, this is for small projects and besides I've got plenty of time to play with it.
Andrew, I have looked at the cactus juice but I'm not familiar with the Stick Fast resin. I knew that I'd need a way to cure things and I like the idea of a inexpensive used toaster oven to do the job. Originally Posted by HARRYWALLY
As I've said, this is all new to me. I was wondering if a stain could (or should) be used prior to using a resin. Also does the use of a resin have any bearing on what kind of top coat can be used.
With that said could something as simple as a top coat be used to 'stabilize' the wood again I'm new to all of this.
Well in a few hours I'm heading to Ski's place and we're going to play with the project a little. As I said I'm going to just use some small scrap wood and water just to see how things go.
If I think that this is something that I can use I'll go ahead and make the scavenger jar and then play some more.
Thanks for all the help and suggestions guy, I really appreciate it Our house is as Neil left it- an Aladdins cave of 'stuff'.
Kim X
-
01-15-2016, 03:30 PM #9
Just a caution from working with vacuum casting etc. for most of my professional life:
Have a screen or other sturdy box around the whole thing. The reason being that; if there is a scratch on the bottle most anywhere, the whole thing implodes ! ! ! To be around in sight of one blasting through itself is not a good idea. Being around grit from stones can make that a problem.
That is the reason most of the hobby and commercial ones are made of high strength Plexiglas and PVC.
We did make our own on occasion for special projects or weird sizes.
Just satin!
~RichardBe yourself; everyone else is already taken.
- Oscar Wilde
-
The Following User Says Thank You to Geezer For This Useful Post:
cudarunner (01-15-2016)
-
01-15-2016, 03:41 PM #10< Banned User >
- Join Date
- Dec 2013
- Location
- Perth, Western Australia
- Posts
- 318
Thanked: 44
Good point Geezer. I used to put the jar in a cardboard box with the gauge on the outside and pump to pressure. Once at pressure I'd peek in the box.
Geezer and Dafonz6987 like this.


 Reply With Quote