
Results 21 to 30 of 41
 119Likes
Thread: My Experimental Vacuum Chamber
 LinkBack URL
 About LinkBacks
-
01-18-2016, 04:18 PM #21< Banned User >

- Join Date
- Dec 2013
- Location
- Perth, Western Australia
- Posts
- 318
Thanked: 44
When you create the vacuum you reduce the atmospheric pressure brought to bear on the wood. This is why the gas escapes from the wood and is also why you saw bubbles within the fluid. The bubbles in the fluid are created by cavitation, which happens when a fluid is subjected to fast changes in pressure. While the bubbles are leaving the wood, as far as I'm aware, no fluid enters the wood. At this stage the wood is an area of high pressure submerged in a fluid with low atmospheric pressure acting upon it. Once the wood stops releasing bubbles it has reached equilibrium with its environment. At this stage the interaction between the wood and the fluid is neutral, no fluid has entered the wood. Once you release the vacuum you now return the fluid to atmospheric pressure, but the wood, so long as it is fully submerged, is at less than atmospheric pressure and it is that pressure differential that causes the fluid to start to drive its way into the wood in an effort to balance the discrepancy in pressure. How long that takes I don't know, but the longer you can leave it the better.
-
The Following 2 Users Say Thank You to puketui41 For This Useful Post:
HARRYWALLY (01-18-2016), MattCB (01-18-2016)
-
01-18-2016, 05:23 PM #22At this point in time...


- Join Date
- Jun 2007
- Location
- North Idaho Redoubt
- Posts
- 27,035
- Blog Entries
- 1
Thanked: 13249
Roy here is the old one from 4 years ago some good tips in there to read
Basically the amount of Foam up is different for each type of wood..
The less dense the wood the more air coming out, I keep messing with it until there are no more bubbles the wood floating can actually help you gauge the amount of resin it is absorbing.. If the wood floats it is not close to being done yet. getting the wood to sink on it's own is a good indicator for it getting close to being done..
The other trick is with the resin you are using, I have found that the less dense woods work better with a thicker resin and the more dense the wood the thinner the resin pretty much like regular finishing
http://straightrazorpalace.com/works...-products.html
-
The Following 2 Users Say Thank You to gssixgun For This Useful Post:
cudarunner (01-18-2016), HARRYWALLY (01-18-2016)
-
01-18-2016, 07:08 PM #23'with that said'


- Join Date
- Aug 2010
- Location
- Walla Walla in WA State USA
- Posts
- 11,240
Thanked: 4237
Thanks Glen!
My Mary Jane Memory has been nudged back to remembering this thread. (Hell I posted at it )
)
I have a sneaky suspicion that sublimely that's how I got the idea only with having the jar on it's side.
I've been looking and found this in store video from an outfit in Spokane very interesting/especially the clear container that he's using for the demonstration as it would solve a lot of problems. The metal pot set up is far out of my financial means but with a friend with a glass shop the plastic enclosure is enticing.
Here's part 2:
I can envision a small one with a clear plastic container to hold the liquid and still be able to use the hand pump.
While the metal container is made by Hold Fast I've found that the stabilizing resin and catalyst that is used in the video is Stick Fast/just as Andrew has suggested. I like that it's able to be cleaned up with soap and water!
Now here's the 'promotional' video by Hold Fast. You will find a difference of opinion as to how the resin gets in the wood. The 'in store' guy says that it's when the vacuum is released and the 'promo' guy says that the resin is replacing the air as it's evacuated. (that's what I'd always thought)
Anyway it is an interesting video:
I'm leaning toward ordering a one quart unit of the Stick Fast and testing it in my two stage on at least one of the gifted woods. Since it's re-usable I'll probably once again use the jar on it's side.
Still learning everyday!Our house is as Neil left it- an Aladdins cave of 'stuff'.
Kim X
-
01-18-2016, 07:42 PM #24At this point in time...
- Join Date
- Jun 2007
- Location
- North Idaho Redoubt
- Posts
- 27,035
- Blog Entries
- 1
Thanked: 13249
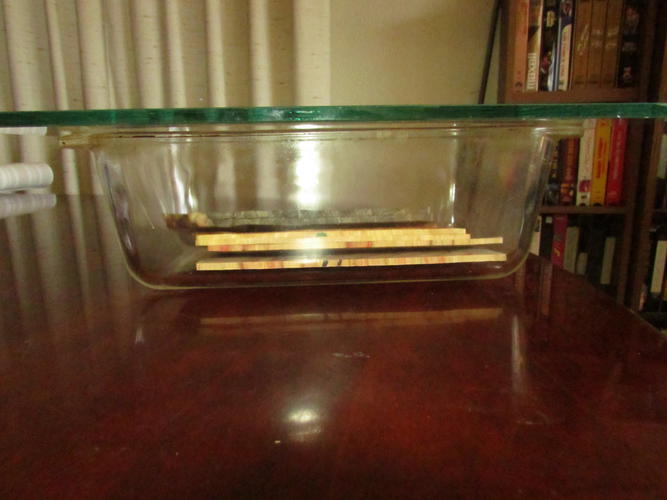
Those Flat Glass Containers made from bakingware are all over E-bay I tried making one myself this past summer as a nice flat one would save all kinds of product for our purposes but the seal was an abject fail for me.. Have to re-think it all but I love the flat bakingware idea, just have to figure out the seal

But that is a healthy price for "Anchorware"
These
http://www.ebay.com/itm/2-QT-Square-...4AAOSw9r1V7f74
One thing we are leaving out in the full "Stabilization process" is when you have something actually stabilized it is first put under Vacuum and then it is Pressurized after..
I personally can't see that investment
Last edited by gssixgun; 01-18-2016 at 07:47 PM.
Geezer and HARRYWALLY like this.
-
01-18-2016, 08:17 PM #25'with that said'
- Join Date
- Aug 2010
- Location
- Walla Walla in WA State USA
- Posts
- 11,240
Thanked: 4237
I too think that kind of money is out of my range.
But it got me to thinking:

'What if' instead of my 12"X12' glass plate was say a 3/4" piece of Plexiglas that had the pattern of the Pyrex baking pan routed out say 1/4" deep and then filled with Silicone. OR perhaps simply a piece of 3/4" plywood that was sealed and then the groove routed and filled with Silicone
Then having say that glass plate coated with Vaseline and then clamped down to level the silicone and let the silicone cure for a few days?
I used feeler gauges and the widest gap between the glass and the bake-ware is 30 thousandths.
As my friend walleyeyman likes to say; "Always Thunkin"RezDog likes this.Our house is as Neil left it- an Aladdins cave of 'stuff'.
Kim X
-
01-19-2016, 05:42 AM #26Senior Member

- Join Date
- Dec 2015
- Location
- Alaska
- Posts
- 226
Thanked: 41
This is the system I came up with and it works great https://youtu.be/R3xO8MUEMDg
Geezer likes this.
-
The Following User Says Thank You to AKwildman For This Useful Post:
cudarunner (01-19-2016)
-
01-19-2016, 05:47 AM #27Senior Member
- Join Date
- Dec 2015
- Location
- Alaska
- Posts
- 226
Thanked: 41
And if you want to use mason jar type systems this is the trick for that ,this is a lid to a automatic oiler on a vacume toilet used in the oilfields in Prudhoe bay.
-
The Following User Says Thank You to AKwildman For This Useful Post:
cudarunner (01-19-2016)
-
01-19-2016, 05:41 PM #28At this point in time...
- Join Date
- Jun 2007
- Location
- North Idaho Redoubt
- Posts
- 27,035
- Blog Entries
- 1
Thanked: 13249
 Originally Posted by cudarunner

Almost exactly what I built even spent days with sandpaper making the top of the Pyrex even as possible and creating a larger flat for the Silicon to grab onto...
Just could not get it to work, and the Pickle Jar was SO easy, it was pretty frustrating to put in all that work and fail at something that seemed pretty simple..
I tried the Vaseline after the Silicon seal failed..
One thing I have learned is that the solutions will destroy the seals on the lids so you have to think ahead for their eventual failure
-
01-19-2016, 07:06 PM #29'with that said'
- Join Date
- Aug 2010
- Location
- Walla Walla in WA State USA
- Posts
- 11,240
Thanked: 4237
Funny how we both have similar ideas. I also agree that since the mason/pickle jar works we are probably banging our heads for nothing. Originally Posted by gssixgun
With that said, I wonder how this would work for a seal? It should hold up much better than the jar lid seals since they are just rubber.
This is 3/16" thick and 12"X12".
Buy Stock Length Black Neoprene Rubber Sheets (327-6764) from UseEnco
I'm still liking that Plexiglas container with the jars inside of it that the store in Spokane built and was using. Just as Richard warned the glass jars could implode, I would think that the thick Plexiglas container would be safer.
Our house is as Neil left it- an Aladdins cave of 'stuff'.
Kim X
-
01-19-2016, 09:27 PM #30Senior Member


- Join Date
- Feb 2013
- Location
- Haida Gwaii, British Columbia, Canada
- Posts
- 14,443
Thanked: 4828
I have been following this thread and cannot help but wonder about a plexiglass aquarium with a pexiglass top and a rubber seal. My brother had one once upon a time, the aquarium that is.
It's not what you know, it's who you take fishing!


 Reply With Quote