
Results 11 to 20 of 41
 119Likes
Thread: My Experimental Vacuum Chamber
 LinkBack URL
 About LinkBacks
-
01-15-2016, 05:34 PM #11Senior Member


- Join Date
- Nov 2015
- Location
- Chicago
- Posts
- 227
Thanked: 57 my thoughts exactly: I hope you guys are following proper PPE. Face shields and goggles at all times. No exposed skin.
 Originally Posted by Geezer
 Japanese-Whetstones and physics it's all just a sea of particles. "If I could remember the names of all these particles, I'd be a botanist." - Enrico Fermi
-
01-15-2016, 10:59 PM #12'with that said'


- Join Date
- Aug 2010
- Location
- Walla Walla in WA State USA
- Posts
- 11,244
Thanked: 4237
Well here's some progress pics of what happened at Ski's place.
I'd already played with some Starbucks stir sticks in water and not much happened! I got a few big bubbles of air but after that; Nothing!
So I dried the jar and put it in the oven at 150 to make sure it was thoroughly dry then let it cool to room temp and packed everything up and headed to Ski's.
He had some Mini wax polyurethane in gloss so we added 1 cup to the quart jar, put the two blanks (not from my friend/some that I had already sanded down/maybe too much) put it all back together and started drawing vacuum.
Ski kept telling me that the wood was going to float and wouldn't get sealed.
Once the vacuum started I did get some bubbles going. However NOTHING Like I've seen in the YouTube videos/perhaps it's because the vacuum was being drawn down so slowly.
Here's the most bubbling that happened:
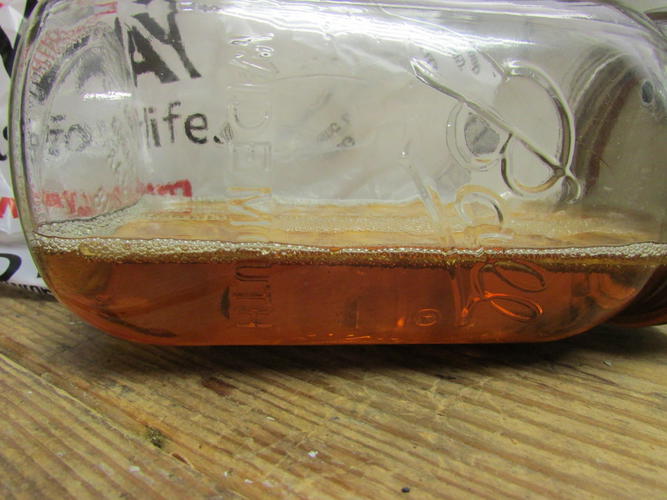
I just left things alone while Ski and I shot some pool with his son but I kept checking the vacuum gauge and it did rise a couple of degrees so I drew the vacuum back down a bit and then it settled down and pretty much held at 24 to 25 inches.
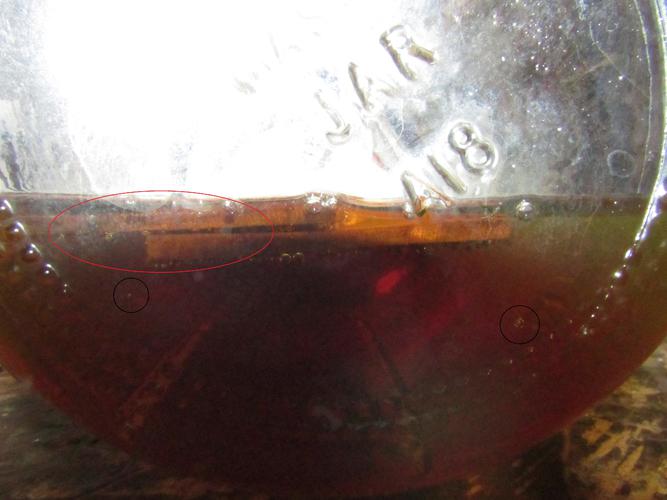
After an hour while once again checking on things I noticed something interesting. There were air bubbles coming out of the urethane. Very Small bubbles.
The circles in Black are of them the Red is of the bubbles coming out of the wood.
After shooting pool for 3 hours I headed home. When I had let the jar settle down I noticed that the blanks were Ever So Slightly submerged.
However I decided to evacuate the chamber and turn the wood over and see what happened.
Well I started getting more bubbles so I released the vacuum and put a couple of new and unused bolts tied together on top of the blanks to weight the wood down. I once again drew the vacuum and while they are very, very tiny I am still getting air bubbles out of the wood and not the liquid.
Learning as I go!
Oh! Yes Ski and I were wearing safety glasses! I don't think that not only would working with the Mason Jar have been difficult it would Damn Near be Impossible to shoot pool totally protected in a Class A Hazmat
Last edited by cudarunner; 01-16-2016 at 01:04 AM.
Our house is as Neil left it- an Aladdins cave of 'stuff'.
Kim X
-
01-18-2016, 12:56 AM #13'with that said'
- Join Date
- Aug 2010
- Location
- Walla Walla in WA State USA
- Posts
- 11,244
Thanked: 4237
Ok,
I left the vacuum pulled down overnight then drained it off and removed the scales. I'd wiped them off but not entirely. Here they are on some wax paper.
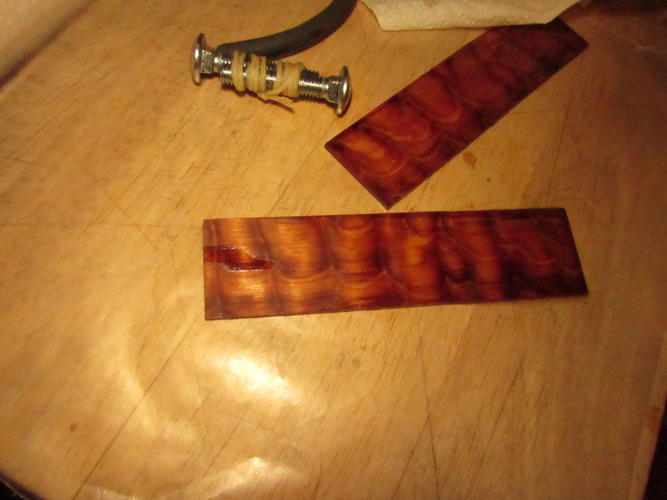
Then I wiped them dry as best I could and hung them by wooden clothespins for 24 hours. They seem nice and dry.
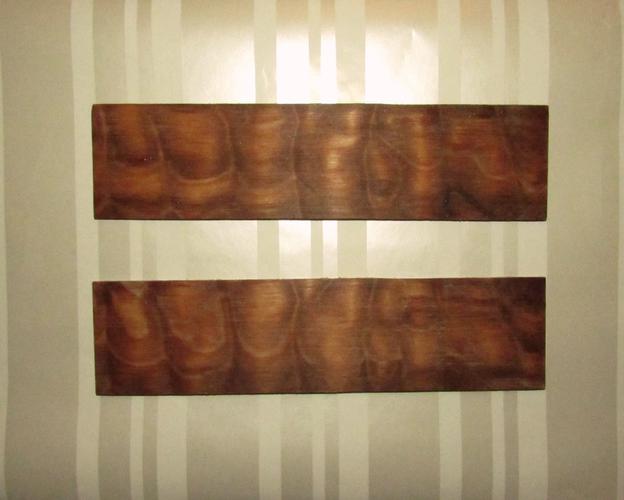
I'll see what I can do for some scales for an orphan blade that I've got lying around here.Our house is as Neil left it- an Aladdins cave of 'stuff'.
Kim X
-
01-18-2016, 01:19 AM #14I love Burls....... and Acrylic

- Join Date
- Mar 2012
- Location
- Baden, Ontario
- Posts
- 5,475
Thanked: 2284
Looks promising Roy. Yes, weighing it down so that it's submerged is key, as you probably found out. That way the entire piece can take in the fluid. Other things I have read about stabilizing that is very key, is once you bring the atmospheric pressure back to normal, or 0, leave the wood in the fluid, fully submerged for another 1/2 hour to an hour. The wood does not take on the fluid until it is brought back to normal atmospheric pressure.
The vacuum draws out the air from the wood, and the reintroduction of normal atmosphiric pressure is what forces the fluid into the piece of wood.Burls, Girls, and all things that Swirl....
-
The Following 2 Users Say Thank You to HARRYWALLY For This Useful Post:
cudarunner (01-18-2016), Euclid440 (01-18-2016)
-
01-18-2016, 01:28 AM #15'with that said'
- Join Date
- Aug 2010
- Location
- Walla Walla in WA State USA
- Posts
- 11,244
Thanked: 4237
I'd left it in a bit but not that long. As I said I'm learning as I go.
Thanks for the tip! HARRYWALLY likes this.Our house is as Neil left it- an Aladdins cave of 'stuff'.
Kim X
-
01-18-2016, 01:40 AM #16I love Burls....... and Acrylic
- Join Date
- Mar 2012
- Location
- Baden, Ontario
- Posts
- 5,475
Thanked: 2284
I went through the same thing Roy. I couldn't figure out why I wasn't getting good penetration on my material. Once I read this same little tip, things got better. Another thing you can do, if you have a weigh scale, is weigh the piece before and after to see how well the piece has taken on the fluid. This will vary of course from wood species to wood species, and also how low viscosity your fluid is. Polyurethane tends to be on the thick side, which will limit its penetration into the wood. A lower viscosity fluid is ideal, it will penetrate much easier which will allow it to drive deeper into the wood.
MattCB likes this.Burls, Girls, and all things that Swirl....
-
01-18-2016, 02:06 AM #17'with that said'
- Join Date
- Aug 2010
- Location
- Walla Walla in WA State USA
- Posts
- 11,244
Thanked: 4237
I was thinking about buying a small 'Weight Watchers' type scale as my kitchen scale isn't accurate enough to do that kind of measurements. Originally Posted by HARRYWALLY
Also I don't know if the polyurethane will add much strength to the wood
If it does what dilution and of what would you suggest so it would be driven deeper into the wood
Ski had mentioned that he diluted down his final coats so that they went on smooth but also dried faster but for the life of me I can't remember what he said he used and what the proportions were. Probably just as well as I'm hoping others will learn from this thread.
Our house is as Neil left it- an Aladdins cave of 'stuff'.
Kim X
-
01-18-2016, 02:46 AM #18I love Burls....... and Acrylic
- Join Date
- Mar 2012
- Location
- Baden, Ontario
- Posts
- 5,475
Thanked: 2284
I haven't played around much using polyurethane as a stabilizing fluid. I tried it on a few pieces early on, using some crude techniques that took more effort than it was worth. It looks as though you maybe having more success than I did with it. If you want to thin it down, just a regular paint thinner will work fine to thin polyurethane. As to what ratio, I'm no sure. 50/50 sounds like a good place to start.
Burls, Girls, and all things that Swirl....
-
01-18-2016, 12:37 PM #19< Banned User >
- Join Date
- Dec 2013
- Location
- Perth, Western Australia
- Posts
- 318
Thanked: 44
I think it needs longer than that. If it takes say four hours to pull the gas out of the wood, Imagine how long it takes for a fluid to work its way back in. Originally Posted by HARRYWALLY
-
01-18-2016, 01:19 PM #20I love Burls....... and Acrylic
- Join Date
- Mar 2012
- Location
- Baden, Ontario
- Posts
- 5,475
Thanked: 2284
Very good point. Also depending on woods species as well, and viscosity of the fluid. See, I'm still learning. Originally Posted by puketui41
Burls, Girls, and all things that Swirl....


 Reply With Quote