
Results 11 to 20 of 25
 38Likes
Thread: Lots of rust on a W&B
 LinkBack URL
 About LinkBacks
-
01-20-2016, 04:19 AM #11Matt


- Join Date
- Dec 2015
- Location
- Albany, NY
- Posts
- 971
Thanked: 260 That was exactly the reason i got them.
 Originally Posted by RezDog

The whole lot was 6 bucks.
-
The Following User Says Thank You to MW76 For This Useful Post:
outback (01-24-2016)
-
01-23-2016, 11:42 PM #12Matt
- Join Date
- Dec 2015
- Location
- Albany, NY
- Posts
- 971
Thanked: 260
Just an update..
I sanded down the edge of the W&B after about 3 soakings in Naval Jelly and some work with a wire brush.
Same process on the Deutcher to remove the chipping.
Next im gonna sand the bejeezus out of em.
-
01-24-2016, 02:17 AM #13Senior Member


- Join Date
- Feb 2013
- Location
- Haida Gwaii, British Columbia, Canada
- Posts
- 14,457
Thanked: 4830
Start high and go low when you need too. I never drop below 400, the scratches are just too hard to get out. I back my sandpaper with a cork to keep it flat. I use WD-40 to make it smoother.
MW76 likes this.It's not what you know, it's who you take fishing!
-
01-24-2016, 02:58 AM #14Matt
- Join Date
- Dec 2015
- Location
- Albany, NY
- Posts
- 971
Thanked: 260
I tried a flap wheel on my rotary tool first. It did a nice job removing some of the surface rust. Then i hit it with the WD40 and some steel wool. It didn't do much. Since this blade is an art project anyway i went down to 80. I was pulling some rust out of the pits at 80 so i gave it another 20 minute soak in the Naval Jelly and then i used a wire wheel on it.. Got some of the deeper rust out. Its coming along.. Originally Posted by RezDog
I am using a cork and i also made a sanding stick out of some lollipop stems glued together. I sanded one side smooth and glued some felt to it. Even with all that and a jig my right arm is killing me, but its for the razors man.. the razors.
When i sand the Deutcher ill probably start a lot higher with the grit since the pitting isn't as deep and id actually like to hone that one.
-
01-24-2016, 03:06 AM #15Senior Member
- Join Date
- Feb 2013
- Location
- Haida Gwaii, British Columbia, Canada
- Posts
- 14,457
Thanked: 4830
So many people make the mistake of thinning that the dark black splotches are patina. It is rust, and as the rust gets removed it exposed all of those pits, just like the ones on your blade. One of the great challenges in restoring is to get the blade clean, any shallow pitting removed, and retain the lines of the blade. eBay is full of over buffed razors with rounded out lines, they are shiny but have lost their crisp lines. Not every razor can be a perfect restore. It will be interesting to see if you can get that back into shaving condition. I am not a flat sander user. I do very little power sanding. You have gotten quite a bit done on that. Later it will be a good one to reshape the heel on too. There are a lot of lessons left in that old girl.
MW76 likes this.It's not what you know, it's who you take fishing!
-
The Following User Says Thank You to RezDog For This Useful Post:
MW76 (01-24-2016)
-
01-24-2016, 03:51 AM #16Senior Member

- Join Date
- Mar 2015
- Location
- Akron, Ohio
- Posts
- 12,118
Thanked: 4316
You might try setting a bevel on the butcher.
If you can do so, youll have a fine shaver. Who knows, ya just might get lucky.
I got to say....you remind me of myself, coming up with different ways to restore these magnificent works of art. Im right there with ya, all the way!! Next you'll be making Scales and wedges, and learning all aspects of restorations.
Shine on brother, and dont let anyone or thing dim your light. [emoji41]Mike
-
The Following User Says Thank You to outback For This Useful Post:
MW76 (01-24-2016)
-
01-24-2016, 05:03 AM #17Senior Member

- Join Date
- Mar 2014
- Posts
- 333
Thanked: 65
Each one is a learning opportunity. Take the time to try things out and see what works and what doesn't for you. Practice makes perfect. Then the next time you restore another razor your experience level and arsenal of tricks will be better.
Ive got one now that Im using as a learning opportunity. That is after i dropped it and cracked it...MW76 likes this."The production of to many usefull things results in too many useless people."
Karl Marx
-
The Following User Says Thank You to Suticat For This Useful Post:
MW76 (01-24-2016)
-
01-24-2016, 05:17 AM #18Matt
- Join Date
- Dec 2015
- Location
- Albany, NY
- Posts
- 971
Thanked: 260
I am trying not to sand down the lines. On the first razor i sanded i definitely gave it what i've read is called a 'liquid' look, and i wish i hadn't done that but it was a lesson learned. I think a few spots got softened up on the Butcher while i was attacking the deep rust, but i was careful to do minimal damage. On this one some of the pitting is very deep, so ill have to leave it. I think it actually looks ok.. like it belongs. Originally Posted by RezDog
After i re cut the edge i thought i might just try honing it. I lost a tiny chip in the edge while sanding, where the worst rust and pitting had occured. Im leaving it for now. I might breadknife the edge to remove it or possibly recut with the sanding wheel once its polished. I think i can reach clean steel. Fingers crossed..
And yes this blade is teaching me a lot. I knocked the yellow scales off the other razor in my OP, and i'm going to try putting them on this one. They wont look the best but its just for practice.. Like you said, a lot of lessons
Thanks man!! I appreciate the kind words Originally Posted by outback
You and Rez have been a big help to me the last few weeks, along with the rest of SRP. Its definitely appreciated. I share your view on these being works of art. That is part of the draw for me, taking something old and neglected and like you said.. bringing it back to life!!
-
01-28-2016, 12:57 AM #19Matt
- Join Date
- Dec 2015
- Location
- Albany, NY
- Posts
- 971
Thanked: 260
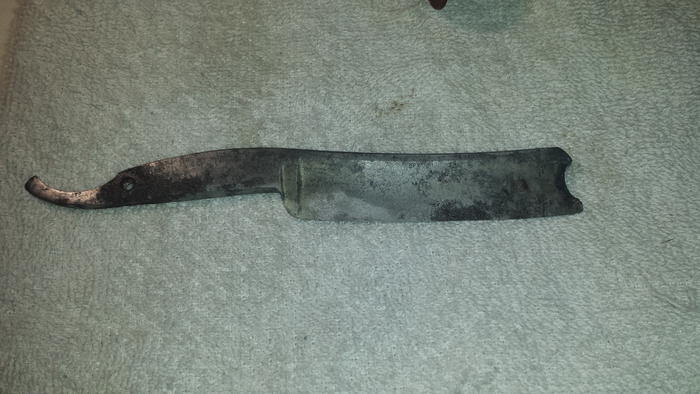
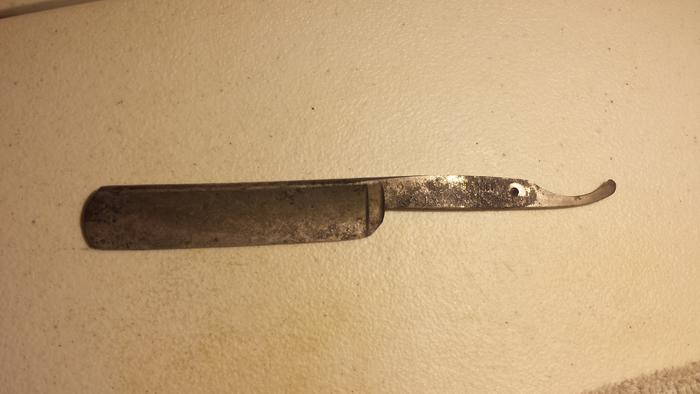
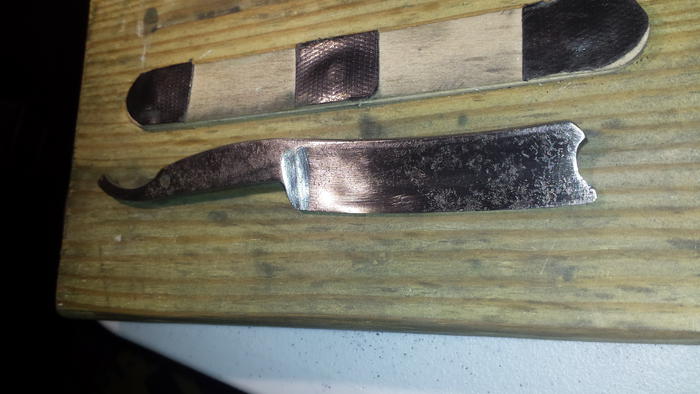
After two 12 hour soaks in Evaporust, and a few evening after work sanding sessions i present the polished Wade & Butcher..
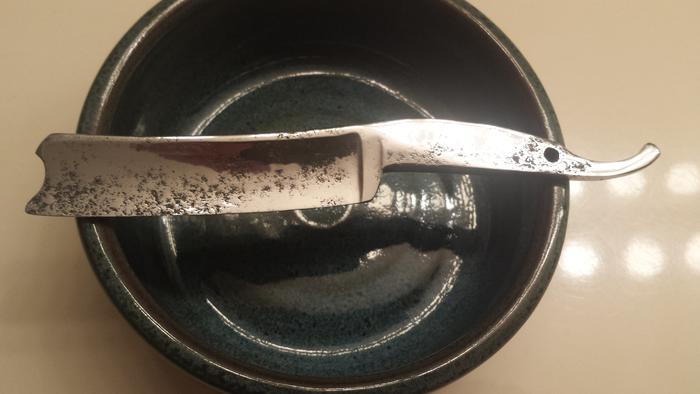
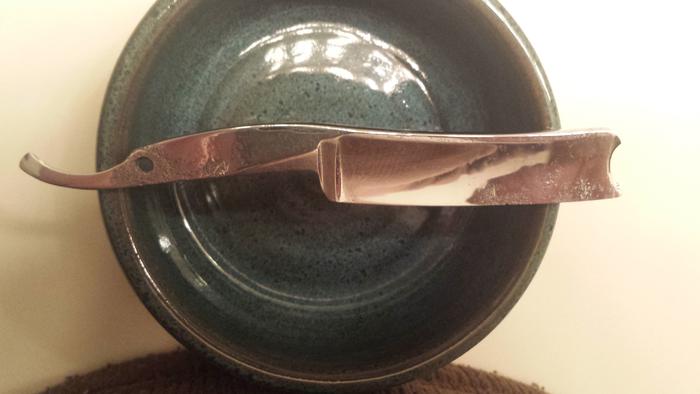
I'm pretty darn sure i will never set a clean bevel on this puppy, so im not gonna try. The pits on the front side are two frequent and deep.
It would make a nice letter opener but..
I'm thinking it would make a pretty bad ass earring.
-
01-28-2016, 01:35 AM #20Senior Member
- Join Date
- Feb 2013
- Location
- Haida Gwaii, British Columbia, Canada
- Posts
- 14,457
Thanked: 4830
That's the way. Second verse same as the first, but with a better razor and you will be on your way. Same the one for practice reshaping the heel.
outback likes this.It's not what you know, it's who you take fishing!


 Reply With Quote