Results 1 to 10 of 11
Thread: The Corsican Ram project
-
01-30-2016, 12:03 AM #1
 The Corsican Ram project
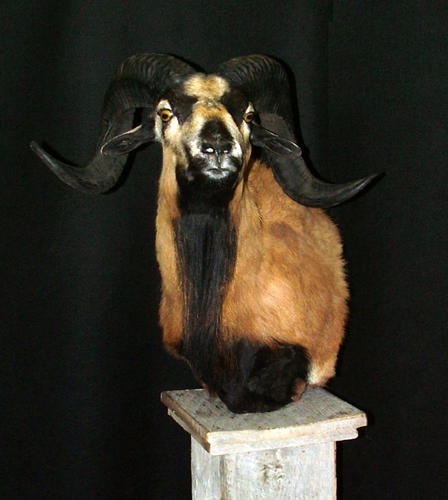
I was asked to document my progress on this Corsican Rams horn. Here's a Coriscan Ram for reference.
I started off with this piece of horn.
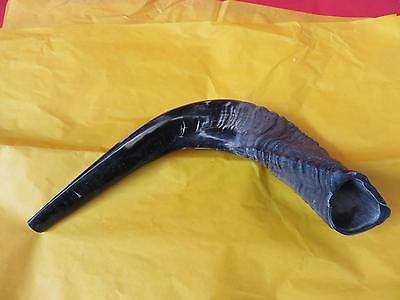
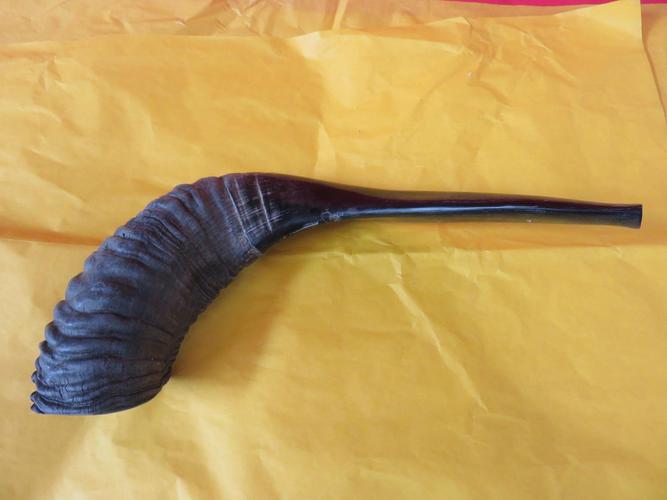
When it arrived I scrubbed it down to get the funk off of it. Then proceeded to cut it along the thick bands that run longitudinally with the horn. My goal is to save the outer bark. I do not plan on polishing it smooth like the tip of the horn has been. It will end up just like every other streaked cow horn and that's not what I want. Heres the first set of rough cuts. I can get two sets of scales out of it. The inner curve is much thinner than the outer curve. It should flatten and straighten out much easier. But for my first project, Im after the outer curve bark.
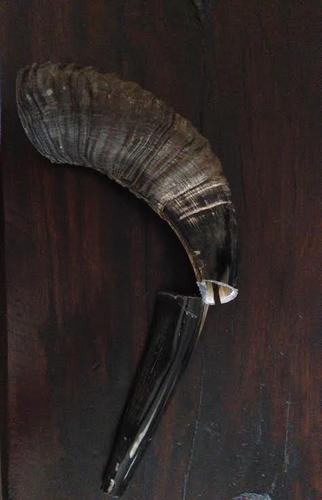
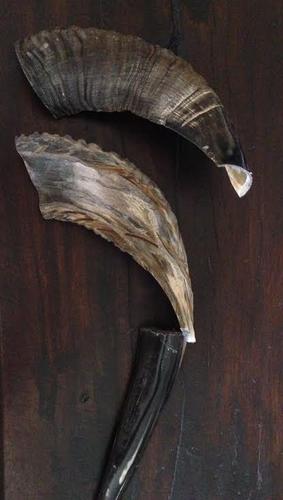
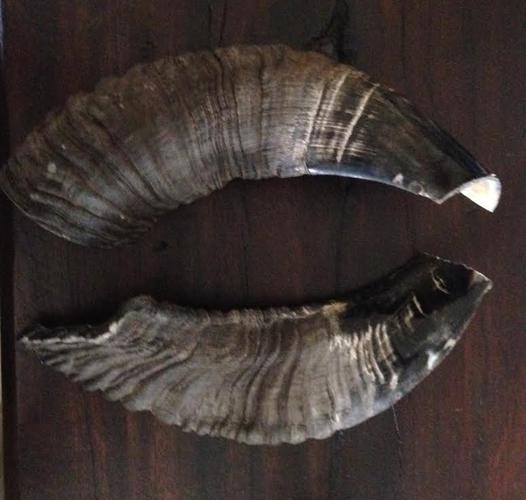
I think I may stain them even blacker since they are a bit lighter than the original picture shows. Im going to wait until Im almost done shaping before I decide on that. The polished end Im thinking about making the pivot end. That way I can have more of the ridges showing on the fatter wedge end.
Time to heat, flatten, sand the inside smooth and repeat as necessary.
To be continued...Last edited by Suticat; 01-30-2016 at 01:06 AM.
"The production of to many usefull things results in too many useless people."
Karl Marx
-
01-30-2016, 12:07 AM #2

BTW, I am always open to advice if you have any.
"The production of to many usefull things results in too many useless people."
Karl Marx
-
01-30-2016, 02:11 AM #3

Very eager to see how it goes. Are you planning on using dry heat, steam, or boiling?
The older I get the more I realize how little I actually know.
-
01-30-2016, 02:59 AM #4

Dry heat. In the oven at 350* then into a press to clamp them for the night.
Sand back side smooth and repeat if needed.Last edited by Suticat; 01-30-2016 at 03:01 AM.
"The production of to many usefull things results in too many useless people."
Karl Marx
-
01-30-2016, 03:13 AM #5

Interesting project to say the least!
I have no experience but the guys in the video that the link will take you to have been working with horn for centuries!
Our house is as Neil left it- an Aladdins cave of 'stuff'.
Kim X
-
The Following User Says Thank You to cudarunner For This Useful Post:
jfk742 (01-30-2016)
-
01-30-2016, 07:50 AM #6

Thanks for the video. This is the first time I've started from a full horn and worked it to a set of scales.
-
01-30-2016, 03:26 PM #7Senior Member


- Join Date
- Feb 2013
- Location
- Haida Gwaii, British Columbia, Canada
- Posts
- 14,457
Thanked: 4830
How long are you going to bake the horn? I presume it will be until it reaches a test point, what condition are you looking for before you remove it and clamp it.
It's not what you know, it's who you take fishing!
-
01-30-2016, 05:50 PM #8

About 30 minutes give or take a little. You have to heat it until it's mailable and loses its memory.
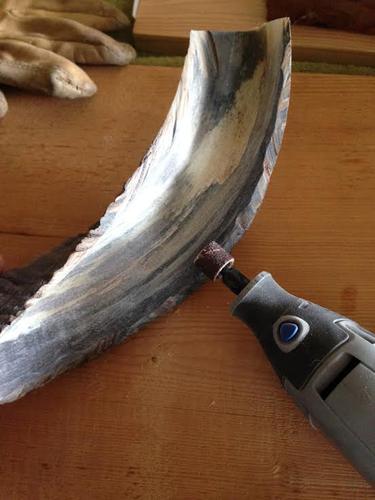
Grinded down most of the thick ridge to help even out the thickness before I heat and clamp.
Now into the oven...
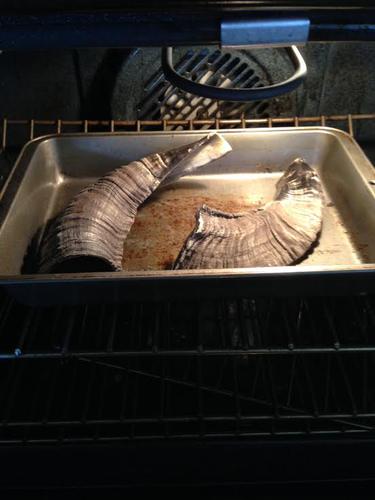
The wife is out shopping for the day. So if it smells she won't be here to complain.
Its all about timing.Last edited by Suticat; 01-30-2016 at 07:05 PM.
-
01-31-2016, 09:35 AM #9

Very cool project. TI makes some pretty nice ram horn scales the keep a lot of the original texture. I look forward to seeing how this comes out.
B.J.
-
01-31-2016, 10:17 AM #10

Interesting project, please keep us posted of your progress.
Plus ça change, plus c'est la même chose. Jean-Baptiste Alphonse Karr.


 7Likes
 LinkBack URL
 About LinkBacks


 Reply With Quote

