Results 1 to 10 of 11
Thread: Frameback assembly question???
-
02-07-2016, 02:57 AM #1
 Frameback assembly question???
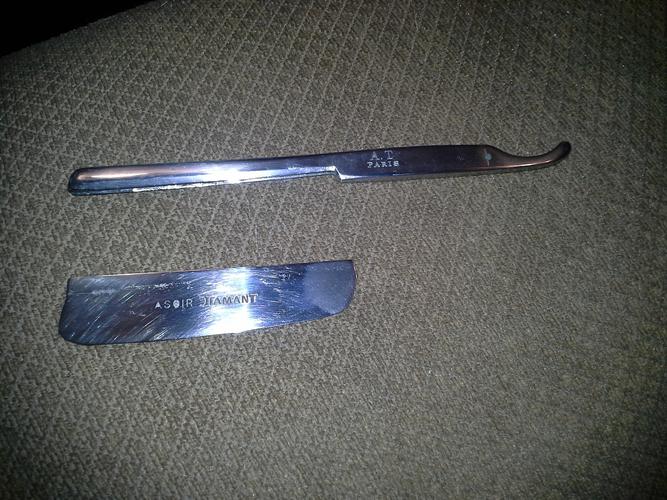
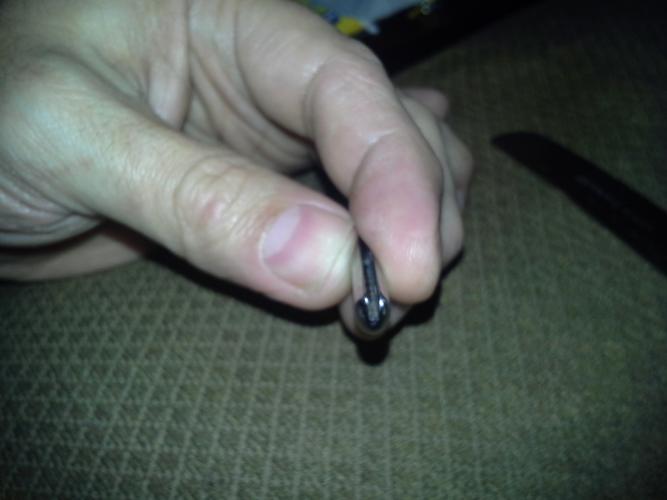
So I'm doing my first restore on a frameback. I was hand sanding a bunch of rust off it and the blade fell out.


It doesn't have screw threads on the end, so I assume it is supposed to be a friction fit.
Before I make a die to press it back together again, I was wondering if they leaded the blade in place as well?
ThanksSome people never go crazy. What truly horrible lives they must lead - Charles Bukowski
-
02-07-2016, 03:15 AM #2

I'm sorry that I don't have an answer for you. When I was privileged to have the Japanese Frameback that was found on Iwo I believe that it looked like along with a press fit it seemed to have been soldered in place also.

I do hope that someone has the answer!Our house is as Neil left it- an Aladdins cave of 'stuff'.
Kim X
-
02-07-2016, 04:03 AM #3

I am not sure how the original blades were held in, pressure, lead,solder,or some babbitt looking material.
I have soldered the blades in using heat sinks clamped to the blade and also by using heat block paste on the blade. I find using some chunks of aluminum as heat sinks the easiest way to go.
Charlie
-
02-07-2016, 04:51 AM #4Senior Member


- Join Date
- Nov 2012
- Location
- Across the street from Mickey Mouse in Calif.
- Posts
- 5,320
Thanked: 1185
Is there any residual material in there that would start to run if heated ? Just thinking if your going to have to heat it up anyway you could find out. Or pick some out and see what heat does to it.
Good judgment comes from experience, and experience....well that comes from poor judgment.
-
02-07-2016, 06:04 AM #5

There may have been some light weight material in the groove with the rust. I did not think to pay attention to material that I removed from the slot. There was a lot of rust in the slot as well so it would have been hard to tell. If I had thought about it before now I would have run a lead test on it.
Some people never go crazy. What truly horrible lives they must lead - Charles Bukowski
-
02-07-2016, 06:57 AM #6Senior Member


- Join Date
- Nov 2012
- Location
- Across the street from Mickey Mouse in Calif.
- Posts
- 5,320
Thanked: 1185
Your call it looks like. You could try the simple press on and if it doesn't stay then break out the lead. If you get everything cleaned up and it's loose in there than the answer is obvious right ?
Last edited by 10Pups; 02-07-2016 at 06:59 AM.
Good judgment comes from experience, and experience....well that comes from poor judgment.
-
02-07-2016, 10:16 AM #7Senior Member

- Join Date
- Dec 2015
- Location
- North Dakota
- Posts
- 1,455
Thanked: 250
Would one of the better epoxies work? That thing is cool.
-
02-07-2016, 10:40 AM #8

Although it may not be the traditional way, I'd go with epoxy as it will help to stop water getting into the slot.
I recall an old thread about this with a contribution from Neil Miller - I may be wrong but I think Neil's opinion was that the blade was just pressed into position.My service is good, fast and cheap. Select any two and discount the third.
-
02-07-2016, 12:25 PM #9

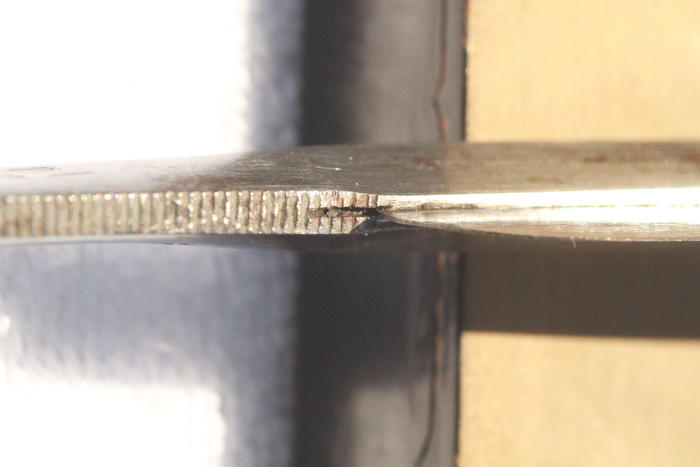
I'd vote for a small amount of epoxy to secure it rather than stuff around with solder and heat - too much to go wrong. The picture cudarunner posted shows a good place to apply the resin - perhaps also on the other end as well. It's not like there's any great force acting to pull the blade out of the slot in normal shaving, or even while stropping.
-
02-07-2016, 02:09 PM #10

I posted on removing the spine from a Wade & Butcher back on 12/19/2014. I wish I new how to link the thread. I used brass jaws as a heat sink and played the heat over the spine. It was soft soldered and came off easily. I used epoxy dyed black for the reassembly. It worked out just fine.
Try this link. http://straightrazorpalace.com/works...e-removal.htmlLast edited by karlej; 02-07-2016 at 02:39 PM.
-
The Following User Says Thank You to karlej For This Useful Post:
criswilson10 (02-07-2016)


 12Likes
 LinkBack URL
 About LinkBacks


 Reply With Quote

