
Results 1 to 10 of 22
 20Likes
Thread: Making Leather Scales
 LinkBack URL
 About LinkBacks
-
02-15-2016, 06:12 PM #1Senior Member


- Join Date
- Apr 2015
- Location
- Baldwin City, Kansas
- Posts
- 225
Thanked: 44 Making Leather Scales
So I read a few threads last week about vintage leather scales on razors. I have a couple of razors that arent in the greatest of shape to begin with, so I decided to do some experimenting. What I am trying to figure out:
- Will leather harden enough to be good scale material?
- Will there be issues with water absorption or softening in use?
- Will they look decent?
I have been doing leatherwork for several years, so all of the tools I am planning on using are things I already have. I have specifically been trying to avoid getting things like a band saw to do scales, so if this works out I will be happy. I did some google research on boiled leather (also known as cuir bouilli, )to get an idea where to start. Most of the information I found was about leather armor. In the interest of simplicity, I ended up going with just boiled water, not measuring the temperature, and just keeping it in the water until it curled and turned dark.
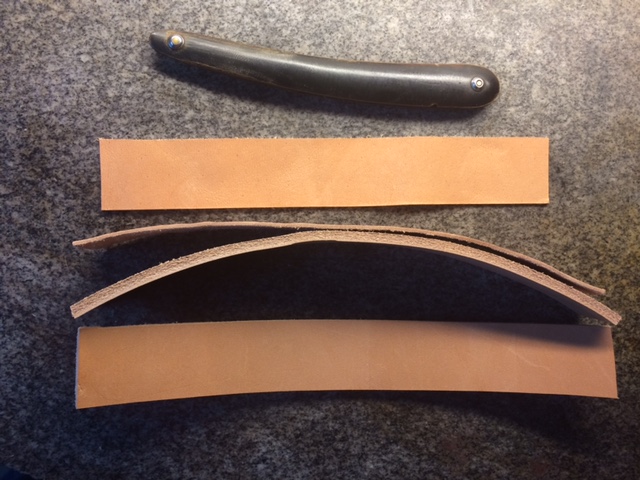
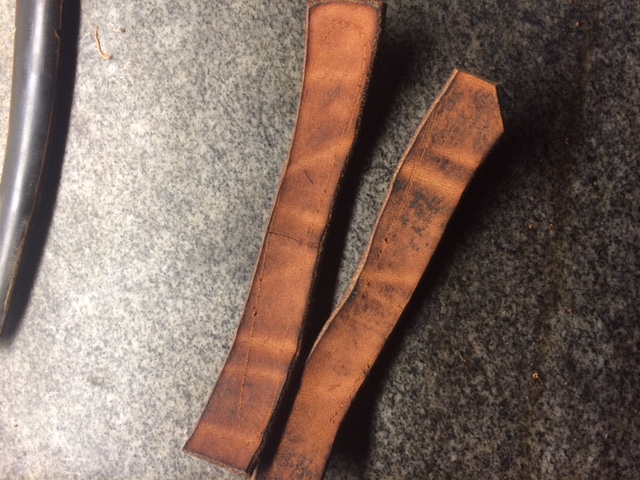
The leather I used is vegetable tanned. Other types of leather (chrome, brain, or oil tanned) will not react the same way. (I also tried a bridle leather, which is vegetable tanned then treated with waxes and oils. The waxes and oils did not allow the hot water to penetrate all the way. Dont use bridle leather.) What I did was cut strips from 10-12 oz (7.5-9mm) leather, and 4-5 oz 3-3.75 mm) leather. I cut them oversized, expecting them to shrink up to 2/3rds. I was also expecting them to thicken, which they did, but not as much as I was thinking. The heat of the water causes a physical and chemical change in the leather. The collagens begin to run, and the whole piece turns rubbery. (Technical term.) I dropped the already damp leather pieces into water at a rapid boil, and the thinner ones immediately curled. I pulled those out with tongs and put them on a paper towel. The thicker leather stayed in for 20-30 seconds. (As a side note, the stuff that comes out in the boiling water cleans up pretty easy, so my wife didnt even realize I had used the good pan and the tongs.)
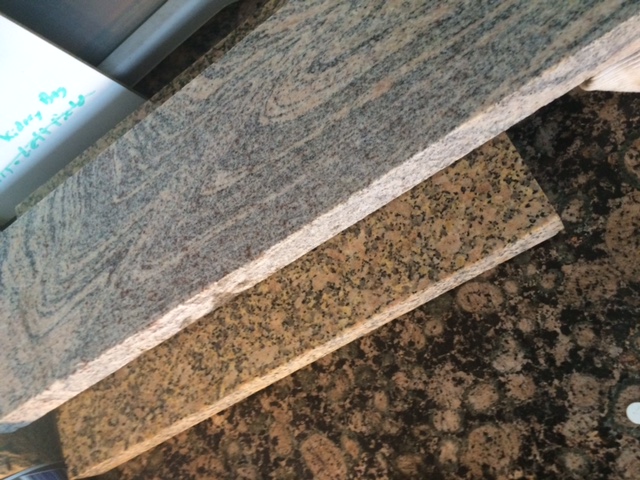
I daubed the grease off the leather surfaces, and worked it with a rounded piece of glass to straighten it out. You have less than two minutes before the leather starts to harden, so it is important to do this quickly. I smoothed the surface, and placed the leather pieces under flat pieces of stone to dry. The stone has to be smooth, or you will end up with embossed prints on the leather. At this point, I let the leather dry for several hours.
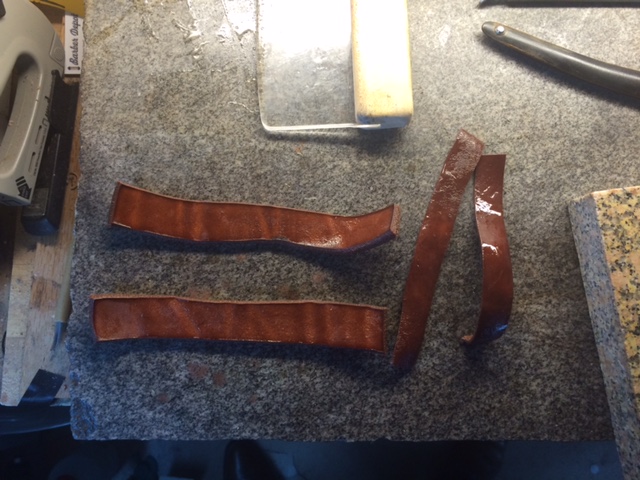
When I pulled it out from under the stone, it was fairly rigid, but not all the way there. It appeared dry. I daubed the grease off the leather. I was able to use some of my leatherworking tools to cut the leather to shape, and round the edges. This made me both happy and sad, since it meant that the leather would be easy to work, but not as stiff as I wanted. I shaped the leather to match the scales I had. I had to step away from the work bench at this point, and left the leather pieces on the bench. Apparently they were not fully dry. Over the next few hours, they hardened and curled to an unusable shape. I attempted to flatten them out, and the leather broke like a piece of wood. I was also not able to use my leatherworking tools at this point to cut them, but my wood carving tools worked. It had become as rigid as I wanted, and had a similar texture to wood.
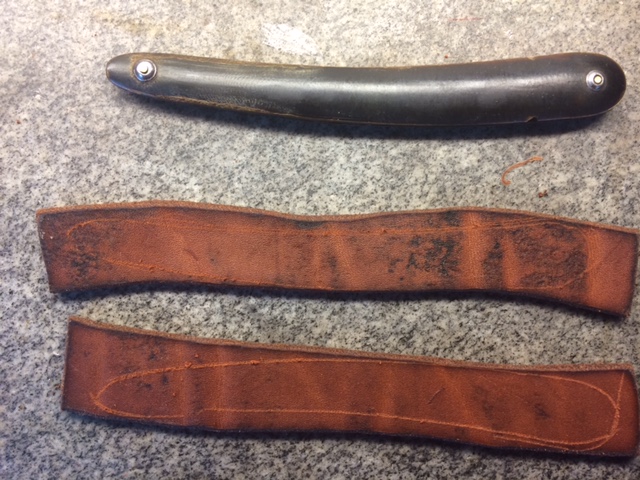
I boiled another set of leather pieces, and will have had these under the stone pieces for about 30 hours when I get home from work tonight. I am hoping they are still a little damp, and I can cut them with my leatherworking knives, then put them back under the stones to press dry for a few more days. Then I will figure out how to waterproof them. At this point I am encouraged. I dont know how they will hold up to water, but we will see.
-
-
02-15-2016, 06:33 PM #2KN4HJP

- Join Date
- Feb 2015
- Location
- Chesapeake, Virginia
- Posts
- 932
Thanked: 261
Here's a PDF that may be of use: http://www.jeanturner.co.uk/static-c...iTechnique.pdf
"Every normal man must be tempted at times to spit on his hands, hoist the black flag, and begin to slit throats." -H. L. Mencken
-
The Following User Says Thank You to sqzbxr For This Useful Post:
Drygulch (02-15-2016)
-
02-15-2016, 06:49 PM #3Senior Member

- Join Date
- Mar 2014
- Posts
- 333
Thanked: 65
Once you shape it you could try pressing them between oak. It's hard enough to crank it down tight between c clamps and shouldn't soak out the water to fast. It's should allow the leather to dry nice and slow over a 24 hour period. The stone is not allowing the leather to breath except for the exposed ends. Causing it to dry out on the edges long before the middle. Figuring out how to dry it more evenly will help to prevent some of the curling.
-
02-15-2016, 06:58 PM #4Senior Member
- Join Date
- Apr 2015
- Location
- Baldwin City, Kansas
- Posts
- 225
Thanked: 44
That's a great resource for some examples of what was made. I found myself more on SCA websites that talked about experiments making armor. I focused more on hardening, and less on the decorative aspects. For razor scales that were actually made from leather that have decoration on them, they were pressed into heated cast iron molds that cut and embossed them as they dried. I didn't have the ability to do that, and at this point I am just playing around to see what the results are. I am thinking I am still going to need to thin the scales down on a belt sander, and shape them once they are dry. Not sure if I will do a wax or lacquer based finish. I am excited to try it out though.
-
02-15-2016, 07:00 PM #5Senior Member
- Join Date
- Apr 2015
- Location
- Baldwin City, Kansas
- Posts
- 225
Thanked: 44
Yeah, if I can get this next round to dry flat, I will see about making something to press them that will wick the water out. Right now, I am trying to do it with what I have on hand, and not getting any new stuff. I think if I leave them under the rocks for a longer period they will resist cupping longer. Originally Posted by Suticat

-
02-15-2016, 07:01 PM #6Senior Member

- Join Date
- Apr 2014
- Location
- Goiânia, Brasil
- Posts
- 530
Thanked: 159
This is waaayy cool.
Drygulch likes this.
-
02-15-2016, 07:11 PM #7Senior Member

- Join Date
- Apr 2008
- Location
- Saint Paul, Minnesota, United States
- Posts
- 2,944
Thanked: 433
I've got a very vintage razor in the classifieds with vintage leather replacement scales, even after probably 150 years they are still very stiff and like shoe sole type stiffness, they seem to hold up very well. At first I wasn't even sure what the material even was.
Drygulch likes this.
-
02-15-2016, 08:12 PM #8Senior Member

- Join Date
- Jan 2012
- Location
- Waukesha, Wisconsin
- Posts
- 1,943
Thanked: 390
This is easily the bee's knees.
Drygulch likes this.
-
02-16-2016, 02:46 AM #9Senior Member

- Join Date
- Dec 2013
- Location
- Texas
- Posts
- 1,568
Thanked: 269
Very interesting idea, I would never have even thought to try leather as a scale material! Please keep us posted

-
02-16-2016, 02:52 AM #10Senior Member
- Join Date
- Apr 2015
- Location
- Baldwin City, Kansas
- Posts
- 225
Thanked: 44
Checked on my second attempt tonight. After 30 plus hours, they are still damp. More dry than the last set was. I may take them out tomorrow and put them in a 200 degree oven with binder clips holding them to shape. I do think this is going to work. Not sure how they are going to look, but we will see.


 Reply With Quote