
Results 1 to 10 of 18
 25Likes
Thread: How to preserve blade etching
 LinkBack URL
 About LinkBacks
Hybrid View
-
06-03-2016, 01:02 PM #1Senior Member


- Join Date
- Sep 2015
- Location
- I'm thinking...
- Posts
- 447
Thanked: 79 How to preserve blade etching
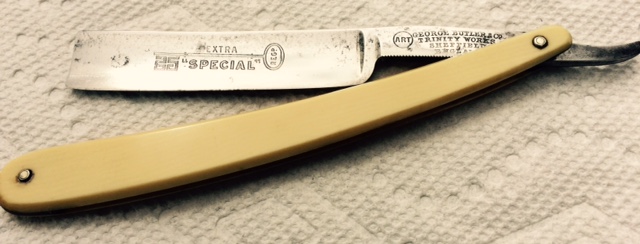
I am restoring a George Butler & Co razor. I am concerned about damaging the etching on the blade...and yet there is more discolouration and patina to remove. There's no rust or scaling...any advice? Will sanding with 600, 800, 1000, 2000 dig into the etch? Sorry for poor pic quality.
-
06-03-2016, 01:16 PM #2Senior Member


- Join Date
- Jun 2013
- Location
- Pompano Beach, FL
- Posts
- 4,048
Thanked: 636
Etching looks pretty strong. I would work slow and try to avoid most of the blade etch. You should be OK on the shank. Do hand sanding so you have more control of metal removal. Good luck.
Whizbang likes this.
-
06-03-2016, 01:21 PM #3I love Burls....... and Acrylic


- Join Date
- Mar 2012
- Location
- Baden, Ontario
- Posts
- 5,475
Thanked: 2284
If it were mine I'd get rid of any active rust and leave those beautiful age marks. Just me though.
Burls, Girls, and all things that Swirl....
-
06-03-2016, 01:33 PM #4Junior Member
- Join Date
- Nov 2015
- Posts
- 13
Thanked: 0
New to site how do I post a question or start a thread about razor restoration . Thanks Immy
Whizbang likes this.
-
06-03-2016, 02:12 PM #5Senior Member

- Join Date
- Feb 2013
- Location
- Haida Gwaii, British Columbia, Canada
- Posts
- 14,457
Thanked: 4830
That looks like a good candidate for steel wool and WD-40. Finish it with mothers polish and all should be well.
It's not what you know, it's who you take fishing!
-
06-03-2016, 02:52 PM #6Senior Member
- Join Date
- Apr 2012
- Location
- Diamond Bar, CA
- Posts
- 6,553
Thanked: 3215
Saving an etch is delicate work, yours looks pretty deep though.
Lapping film works exceptionally well. For the blade start with 1k or higher with a stiff backer. Small pieces of wet & dry or film and a pencil on the tip of the eraser works well to sand around the etch, take your time.
Micro Mesh sanding pads and paper work well for cleaning up around the etch when used carefully, but use lapping film over the etch for maximum performance.
I buy my film from Thor Labs, but you can buy single sheets from some woodworking and carving supplies. Diamond lapping film is 10 times the cost, but do not produce 10 times the performance, Silicone and Aluminum Oxides
Here is an excellent post by Geezer on darkening bluing and high grit sanding, (Revealing Etchings). The trick to cold bluing is scrupulously clean surface and a bit of heat from a hair dryer or heat gun.
-
The Following User Says Thank You to Euclid440 For This Useful Post:
Whizbang (06-03-2016)
-
06-03-2016, 11:30 PM #7lobeless

- Join Date
- Feb 2012
- Location
- Kansas
- Posts
- 4,864
Thanked: 762
 Originally Posted by Immy

QUICK HIGHJACK:
Immy - your profile says that you have started 6 posts already, beginning in January??
In case you have forgotten. No Need To Reply.
 David
David
-
06-04-2016, 03:32 AM #8Senior Member
- Join Date
- Apr 2012
- Location
- Diamond Bar, CA
- Posts
- 6,553
Thanked: 3215
You always will have better and quicker results cross direction sanding, unless you are laying down a satin type directional finish. Because you lay down a stria pattern then remove it cross directionally, then lay down another and remove it.
I hand sand 10 – 20 strokes in one direction, then sand 90 degrees to the stria you just laid down, when you can. Circles will leave circular scratches that are hard to remove, and I feel I have better control directionally.
Once you remove all you staining, rust or pitting, then you want to lay an even stria pattern that will be removed by the next grit. You can feel when the paper stops cutting, replace it. Paper is cheap.
Often folks think a shiny 1k finish is stria free, but look at it at 100 or 400X and you will see the scratches, even high grit polish leaves stria.dinnermint likes this.
-
06-03-2016, 08:23 PM #9Senior Member
- Join Date
- Sep 2015
- Location
- I'm thinking...
- Posts
- 447
Thanked: 79
I tend to agree...though I feel I should be trying to bring it back to its "old self". Hard to decide...I really like the vintage look. Originally Posted by HARRYWALLY


 Reply With Quote