
Results 1 to 10 of 31
 61Likes
Thread: Tired of easy polishing
 LinkBack URL
 About LinkBacks
Hybrid View
-
07-07-2016, 09:43 AM #1Senior Member


- Join Date
- Apr 2015
- Location
- paris
- Posts
- 449
Thanked: 13 yes nice work actually. but i'm not considering that the handsanding won't take off all etches. as i said earlier (if you see my other comments!) i was asking for a quicker way.
 Originally Posted by Chevhead

-
07-07-2016, 08:48 PM #2
There's quick and there is the right way. Originally Posted by Oustoura
Remember the old saying....
Nothing good comes easy and nothing easy is good.
Now if you want to just buff them up so they look half way decent.... A buffer will get it done much faster but as I said before you will probably round over some of the crisp edges. A buffer it's just like SR Shaving... There is an art to using it and getting it to look right.ScoutHikerDad and engine46 like this.
Ed
-
The Following User Says Thank You to Chevhead For This Useful Post:
ScoutHikerDad (08-13-2016)
-
08-02-2016, 04:20 PM #3Senior Member


- Join Date
- Apr 2012
- Location
- Diamond Bar, CA
- Posts
- 6,553
Thanked: 3215
There is restoration and, there is RESTORATION.
So, first It depends on, what you are aiming at. Personally, when shooting at distance, I like to holdover, just a bit, to allow for bullet drop
Here are a couple pics, at which you might sight at. On this forum, we are blessed to display the amazing work of several, first class restorers, turning out higher, than museum quality restoration. Most hand sand and buff to finish.
As with honing, it is not just about, how shiny you can make it, and certainly not how quickly, it can be done
This is just one example of Mike, (Wolfpack64s) hard work, notice the flat flats, crisp edges and pleasing lines, the results speak for themselves, lots of hand sanding
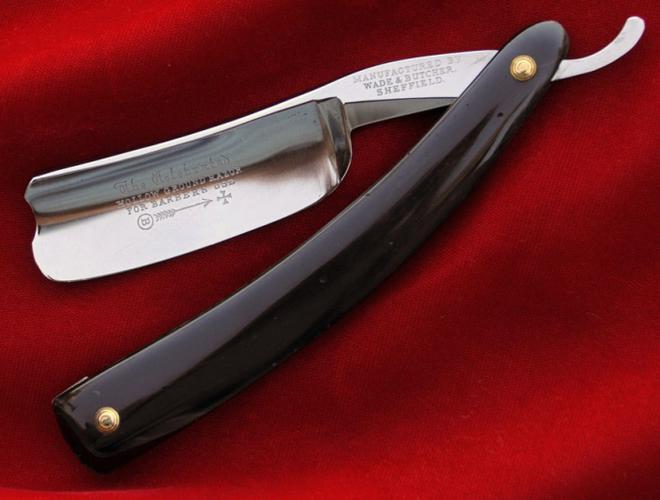
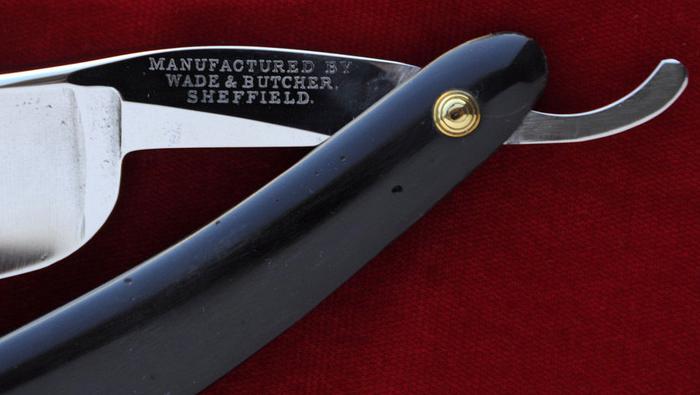
Edit It's Wolfpack 34, sorry Mike, I gave you a promotion...Last edited by Euclid440; 08-02-2016 at 10:08 PM.
-
The Following User Says Thank You to Euclid440 For This Useful Post:
ScoutHikerDad (08-13-2016)
-
08-03-2016, 12:47 AM #4Senior Member

- Join Date
- Oct 2015
- Location
- Knoxville,IA
- Posts
- 2,368
Thanked: 762
I can say this, I bought a GD just to play with as to not ruin a good blade. I hand sanded and then thought well I will try my buffing wheel, thank god that POS was not sharp because I would have lost a finger! It was my own fault but the buffer grabbed the blade and flung it at mach 1 to the floor bent the blade at the tip and basically ruined the blade ( I know funny to say about a GD ) but still I ended up with a small knuckle cut and a great lessen learned. Hand sanding is safe and though not the most fun a great result can be had. I am currently hand sanding an ebay purchase and it is taking time but turning out very well and I have not been hurt. I just work on it when I have time and in the last 3 days it has been progressing nicely. I recommend staying away from power tools. Also you would not want to over heat the blade while buffing on a high speed buffer.
-
The Following User Says Thank You to ejmolitor37 For This Useful Post:
ScoutHikerDad (08-13-2016)
-
08-03-2016, 05:22 PM #5Senior Member
- Join Date
- Apr 2012
- Location
- Diamond Bar, CA
- Posts
- 6,553
Thanked: 3215
A good safety rule is to remove the edge from any razor, that you will be working on. I run a 400 grit diamond file on the edge and dull to a butter knife edge, just a couple swipes.
I will be re-honing when finished, any way and at least, I will have a clean edge to hone on. Sanding, Buffing and Polishing will ruin the edge anyway.
Hand sanding on a piece of 6mm craft foam also allows you to press the razor into the foam and sand or polish right to the edge without any danger of cutting yourself, the edge is buried in the foam.
I also do not wear gloves when buffing as it gives a better grip and allows you to feel the heat in the blade, as soon as it begins to get uncomfortable, quench. I keep a cut off water bottle on the bench with the buffer, cut off half way, they are surprisingly stable and there is no risk of breakage, should it fall.
-
The Following 2 Users Say Thank You to Euclid440 For This Useful Post:
ScoutHikerDad (08-13-2016), xiaotuzi (08-26-2016)
-
08-04-2016, 01:41 PM #6Senior Member
- Join Date
- Apr 2015
- Location
- paris
- Posts
- 449
Thanked: 13
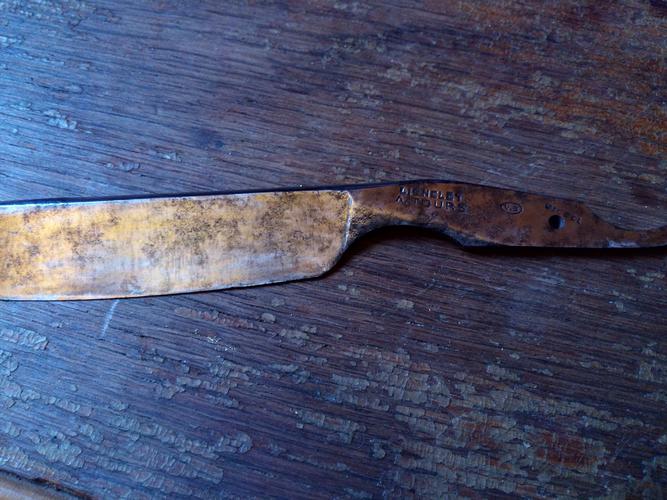
just want to have a advice. i just cleaned up all the rust on this one. what do you think? need to go down untill which grit of paper to rid of these etchse? 300 - 200 or under once more?
-
08-04-2016, 02:04 PM #7Senior Member
- Join Date
- Apr 2012
- Location
- Diamond Bar, CA
- Posts
- 6,553
Thanked: 3215
I usually start with 600 and see what remains. On that one maybe start with 400 and see, do not use a lot of pressure to begin and use a hard backer, synthetic wine corks work well, split in half length wise, for the flats. I rarely go below 320.
Try to put in the least amount of deep scratches as possible, but if you find deeper pitting, then drop down on grit, keep dropping until you find a grit that will remove the damage causing the shallowest stria.
The little bit of time you lose, doing it this way will pay off large, by not having to spend a lot of time removing needless deep scratches.
Where a lot of folks have issues with sanding is they dont change paper often enough, once it stops cutting, get a new piece or shift to an unused part. Or by not changing directions, count your strokes, say 10 or 20, then switch to 90 degree strokes, heel to toe, then spine to edge.
And dull the edge for saftey, I work on a sheet of 6mm craft foam, that you can bury the edge into the foam and sand to the edge with no danger of cutting yourself.
I cut my paper into 3X3 in squares with a Garage Sale paper cutter, here is a post I made about making the paper into pads to save time and looking for grits. Sandpaper Notepads.
-
The Following User Says Thank You to Euclid440 For This Useful Post:
ScoutHikerDad (08-13-2016)
-
08-05-2016, 01:32 AM #8Senior Member
- Join Date
- Apr 2015
- Location
- paris
- Posts
- 449
Thanked: 13
I started by 400 than 320. I'm at 800 now but there're still etches. I build a base as said in hand sanding tuto.
-
09-02-2016, 01:52 AM #9Senior Member
- Join Date
- Apr 2015
- Location
- paris
- Posts
- 449
Thanked: 13
Hey, again mates. Originally Posted by Oustoura
Well I'm still on the razor and trying only sandpapers. But really there is way too get rid of these black stains. Even I tried 120. They are still there.
 the
the
Don't you have a trick to tell me. That's annoying really.


 Reply With Quote


