
Results 1 to 9 of 9
 34Likes

Thread: Just completed my first full restoration
 LinkBack URL
 About LinkBacks
-
08-26-2016, 12:32 AM #1Member


- Join Date
- May 2016
- Location
- HONOLULU
- Posts
- 34
Thanked: 3 Just completed my first full restoration
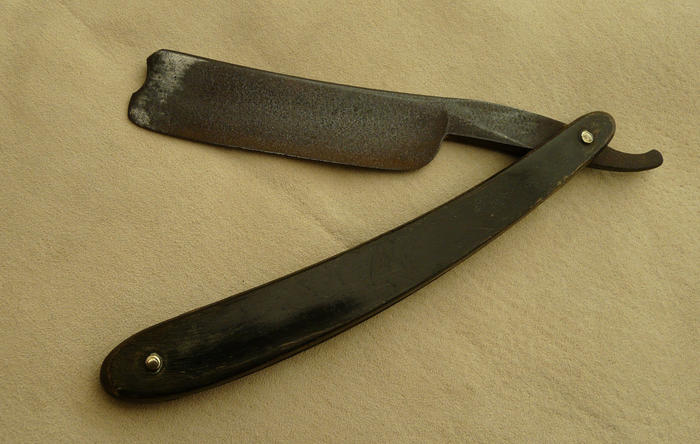
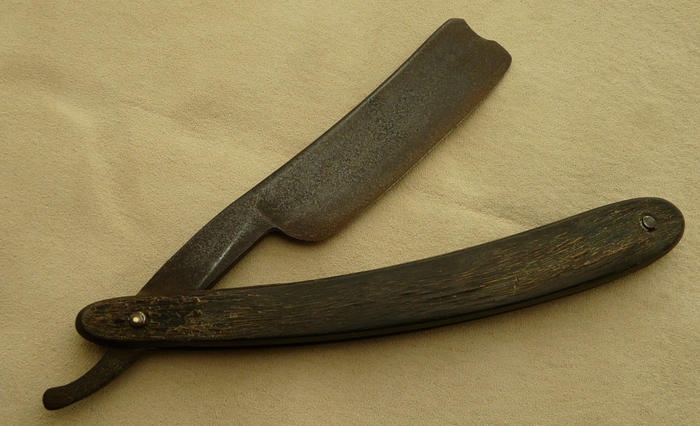
I picked up this George Westenholm & Sons I*XL for $32 and decided it would make a good candidate for me to try my hand at restoration.
It looked like this when I got it:
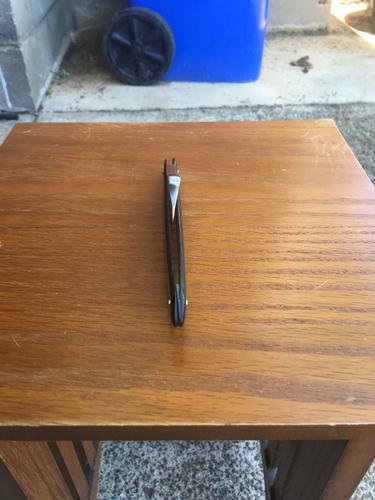
After working on it for several days, it looks like this now:
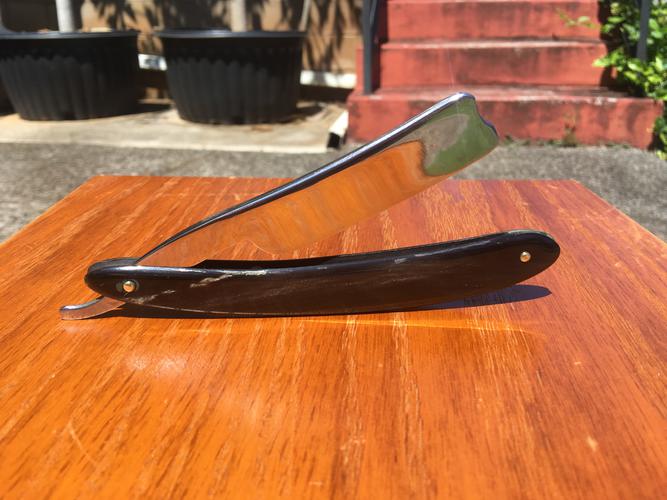
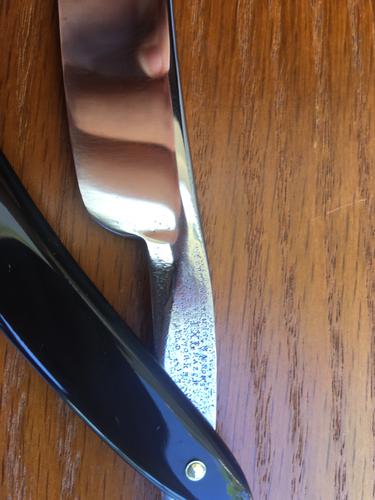
There was serious pitting all over, most of which I got out of the blade, but I decided to leave it on the tang near the stamp because I would have completely lost the stamp if I removed it.
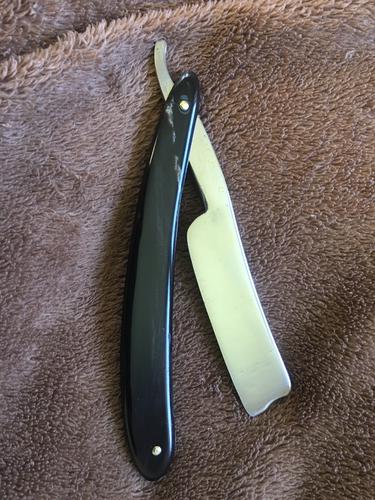
I have made several scales out of wood before as replacements for other razors, and they have all centered nicely. This is my first time working with horn, and unfortunately, the toe will hit the scales if I'm not careful when closing it. Is there something I could have done wrong in the process of pinning it that would make it not center well? I know if you hit the pin too hard you can bend it in the center, and I'm fairly certain I didn't do that.
Here is a pic of the spine that kinda shows it off center.
-
The Following 3 Users Say Thank You to WWRSD For This Useful Post:
dinnermint (08-26-2016), Hirlau (08-26-2016), xiaotuzi (08-26-2016)
-
08-26-2016, 12:44 AM #2Senior Member

- Join Date
- Jun 2016
- Location
- NH
- Posts
- 1,924
Thanked: 1363
Quite a transformation there! It was a bruiser to begin with and it's looking 100% better now. Nice job on the horn, the color is great. It could be closing off center due to a bent pin, that's a possibility. It could also be that the tang is coming in contact with one scale on the way down and the blade gets pushed the other way because of it. Make sure there is clearance for the tang, you can hold it up to the light and watch the small gap there to check. Good being careful of the maker's mark. Turned out sweet!
-
08-26-2016, 01:23 AM #3Str8Faced Gent.


- Join Date
- Aug 2013
- Location
- Orangeville, Ontario
- Posts
- 8,456
- Blog Entries
- 1
Thanked: 4207
Nice job on that clean up. Good restraint shown on the tang to preserve what's worth preserving.
In my experience with horn, once I have the wedge end pinned up fairly snug with a nut and bolt through the pivot end holding things square, I then chase the pivot end one last time, through both scales simultaneously with my drill bit and eye ball the squareness to profile one last time.. Not sure if there is slight flexing or a few thou difference in holes, but if I skip that clean out step, I am quite often repinning due to toe contact..
You can draw the toe slightly by peening more on the side you want it to go to, but not always enough. Horn also seems to flex and self center, over time in some cases.
A few I live with, like my ducks.. And just close those ones careful like..
Again buddy, nice work."Depression is just anger,, without the enthusiasm."
Steven Wright
https://mobro.co/michaelbolton65?mc=5
-
The Following User Says Thank You to MikeB52 For This Useful Post:
ScoutHikerDad (08-28-2016)
-
08-26-2016, 01:42 AM #4Senior Member


- Join Date
- Mar 2015
- Location
- Akron, Ohio
- Posts
- 12,107
Thanked: 4313
Great transformation.
Could be the tang is bent or twisted. Not uncommon, for older blades. Got a few myself.ScoutHikerDad and xiaotuzi like this.Mike
-
08-26-2016, 02:18 AM #5Senior Member
- Join Date
- Apr 2012
- Location
- Diamond Bar, CA
- Posts
- 6,553
Thanked: 3215
So a couple thing, before you un-pin, take a good look at the razor and how it fits in the scales, problems there are indicators of potential problems.
Once you get the blade out of the scales, look at it on a flat surface.
Were you new scales flat, when you started, (the blanks), and flat when you finished shaping? Horn can be steamed straight if needed. Just a bit of warp will touch the tip.
Did you drill you pin holes, when your scales were glued together and were still flat on both sides? In other words the holes are 90 degrees to the inside flats. Measure your pins, from ends to pin, from pin to pin and from top and bottom of the scales.
Did you re-use the original wedge? Did you use a wedge? (hard to tell from the photo. The blade looks crooked, (twisted) in the photo and the wedge pin does not look straight. It could be the photo.
Are the pin holes 1/16 in or larger?
Mocking up with bolts will tell you if you have a problem.
Nice looking scales and good work on the blade.ScoutHikerDad and Chevhead like this.
-
The Following User Says Thank You to Euclid440 For This Useful Post:
ScoutHikerDad (08-28-2016)
-
08-26-2016, 02:20 AM #6Senior Member

- Join Date
- Feb 2013
- Location
- Haida Gwaii, British Columbia, Canada
- Posts
- 14,451
Thanked: 4829
There are a few threads on dealing with problem off center razors. If you mock up first, with nuts and bolts you can discover the issues before the final pinning. I think the most common fix is to shave a little off the scales at the pivot to get your blade to swing over. Unfortunately that means taking it apart and going back a couple of steps and then mocking it up and a little trial and error. I think the older sheffield have large issues with centering and being a little off in the manufacturing than others. I hope you saved the old scales for a little revival later. You can also tweet it a little be moving the hole slightly. The good news it it looks like a pretty nice job on the restore. I love the streaked horn too.
ScoutHikerDad and xiaotuzi like this.It's not what you know, it's who you take fishing!
-
The Following User Says Thank You to RezDog For This Useful Post:
ScoutHikerDad (08-28-2016)
-
08-26-2016, 02:32 AM #7Member
- Join Date
- May 2016
- Location
- HONOLULU
- Posts
- 34
Thanked: 3
Thanks for all the replies. Originally Posted by Euclid440

The horn was a little warped when I started. I tried as much as I could to flatten it on a belt sander, but there was still some bow to it when I unglued them.
Yes, the holes were drilled with a 1/16 bit while the scales were still glued together and flat on both sides.
I did re-use the original lead wedge. It doesn't fit perfectly in the scales, but I had already polished them and didn't try to reshape them to match the wedge.
Next time I'll try getting some small bolts to mock up before pinning.
-
08-26-2016, 03:43 AM #8Senior Member
- Join Date
- Apr 2012
- Location
- Diamond Bar, CA
- Posts
- 6,553
Thanked: 3215
If the blade was warped or twisted you could have used a bit of warp, to give you a bit of clearance.
As said on Sheffield’s are rarely straight.
You could shape the old wedge to fit the scales or fit the scales to fit an existing wedge, with a file or bit of sandpaper. horn and lead wedges polish easily.
Mikes tip, post 3, is a great on to align the pivot holes after the wedge is pinned. If you make the pin holes a bit larger, you will have a little wiggle room if you need it.
If you do end up re aligning the holes, some larger collars will hide the larger holes.
Micro Fasteners for washers and bolts and AJKennedy on eBay or SRP for nice large or triple stacked collars.ScoutHikerDad and xiaotuzi like this.
-
The Following User Says Thank You to Euclid440 For This Useful Post:
ScoutHikerDad (08-28-2016)
-
08-28-2016, 09:43 AM #9Senior Member
- Join Date
- Aug 2015
- Posts
- 317
Thanked: 15
The Sheffield I'm working on was either twisted or ground off sided. I used spacer washer and filed one tapered. It worked out pretty well. Bolts and nuts are mandatory imo, for mocking things up. I got mine from the local ace hardware. I bought extras too. Silly how tiny the washers and nuts are.
Sent from my SM-G930V using TapatalkScoutHikerDad likes this.
-
The Following User Says Thank You to Clayglen For This Useful Post:
ScoutHikerDad (08-28-2016)


 Reply With Quote