Results 1 to 10 of 16
Thread: First Razor Restore
-
12-13-2016, 05:19 PM #1
 First Razor Restore
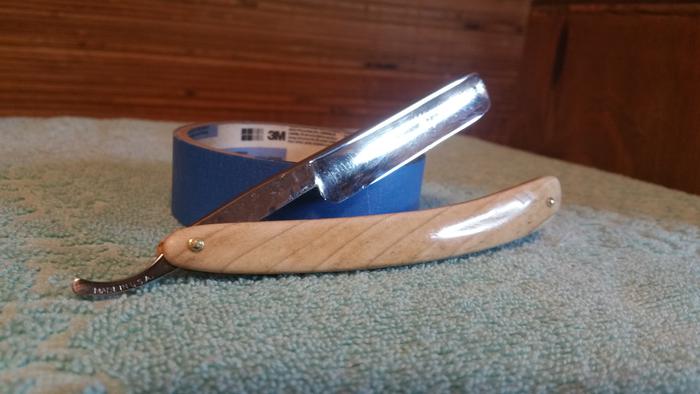
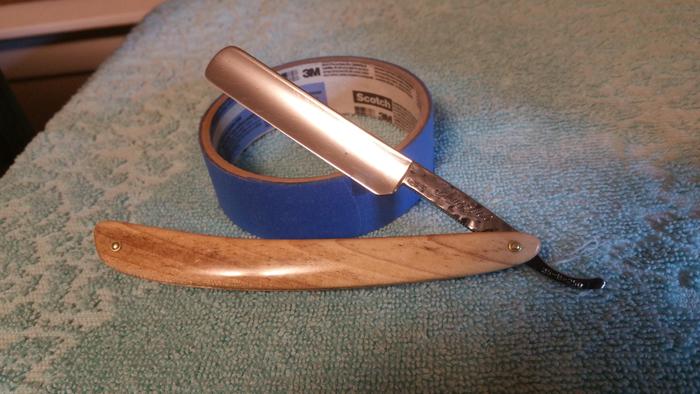
I finally got the time and reshaped my first set of scales as they were not the same exactly. Drilled the holes at 5/32" as I was told and this helped out a lot. Put a few more coats of CA on last night and sanded. This morning I tried my hand at pinning for the first time. The pivot pin I think I made just a smidgen to short but was able to peen it enough. Might have to re-do that pin but for now its together and don't look too bad for my first attempt. The blade, when I got it was rusted and the rust had gone into the metal so I sanded it down as much as I could going from 200 up to 2500 grits and then polished with some kind of metal polish the wife had laying around.
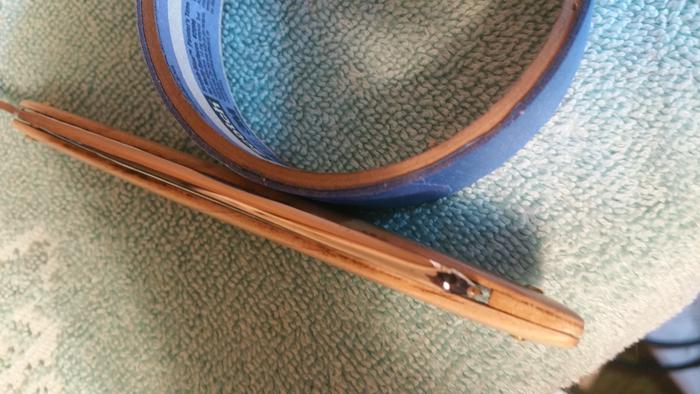
Things that don't make me happy about the way it came out is I didn't clean up the insides of the scales when I had stain them originally as there are streak's of dark stain on the inside so I left that out of the pics. ha. And it is not quite centered as well as I wanted but that is something I think I can correct as I read about this. Its not off by much but...My wedge could have been a little thinner as the spacing of the scales seams a bit much but the blade don't fall thru so that's what counts the most.
So here you go. Flame me as much as you can so I'll know what to do better the next time!


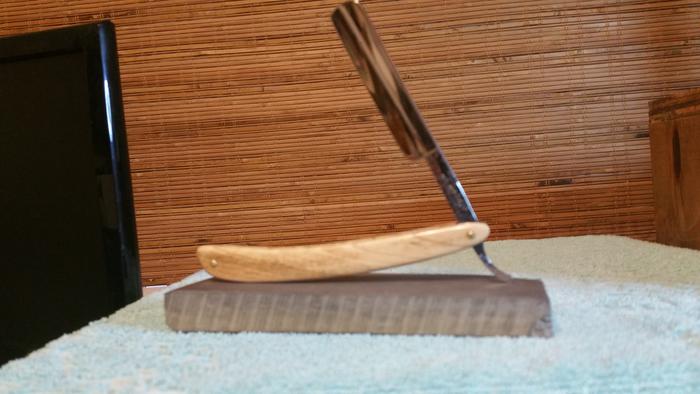
This last pic is with my new Rock. Jnat, and I still haven't figured out how to use it properly I guess. I got four hours in just touching up an edge and it still wont do an HHT. I'll get it. As you can tell if you know anything about me by now that I don't give up and jump in with both feet. Only at SR shaving 3+ weeks and own 5 now.It's just Sharpening, right?
Jerry...
-
12-13-2016, 05:46 PM #2Senior Member

- Join Date
- Feb 2016
- Location
- pennsylvania
- Posts
- 302
Thanked: 66
if this is your first restore i think you did a terrific job gasman. the reflection on those scales is like glass. well done. truly. my only small critique is that the wedge does not look 100% seamless with the scales. you either might need to peen a little more to close the gap or be careful not to sand the inside of the scales up around the wedge and roll/round the edges.
ive been trying my hand at making some scales too and ive got a looooong way to go.
keep up the great work.
-s.
-
12-13-2016, 06:14 PM #3

Thanks for the comment. I'll be sure to work on that. But I do know what you mean. Thanks. BTW, This was just some wood I picked up at the hardware store. Nothing fancy. It said Hard Wood and its not Oak. That's all I know.
It's just Sharpening, right?
Jerry...
-
12-13-2016, 06:33 PM #4

Looks great only can go up from here
Sent from my SCH-R970 using TapatalkNothing is fool proof, to a sufficiently talented fool...
-
12-13-2016, 07:16 PM #5

You did a good job with the CA.
The second to last pic looks like the thrust washers are a little thick. I think you have washers in there. I usually go for .004 in thickness. IMHO, you should use thrust washers on wood scales to prevent possible wear of the wood by the tang steel.If you don't care where you are, you are not lost.
-
12-13-2016, 07:35 PM #6

What do you have for nagura for your Jnat? If you only have a tomo nagura (or are using a diamond plate) to raise slurry, it will never be much more than a finisher. A set of asano Mikawa nagura (botan, tenjyou, mejiro) will let you do everything from minor bevel setting to finishing.
Did you use any slurry when trying to touch up your edge, or just plain water?
Here is a post I wrote a while back explaining how a Jnat is used with nagura slurry: http://straightrazorpalace.com/honin...ml#post1648467Last edited by sqzbxr; 12-13-2016 at 07:45 PM. Reason: Added link to post
"Every normal man must be tempted at times to spit on his hands, hoist the black flag, and begin to slit throats." -H. L. Mencken
-
12-13-2016, 07:43 PM #7

Not too shabby for first time.
Better than some of my first few, which were held together with micro screws.
Using the micro screws, instead of pinning, taught me alot about the relationship of the scales to the wedge, and the pivot too the tang.
Most ,if not all of us that make scales, use them for fitting a blade to our scales, before actually pinning them together.
Here's some of my earlier work. Just like yours.


Thick, clunky scales, with wedges that don't fit properly...Harr!!
But with a push from a certain member here, and with time and practice, I've reached the goal.....🙌


Your doing great, keep at it bro., they only get better. Then go back and fix your earlier creations.
Here's a pic of a set in micro screw's, checking the fit of the wedge, and blade.

 [IMG]
[IMG]
Hope this helps, and encourages you to reach your goal...then surpass it!!!
MikeMike
-
The Following User Says Thank You to outback For This Useful Post:
Hirlau (12-13-2016)
-
12-13-2016, 08:18 PM #8

For thrust washers I have some #1 washers and flattened them. I went with the #1 figuring that when I smack them with a hammer they will flatten and the center hole will still be big enough to get the Micro Bolt thru it. I just took another look and I think I might not have smashed one of them enough. Guess I should put a micrometer on the wish list. Thanks for your comment. It will help in the future. And thanks for the CA comment. I think I might pick up some of the accelerator the next time. I try to put on thin coats so it will dry faster but the CA I bought don't dry as fast as normal stuff. I think that is around 12 coats with a lot of sanding. I bet I sanded off more than half the coats because it ripples up when it dries.
Last edited by Gasman; 12-13-2016 at 08:21 PM.
It's just Sharpening, right?
Jerry...
-
12-13-2016, 08:29 PM #9

Thanks for the encouragement @outback. Those are some clunky and rough looking razor to start with but you have come a long way. The other are great lookers. I do like the double pin in the wedge look. I know it will get better. I just didn't really know what I was doing. I knew what the outcome should be so I went for it but skipped a few steps along the way. Then went back and did them again.
I've found lots of info on making and pinning scales now and I made myself a cheek sheet for the next one I do so I don't mess-up the steps and get them out of order. BTW, The metal Wedges are a nice touch. I was thinking of that and had some S.S. flat bar but couldn't think of a good way to cut and sand/file. My tools are extensive but its mainly automotive. Not many files, saws and sanders but the wife did buy me a cheep table saw for Christmas. But the reason was so I would make new baseboards for the house. Shes always got a reason and it normally means work for me. But I get a saw so I'm not complaining. ha.It's just Sharpening, right?
Jerry...
-
12-13-2016, 08:36 PM #10

Great job on your first restoration! Did a lot right as far as I can see, better than some of my first ones for sure. The shape of scales is a hard thing to get right sometimes, I made a few that were way too "banana-ed" before but these look like a pretty good shape. Save any and all broken scales off razors that you get and you can and use 'em for templates. It can be nerve wracking to hammer the pins after so much time put into making the scales. I cracked a set early on trying to get a blade to center. I've since learned why it didn't center and that more hammering was not the solution. Each project offers some sort of lesson and leaves you with an opportunity to improve - that's why this hobby keeps you coming back for more because you think "now I know what I will do next time". You will have a unique satisfaction shaving with that one, nice job!
"Go easy"
-
The Following User Says Thank You to xiaotuzi For This Useful Post:
outback (12-13-2016)


 37Likes
 LinkBack URL
 About LinkBacks


 Reply With Quote


