Results 1 to 10 of 14
Thread: My first re-scale
-
03-20-2017, 11:12 PM #1
 My first re-scale
Well it happened about a year or so ago. The Dovo that my wife (then girlfriend) bought me had one of the scales crack at the pivot pin. I kept using it and eventually that end of the scale broke off. I was very stubborn and kept using it lol! I really like this razor and it's special to me because it was my first and my wife got it for me.
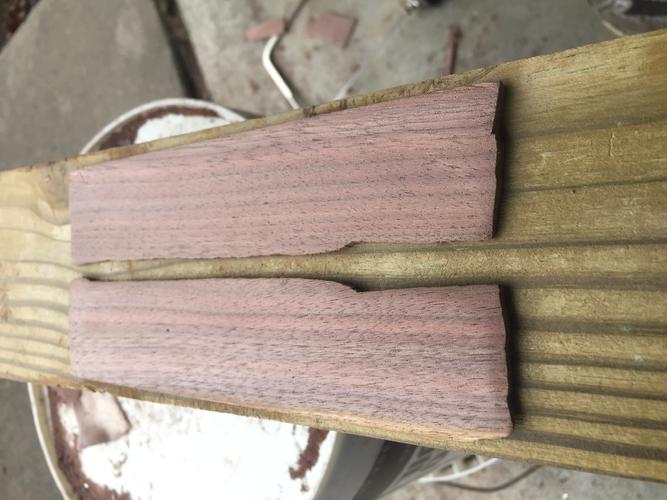
I have the stones and can do honing and decided that it was time to start learning how to do new scales. My grandfather is big into woodworking and gave me some walnut (his favorite to work with) to get started. Problem is it is about 1" thick. So using a hand held skill saw and a coping saw I got that cut down to about 1/2-1/4" thick pieces.
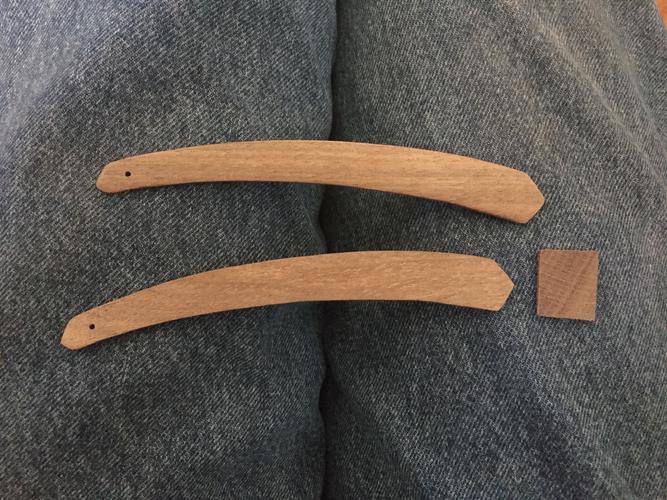
I soon decided that removing that much wood to get down to roughly 1/8" was more than I wanted to do by hand. Off to HF I went and got a belt/disk sander. Let me tell you that thing makes a HUGE difference!!!! I got the blanks shaved down to thickness and then back to hand sanding.
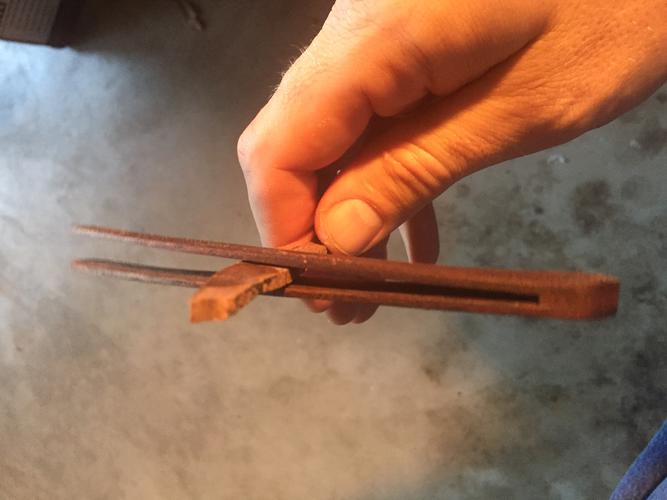
I used a 1/16" drill bit by hand to drill the pivot hole. I also decided that I liked the look of pure wood with no pin on the wedge end so it's just glued in.
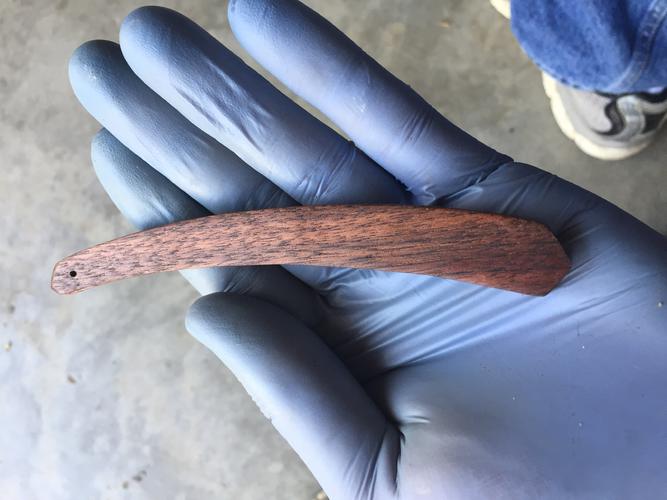
I had a very difficult time deciding how to finish the scales. I couldn't decide if I wanted to do a pore filler then oil or maybe polycrylic. What I finally decided to do was use a danish oil finish. I finished the gluing today and also went ahead and did the oil this afternoon. I'm going to let it dry for about 24 hours before I try my hand at pinning the razor. I'm thinking I'll do a washer between the inside of the scales and the razor just to add an additional buffer between the wood and razor.
I'm open to any suggestions or thoughts. Huge thanks to Lewis Razors for his YouTube video showing him making scales with a minimum number of tools.
Thanks for reading and now for the good stuff pictures:
The cut and thinned blanks

The scales and wedge shaped and thinned

Oiled and drying

Showing the wedge

-
03-20-2017, 11:55 PM #2

Very nice first set. They'll only get better the more you make.
Did you put the blade in them with micro screws before gluing them. If the pivot holes aren't lined up properly, the blade may hit the scales upon closing.Mike
-
The Following User Says Thank You to outback For This Useful Post:
JBPilot (03-21-2017)
-
03-21-2017, 12:51 AM #3

Those look great for a first attempt. Follow anything outback says his info will be solid. Keep it up
 Nothing is fool proof, to a sufficiently talented fool...
-
The Following User Says Thank You to ejmolitor37 For This Useful Post:
JBPilot (03-21-2017)
-
03-21-2017, 12:54 AM #4

Nice first job. Keep at it!
JerKeep it safe and Cheers,
Jer
-
The Following User Says Thank You to MedicineMan For This Useful Post:
JBPilot (03-21-2017)
-
03-21-2017, 01:06 AM #5

Looks mighty fine from here
Look sharp and smell nice for the ladies.~~~Benz
Imperfection is beauty, madness is genius and it's better to be absolutely ridiculous than absolutely boring ― Marilyn Monroe
-
The Following User Says Thank You to Dieseld For This Useful Post:
JBPilot (03-21-2017)
-
03-21-2017, 01:20 AM #6

Very nice looking wood.
A great first set....something to be proud of.
Pete <:-}"Life is short, Break the Rules. Forgive quickly, Kiss Slowly,
Love truly, Laugh uncontrollably, And never regret ANYTHING
That makes you smile." - Mark Twain
-
The Following User Says Thank You to petercp4e For This Useful Post:
JBPilot (03-21-2017)
-
03-21-2017, 01:27 AM #7

Thanks everyone I'm very proud of them so far! They're far from perfect but that's ok for me.
Outback, I didn't use micro screws but did have the razor in with a piece of the nickel rod in going to use to pin them. Thank you for the advice! I'll put another picture up (hopefully tomorrow with the razor in and honed!
-
The Following User Says Thank You to JBPilot For This Useful Post:
outback (03-21-2017)
-
03-21-2017, 01:28 AM #8

Hats off to you my friend, this is a great start. I would like to see the finished project and so would the rest of us. BTW what did you finally decide for and oil finish? Thanks for sharing.
Freddie
-
The Following User Says Thank You to MisterClean For This Useful Post:
JBPilot (03-21-2017)
-
03-21-2017, 01:31 AM #9

Good looking scales there! Neat that your grandfather gave you the wood, that just adds to the meaning of these scales for you. Very cool.
"Go easy"
-
The Following User Says Thank You to xiaotuzi For This Useful Post:
JBPilot (03-21-2017)
-
03-21-2017, 02:04 AM #10
-
The Following User Says Thank You to outback For This Useful Post:
JBPilot (03-21-2017)


 37Likes
 LinkBack URL
 About LinkBacks


 Reply With Quote


