
Results 1 to 10 of 26
 38Likes
Thread: Restoring a PUMA
 LinkBack URL
 About LinkBacks
Hybrid View
-
05-22-2018, 09:43 PM #1Senior Member


- Join Date
- Oct 2010
- Location
- 50 miles west of randydance
- Posts
- 9,575
Thanked: 1352
The chip looks like the least of your worries.
I would get very aggressive with the side of a course hone, vertical with no tape just to see how narrow you have to get it to get past the rust.
You could tell really quick if anything more would be a waste of time.
-
05-22-2018, 10:15 PM #2Senior Member
- Join Date
- Jul 2012
- Location
- Mooresville NC
- Posts
- 737
Thanked: 133
IMO razor is not worth restoring. However the box is very nice and worth the money ALSO you could probably re use the scales if you wanted. Always nice to have spare scales around
-
05-22-2018, 10:31 PM #3The Great & Powerful Oz


- Join Date
- May 2008
- Location
- Bodalla, NSW
- Posts
- 15,608
Thanked: 3748
Is the rust mirrored on the other side & do the scales smell of camphor? Could be cell rot.
Sand off as much rust as you can, oil & close the blade. Don't open it for a week. If it rusts again the scales are toast.
Here's how you fix the edge if the steel is sound:
https://straightrazorpalace.com/adva...l-setting.htmlThe white gleam of swords, not the black ink of books, clears doubts and uncertainties and bleak outlooks.
-
The Following User Says Thank You to onimaru55 For This Useful Post:
DZEC (05-23-2018)
-
05-23-2018, 01:36 AM #4Senior Member
- Join Date
- Feb 2018
- Location
- Manotick, Ontario, Canada
- Posts
- 2,775
Thanked: 552
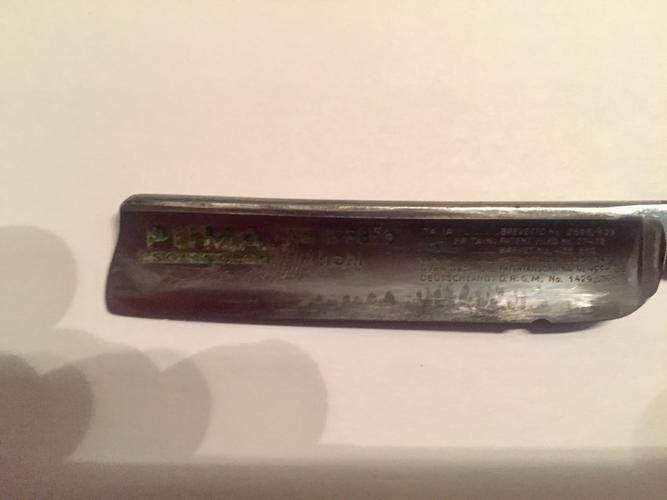
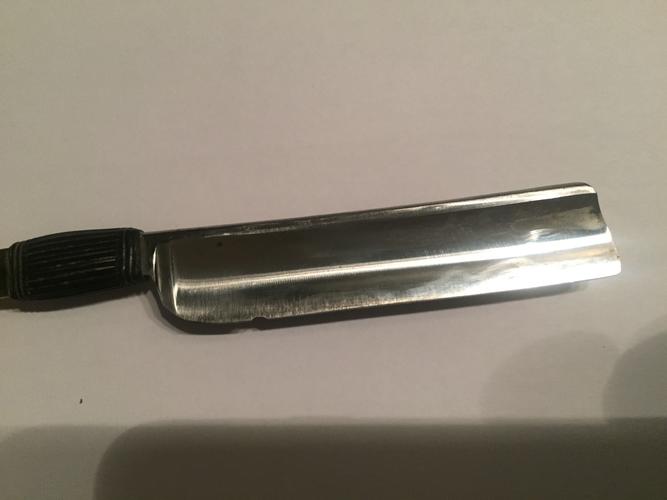
I used my Dremel abrasive pads on the black stuff. Turns out it wasnt corrosion after all, just some kind of stain that seems to come off fairly easily. I guess I lucked out on that.
I will have to be careful to avoid damaging the etching when I go after the stain on that side of the blade. I was thinking of masking the etching with tape or clear nail polish to help protect it before going after the stain some more.
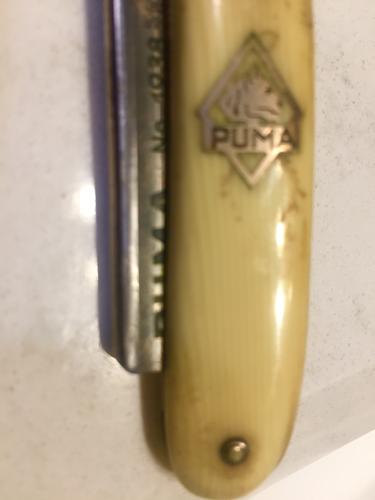
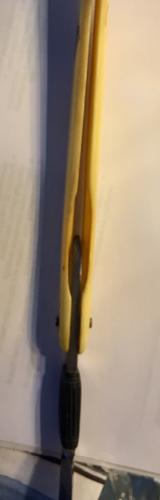
The scales are in good shape and do not appear to be celluloid. Im not able to get them to show clearly in a picture, but they have a pattern that almost looks like a grain.
I had seen that post by Glen about removing a chip, but wasnt able to locate it right away. Thanks for providing the link Onimaru.onimaru55 likes this.David
Shared sorrow is lessened, shared joy is increased
― Spider Robinson, Callahan's Crosstime Saloon
-
05-23-2018, 04:29 AM #5Senior Member

- Join Date
- Feb 2012
- Location
- Menominee,MI
- Posts
- 1,624
Thanked: 325
Those scales are celluloid made to look like ivory. If they are off gassing then the blade will continue to rust. I'd do as posted above and if the scales are bad you can always save the inlay and make another set of scales.
sharptonn likes this.
-
The Following User Says Thank You to JSmith1983 For This Useful Post:
DZEC (05-23-2018)
-
05-23-2018, 05:11 AM #6'with that said'


- Join Date
- Aug 2010
- Location
- Walla Walla in WA State USA
- Posts
- 11,163
Thanked: 4234
I would urge you to put that razor (closed in the scales) in a Ziploc bag then seal it and leave it/kind of like what was recommended before and then leave it there for 7-10 days and see what's happening. Originally Posted by DZEC

What do you have to lose? Give it a go.
 Our house is as Neil left it- an Aladdins cave of 'stuff'.
Kim X
-
The Following User Says Thank You to cudarunner For This Useful Post:
DZEC (05-23-2018)
-
05-23-2018, 10:04 AM #7Senior Member
- Join Date
- Feb 2018
- Location
- Manotick, Ontario, Canada
- Posts
- 2,775
Thanked: 552
Will do. Thanks for the suggestion. Originally Posted by cudarunner
David
Shared sorrow is lessened, shared joy is increased
― Spider Robinson, Callahan's Crosstime Saloon
-
05-24-2018, 04:36 PM #8Senior Member
- Join Date
- Feb 2018
- Location
- Manotick, Ontario, Canada
- Posts
- 2,775
Thanked: 552
Less than 36 hours in a Ziplock and the black stuff has reappeared. Sure looks like celluloid rot. Thank you to Cudarunner and others for the warning and the diagnostic suggestion.

What a shame, the scales look pretty good. They arent brittle at all and are fairly thick. However, as Onimaru said, I would not want to waste a PUMA blade, so I will replace them. I havent read anywhere that it is possible to stabilize them so they dont continue off-gassing.
The blade is currently 11/16 inch from bevel to top of spine and I figure removing the chip will take it down to 10/16. Still respectable and should preserve the etching.
Id really like to preserve the PUMA badge on the scales. I think I read that using acetone to dissolve the existing scale might be the safest strategy, but Im not sure. Any tried and proven techniques would be welcome.
I think I can use a CA to attach the emblem to a replacement scale. Is there a way to imbed it it the receiving scale so that it doesnt just sit on the surface? I was thinking of using a plastic replacement scale and heating it to set the emblem, but that sounds ifffy and chintzy given the blade. With patience and a steady hand, I suppose I could try to carve a shallow receiving spot on the new scales, but that would really tax my current skill level.
What other material would you suggest I use for the replacement scales that could accept the badge?
The existing scales are 1/8 inch thick and have a 1/16 indentation on each side to accommodate the rubber piece on the tang. Im pretty sure I can use my Dremel to rout out a similar feature on the new scales.
This has turned out to be a lot more work and amuch greater challenge than just polishing a tarnished blade. It will certainly be a learning experience. Pretty excited, actually
Dont be surprised if I continue to seek advice as I try to bring this find back to good condition.cudarunner and 32t like this.David
Shared sorrow is lessened, shared joy is increased
― Spider Robinson, Callahan's Crosstime Saloon
-
05-23-2018, 05:48 AM #9The Great & Powerful Oz
- Join Date
- May 2008
- Location
- Bodalla, NSW
- Posts
- 15,608
Thanked: 3748
The only way to stain steel is with an acid or a base. Either causes corrosion but it's great if you have repaired it Originally Posted by DZEC

Mask the etching for sure. It will give peace of mind for the rest of the cleanup.
The scales are celluloid & sometimes called Ivorine as they mimic the grain of ivory. If you rub them with some fine wetndri they will smell of camphor. Do as advised & bag up the razor to assess the scales. A Puma should not be wasted by allowing it to corrode more.
No problema on the link. I'd like to say I have a photographic memory but in truth it was Google that helped
Last edited by onimaru55; 05-23-2018 at 05:51 AM.
cudarunner and Grazor like this.The white gleam of swords, not the black ink of books, clears doubts and uncertainties and bleak outlooks.


 Reply With Quote