Page 1 of 2 12 LastLast
Results 1 to 10 of 11
Like Tree45Likes

Thread: Wostenholm Stubtail Restoration

  1. #1
    www.edge-dynamics.com JOB15's Avatar
    Join Date
    Feb 2013
    Location
    London
    Posts
    3,066
    Thanked: 512

    Default Wostenholm Stubtail Restoration

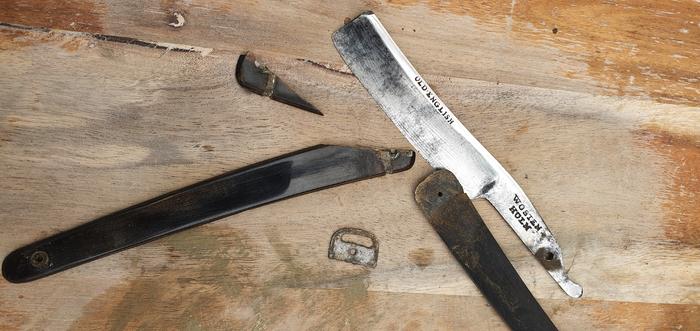
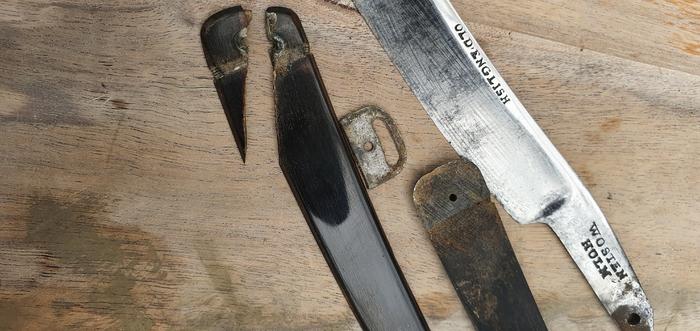
    I am in the process of restoring this one and i will show pictures in a few days.
    The blade is done but the scales need a lot of work.. I am looking forward to tying string back around the wedge end, for authenticity ..

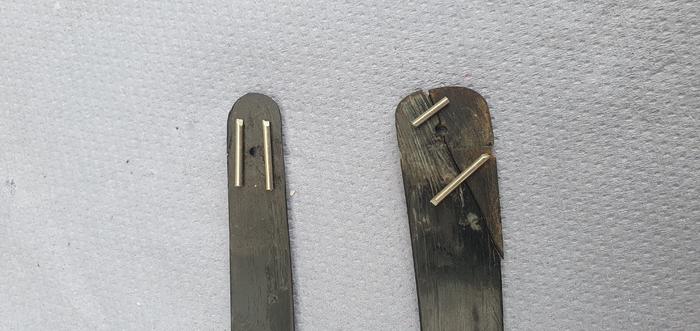
    The reason i'm showing this one is because of the wedge.. There was a thread some years ago about these wedges but i cannot recall what was said..Maybe they relate to a date?
    It seems more cost efficient than a whole wedge i suppose..

    Cheers
    Name:  !cid_643f05c2-0f50-4eb1-a6e8-51a5359061f5.jpg
Views: 187
Size:  46.2 KB

    Name:  !cid_70b95edd-918a-409d-b63d-41697d22b654.jpg
Views: 179
Size:  44.8 KB

    Name:  !cid_71da8a3e-aee1-437f-8a31-72ebd8d44e3b.jpg
Views: 183
Size:  39.6 KB

  2. #2
    Senior Member blabbermouth
    Join Date
    Jun 2013
    Location
    Pompano Beach, FL
    Posts
    4,038
    Thanked: 634

    Default

    That how I fix scales. Carve a groove. I use straight pins. They are thinner and superglue them in groove. That way you don't have to make grooves too deep.

  3. The Following User Says Thank You to bouschie For This Useful Post:

    JBHoren (07-03-2020)

  4. #3
    www.edge-dynamics.com JOB15's Avatar
    Join Date
    Feb 2013
    Location
    London
    Posts
    3,066
    Thanked: 512

    Default

    Quote Originally Posted by bouschie View Post
    That how I fix scales. Carve a groove. I use straight pins. They are thinner and superglue them in groove. That way you don't have to make grooves too deep.
    I gauge out a groove deep, rite on the edge of destroying the scales ,silly.. I have found that JB weld is the best stuff for this job.
    Cheers

  5. #4
    Senior Member blabbermouth
    Join Date
    Jun 2013
    Location
    Pompano Beach, FL
    Posts
    4,038
    Thanked: 634

    Default

    I think I have some of that stuff. Will have to try it.
    By making the groove deep don't the pins show thru the thin layer of scale material?
    JOB15 likes this.

  6. #5
    www.edge-dynamics.com JOB15's Avatar
    Join Date
    Feb 2013
    Location
    London
    Posts
    3,066
    Thanked: 512

    Default

    Quote Originally Posted by bouschie View Post
    I think I have some of that stuff. Will have to try it.
    By making the groove deep don't the pins show thru the thin layer of scale material?
    The trick is to go deep but not penetrate the other side.. I like to get the pins as far down as possible. I have had them come apart on pinning before , but only when i forgot to use JB weld..
    They wont show and if they did i'd hide it.

  7. #6
    www.edge-dynamics.com JOB15's Avatar
    Join Date
    Feb 2013
    Location
    London
    Posts
    3,066
    Thanked: 512

    Default

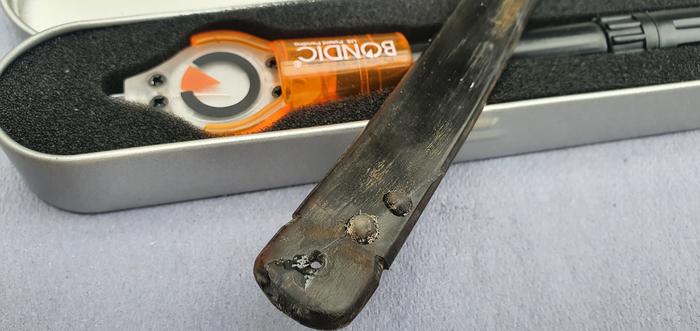
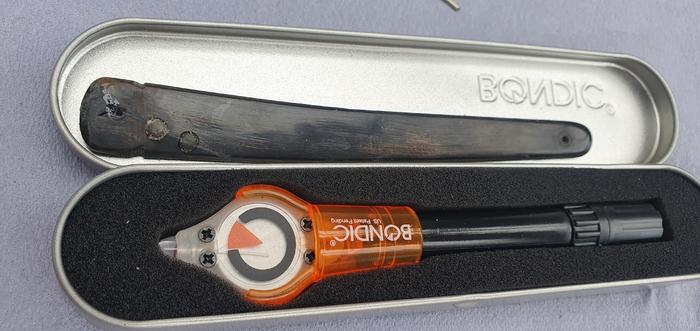
    Another helpful tip is this Bondic instant glue . Cured instantly with a UV light..

    Epoxy the crack then drop some Bondic on the outside to hold the crack together ,, The following day just pick off the Bondic.

    This stuff has many uses and if you want to save money ,buy a refill and a cheap UV keyring off the bay..
    Name:  !cid_e6e9c6e9-e971-4a9f-aa8b-5b3c0f106374.jpg
Views: 164
Size:  35.8 KB
    Name:  !cid_72b30ebd-d3d4-4869-82fa-8ee627e4c88d.jpg
Views: 160
Size:  38.7 KB
    Name:  !cid_8d68fb37-9696-434f-b1fa-2c51e2326d1c.jpg
Views: 138
Size:  34.2 KB

  8. The Following 5 Users Say Thank You to JOB15 For This Useful Post:

    BobH (07-04-2020), JP5 (07-04-2020), markbignosekelly (07-04-2020), PaulFLUS (07-04-2020), randydance062449 (07-04-2020)

  9. #7
    JP5
    JP5 is offline
    Senior Member blabbermouth JP5's Avatar
    Join Date
    Feb 2015
    Location
    Duluth, GA - Atlanta OTP North
    Posts
    2,546
    Thanked: 315
    Blog Entries
    1

    Default

    Quote Originally Posted by JOB15 View Post
    Another helpful tip is this Bondic instant glue . Cured instantly with a UV light..

    Epoxy the crack then drop some Bondic on the outside to hold the crack together ,, The following day just pick off the Bondic.

    This stuff has many uses and if you want to save money ,buy a refill and a cheap UV keyring off the bay..
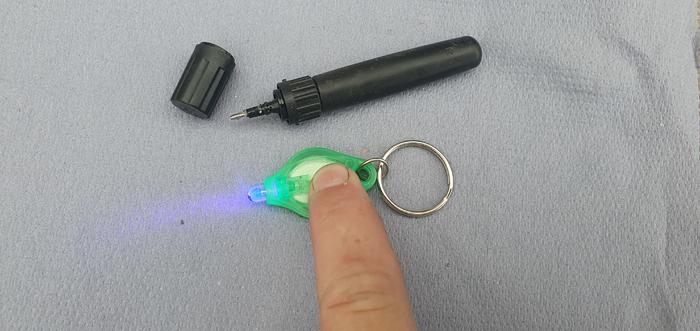
    Very cool! I had wondered if cheap uv lights would be strong enough to cure the epoxy properly.

    Something I have wanted to try for a LONG time is repairing ivory/bone with dental filling material. It is also cured with UV light. I asked a dentist on another forum and he told me it should work well. He said you can get different shades of white to match and different viscosities as well.
    I'm surprised no one else has tried this yet.
    - Joshua

  10. #8
    Senior Member blabbermouth PaulFLUS's Avatar
    Join Date
    Dec 2018
    Location
    Gainesville, FL
    Posts
    6,408
    Thanked: 657

    Default

    ...AND you can refoam the tin and use it to store the razor
    Iron by iron is sharpened, And a man sharpens the face of his friend. PR 27:17

  11. #9
    www.edge-dynamics.com JOB15's Avatar
    Join Date
    Feb 2013
    Location
    London
    Posts
    3,066
    Thanked: 512

    Default

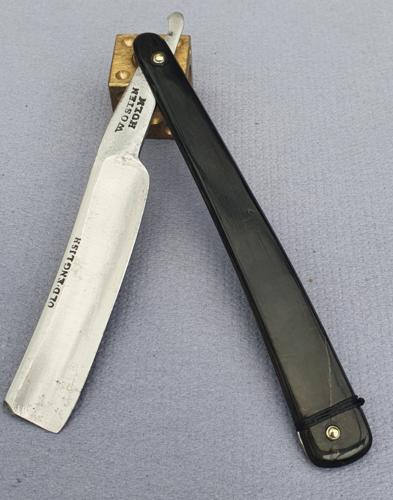
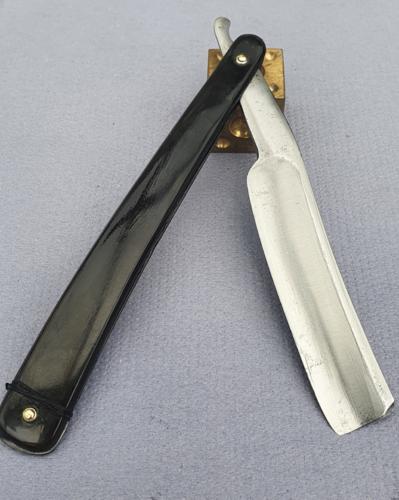
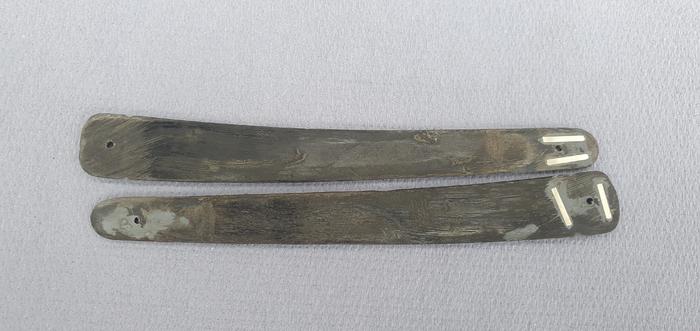
    Finished this today Pinning it was a bit of a nightmare but its all good now..
    The scales are in fact grey in places but everything is drenched in oil making them look darker than they are in these photos..

    Very solid fix
    Name:  !cid_aa9bbb0b-5e2e-4577-a284-a71e59996c35.jpg
Views: 126
Size:  44.1 KB

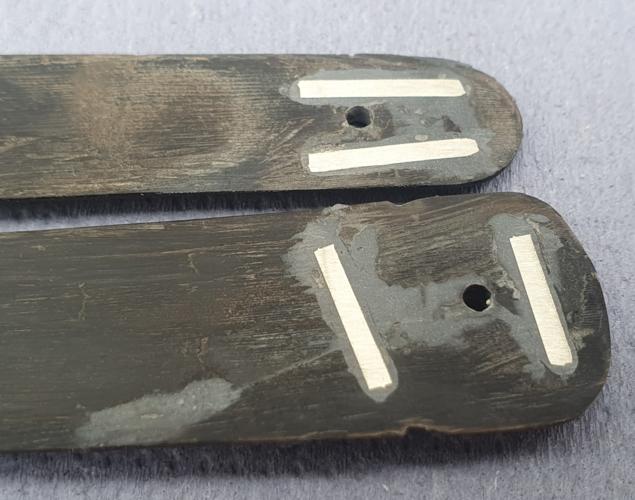
    Gouged out cracked broken wood at the pivot and filled with JB weld.
    Name:  !cid_daa6c389-1f19-4b55-ac34-e7d397cb1c65.jpg
Views: 121
Size:  31.4 KB

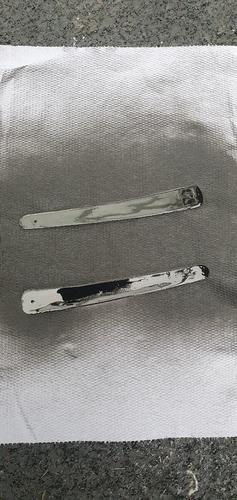
    Sprayed the inside of the scales black to hide all traces of work.
    Name:  !cid_18cc0c27-567c-4a96-a1b3-dceb2bea2139.jpg
Views: 118
Size:  24.9 KB

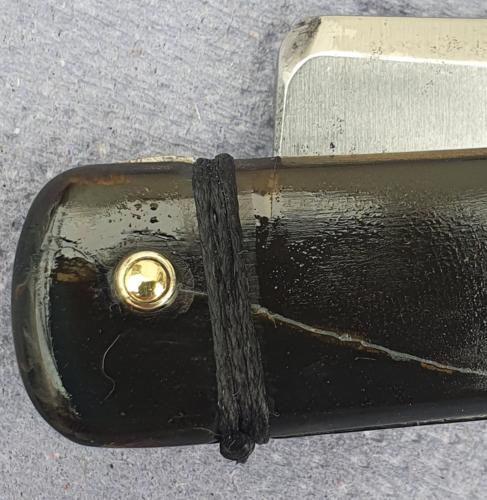
    Re wound some waxed thread. It adds to the story of this razor and there were notches from the original string.
    Name:  !cid_5d6a4717-669f-40b2-a200-74ce6d733502.jpg
Views: 121
Size:  43.9 KB

    Name:  !cid_939f06a3-e31d-44b0-a466-7d9631fd7656.jpg
Views: 120
Size:  27.4 KB

    Name:  !cid_4975fa3d-1483-4557-8120-34066d132604.jpg
Views: 120
Size:  26.2 KB

  12. #10
    Senior Member joamo's Avatar
    Join Date
    Dec 2011
    Location
    Omaha, Ne
    Posts
    479
    Thanked: 262

    Default

    The wrap is a nice touch, well done.
    JBHoren, Geezer and JOB15 like this.

  13. The Following User Says Thank You to joamo For This Useful Post:

    JOB15 (07-05-2020)

Page 1 of 2 12 LastLast

Posting Permissions

  • You may not post new threads
  • You may not post replies
  • You may not post attachments
  • You may not edit your posts
  •