Results 1 to 10 of 37
Thread: Modding / Restoration WIP
Threaded View
-
12-16-2021, 12:22 PM #2Member

- Join Date
- May 2021
- Location
- South Australia & London
- Posts
- 91
Thanked: 10
When I got my first razor the person I got it from also included another old one for me to have a go at restoring. And I don't really have the wherewithal or wookworking ability to start making scaled and pinned handles, so I started thinking about other designs, specifically whether one could make a fixed, hidden tang handle as you would a Japanese knife.
The traditional scaled and hinged handle of a SR is a very good piece of design for shaving; it's ergonomic, adaptable, and protects the blade when not in use. I don't think you can really improve on it.
It is also a terrible piece of design for honing; it's too long, it's too bendy, it's too bent. It needs a lot more stability and axial symmetry.
So could I make a fixed handle that I thought worked just as well for shaving, but found better for honing...? Here's my process, this is now the 4th I've done for a razor.
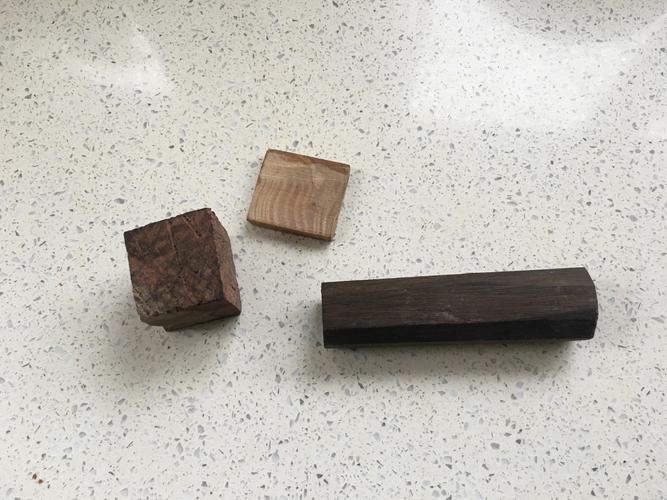
This is some wood. On the left is a piece of Red Mallee burl (ferrule), middle is Olive (spacer), and the dark bits are some used winemaking oak staves (main part). The latter is quite cool; given to me by a winemaker friend, the wood is normally white but after time the wine soaks through and stains the wood dark. When I work this in a specific way it's going to come out almost black.
Epoxy 'em together:
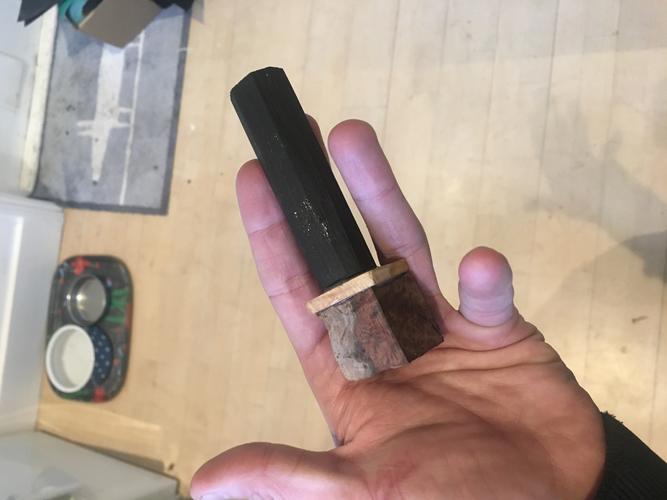
Now you can't see in the picture above, but I've also done something else at this point which is quite important - I've drilled the tang hole in the main, dark part of the handle. And it doesn't have to be particularly neat as any gaps will get flooded with epoxy or glue during the install. What it means though is that later I only have to drill through the ferrule and spacer, and that's much easier to do accurately especially if you don't have a drill press and are just using a handheld electric drill like I do.
The initial shaping is done on a belt sander laid on it's side, up to about 80 or 120 grit:
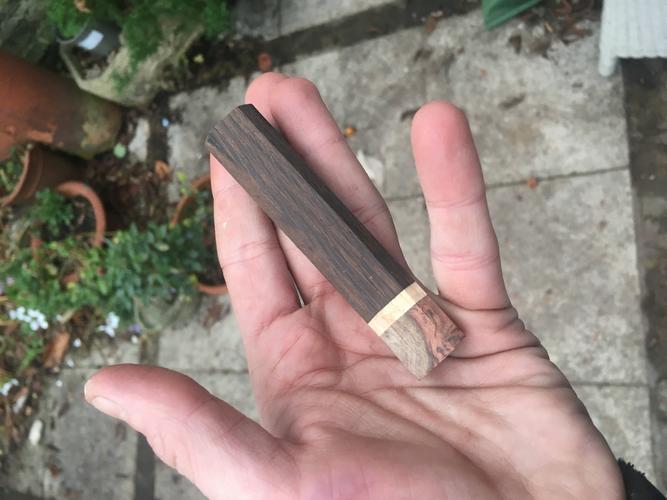
Then my favourite part of the whole process - the first oiling. In Aus I usually use mineral/parrafin oil, but you can't seem to get it in the UK unless you buy 'Baby Oil', so instead I'm just using some oil for Teak. Oiling at this stage I find fixes and deepens the colour of the wood, and is going to mean the dark wood comes out almost black. It's now that you can first get an idea of what the finished handle is going to look like:
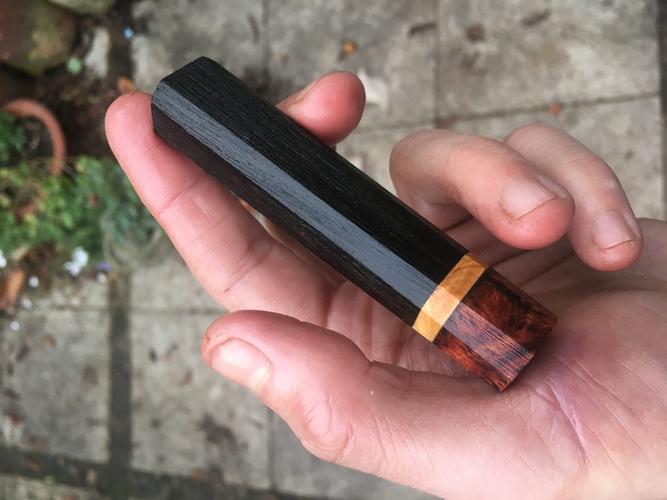
Here next to the previous one I did:
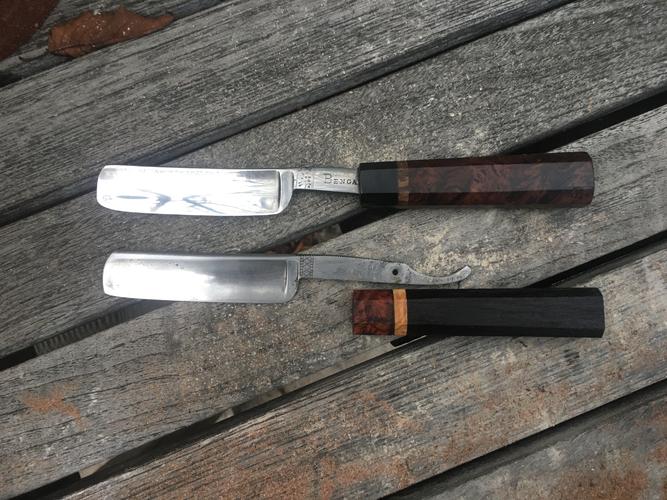
At this stage the handle is a little larger than it's going to be at the end, as the final shaping gets done on a series of hand sanding sheets up to about 600 grit. I give it another coat of oil after 240, again to give it more depth of colour and lustre at the end.
And then drill the tang slot through the ferrule, using files to make sure it's nice and neat. Unfortunately back in the day the hollow grinders of Solingen didn't envisage idiots like me buggering around trying to make wa handles for straight razors, and didn't design the tangs to make it particularly easy. A SR has a pretty wide tang in comparison to how small you need to make a handle, there isn't a lot of tolerance or margin for error here as you can see:
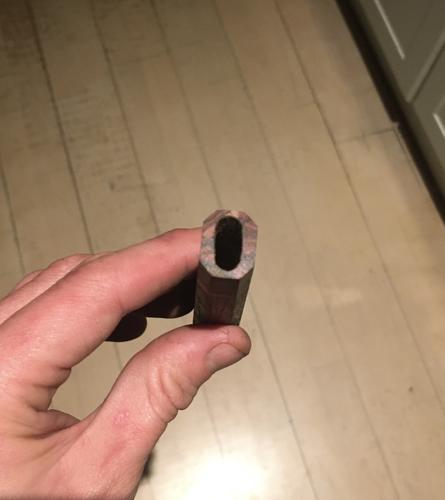
If the main part of the handle wasn't drilled already this would be almost impossible to do without grinding or modifying the tang. And I don't like to do that because a.) I may change my mind about the whole thing, and want to make some scaled handles for it in the future. And b.) As mentioned above the tang is quite chunky so it'd be quite a lot of material removal, and if the tang is hardened, as it probably is to some extent, that's going to be a lot of effort. And I am idle.
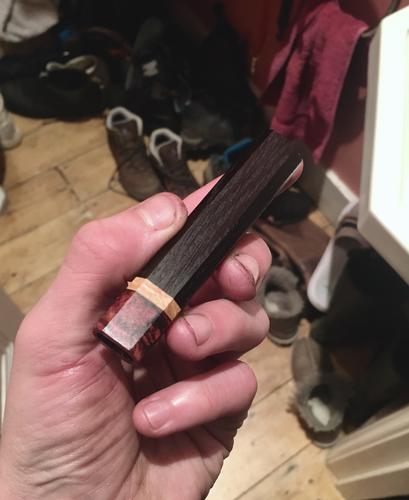
Et voila! (With apologies for the crappy indoor night time picture):
Last edited by cotedupy; 12-16-2021 at 02:36 PM.
-
The Following User Says Thank You to cotedupy For This Useful Post:
randydance062449 (12-18-2021)


 78Likes
 LinkBack URL
 About LinkBacks


 Reply With Quote